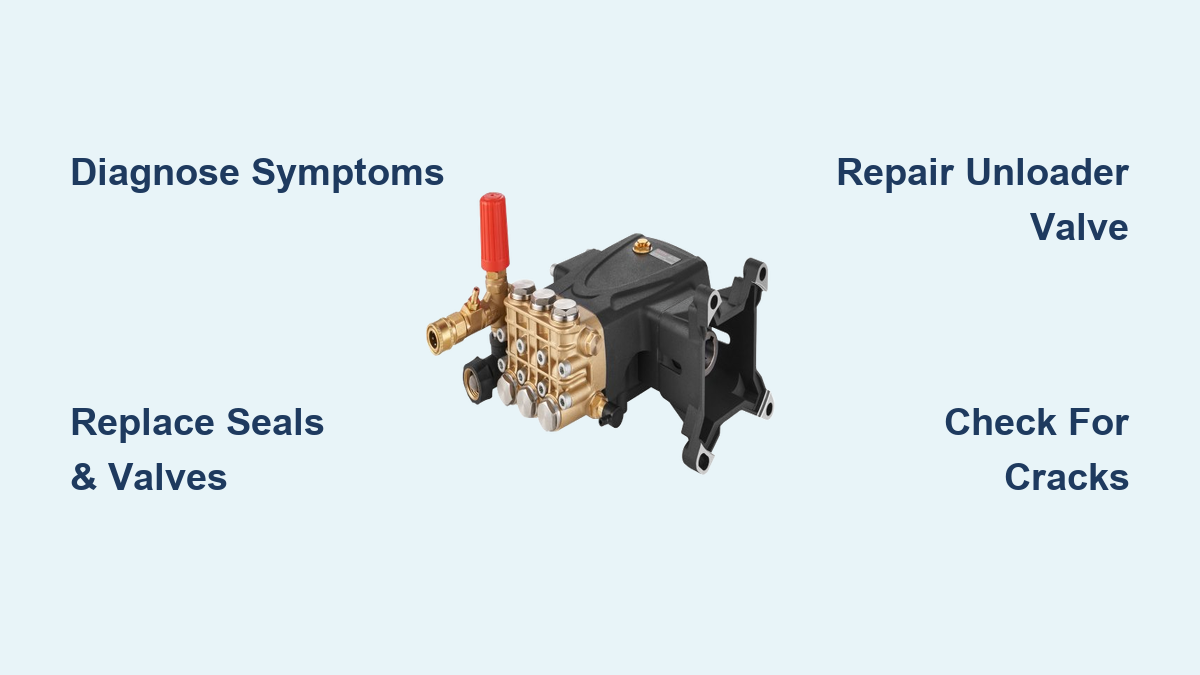
How to Repair Pressure Washer Water Pump
If your pressure washer suddenly loses power or leaks water, learning how to repair pressure washer water pump components can save you hundreds. Common culprits include a stuck unloader valve, worn seals, or cracked valves that stop the machine from building proper pressure. Instead of replacing the whole unit, you can often fix these specific issues with basic tools and a rebuild kit.
This guide walks you through diagnosing symptoms, disassembling the pump safely, and replacing worn parts like O-rings and valves. You will learn exactly when a repair is worth the effort versus when to buy a new assembly. We also cover critical safety steps to prevent thermal shock and ensure your machine runs smoothly for years.
Diagnose Pressure Washer Water Pump Symptoms

Accurate diagnosis prevents unnecessary repairs and helps you identify the root cause quickly. The type of failure determines whether you need a simple seal replacement or a full pump swap. Observing specific behaviors in pressure, leaks, and sound will guide your next steps effectively.
Why Is My Pressure Washer Losing Pressure?
Pressure loss is the most frequent complaint among owners of gas and electric models. Understanding the pattern of loss helps pinpoint the failing component inside the housing.
- No pressure at all: This often indicates a stuck unloader valve, a clogged inlet filter, or air trapped in the suction line.
- Pressure drops after trigger release: This specific symptom on models like the Carture K2400HH points directly to unloader valve failure.
- Fluctuating or pulsing flow: Worn internal valves, air leaks in the hose, or debris blocking passages usually cause this issue.
- Gradual pressure loss: Seal degradation or pump cavitation from poor water supply often leads to slow performance decline.
Use a downstream pressure gauge to confirm actual PSI output before tearing anything apart. Never assume the issue is mechanical without testing the system first.
Where Is the Water Leaking From?
External leaks signal failed seals or O-rings that need immediate attention to prevent further damage. Identifying the leak source helps you buy the correct replacement parts.
- Water from the pump body: Check O-rings around the main housing and valve caps for wear.
- Oil seepage: This indicates compromised crankcase seals, while milky oil means water has entered the system.
- Unloader dripping: Continuous dripping from the unloader area suggests the assembly is worn and needs replacement.
A small amount of water weeping from the thermal relief valve after heavy use is normal for cooling. However, constant leakage when the unit is hot suggests internal damage requiring repair.
What Do Unusual Noises Mean?
Sounds coming from the pump head tell a story about internal mechanical health. Ignoring these auditory clues can lead to catastrophic failure.
- Knocking or grinding: These sounds point to damaged pistons, connecting rods, or a worn wobble plate.
- Clicking or chattering: A faulty unloader or loose internal parts often create this rhythmic noise.
- Squealing: This is frequently caused by dry running or a severe lack of lubrication.
Shut down the machine immediately if you hear metal-on-metal noise. Internal damage may already be severe, and continued operation will destroy the pump.
Decide When to Repair vs Replace Pump
Not every pump is worth fixing, especially if core structural components are damaged. Use this decision framework to avoid wasting money on doomed repairs.
Replace the Pump If
- Oil appears milky, indicating water contamination in the crankcase.
- Ceramic pistons are cracked due to thermal shock.
- Valves show signs of melting or warping from overheating.
- The crankshaft is scored or bent beyond simple cleaning.
- The unit is a low-cost big-box model with major internal damage.
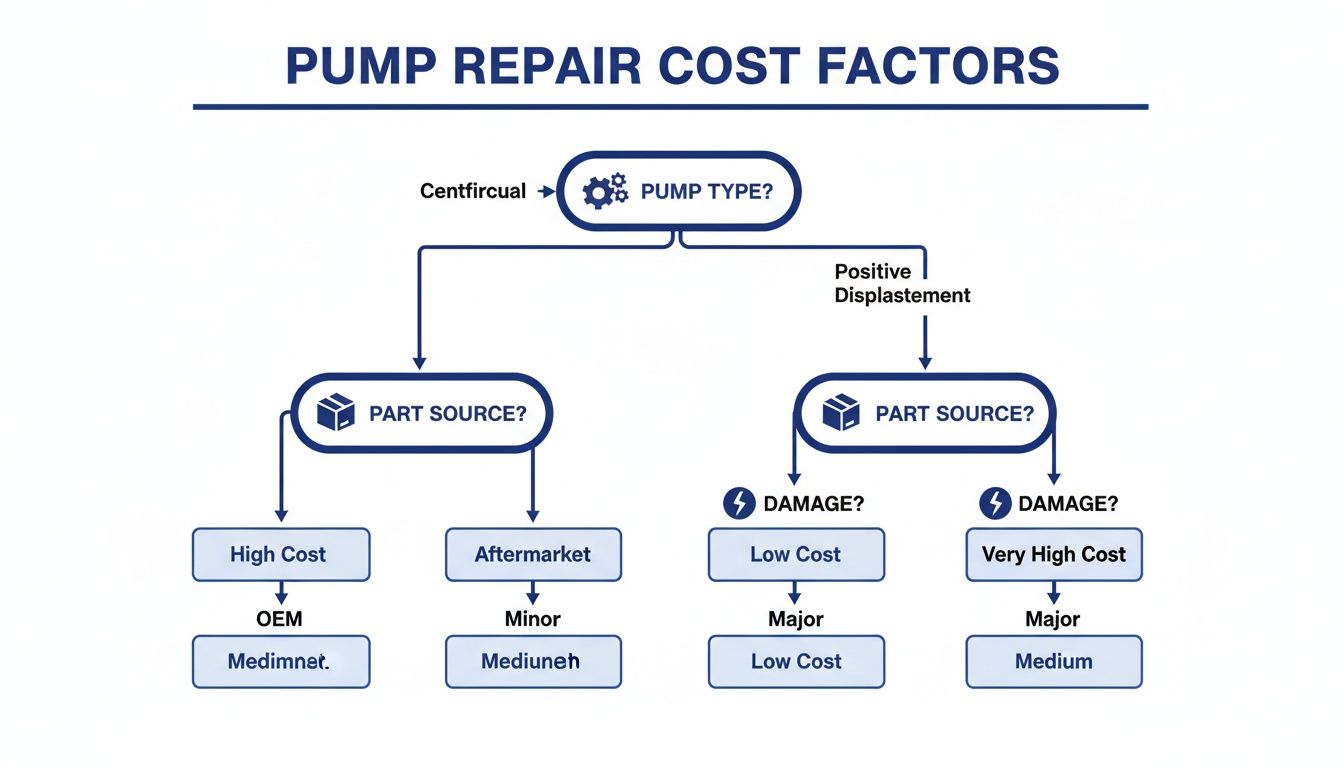
Repairing these issues is risky and often temporary. A new pump assembly costs between $280 and $350 and includes all internal parts, making it more reliable than piecemeal fixes for catastrophic failures.
Repair It If
- Only seals or O-rings are worn out.
- The unloader valve is leaking or stuck in place.
- Valves are cracked but the main housing remains intact.
- The pump overheated briefly but shows no structural damage.
For these cases, a $30 to $60 rebuild kit restores performance effectively. Targeted repairs are cost-effective and fast for minor to moderate issues.
Gather Tools for Pressure Washer Repair
Having the correct tools prevents damage during disassembly and ensures a smooth repair process. Using improper equipment can strip threads or crack fragile housing components.
Essential Tools List
- 13 mm wrench for removing housing bolts
- Torx 30 driver for unloader screws
- Adjustable wrench for various fittings
- Flathead and Phillips screwdrivers
- Needle-nose pliers for valve keepers
- Dead-blow mallet for stuck housings
- Utility knife to cut old hoses
- Clean rags and an oil container
Never use an impact driver on brass components as it can crack the unloader housing. Hand tools provide the necessary control for delicate parts.
Required Replacement Parts
- Pump rebuild kit including six valves, O-rings, and seals
- Unloader valve assembly if not included in the kit
- Pump-specific oil rather than standard motor oil
- Gaskets and washers matching your specific model
Always verify part numbers using your pump’s model tag before purchasing. Kits vary by brand, so Mi-T-M, Kärcher, and Cat Pumps all require different configurations.
Remove Pump from Engine Safely
Start by isolating the machine and removing the pump from the engine to begin the repair. Safety is paramount when dealing with high-pressure systems and heavy components.
Shut Down and Depressurize
- Turn off the engine or unplug the unit completely.
- Pull the trigger to release all remaining pressure in the system.
- Disconnect the high-pressure hose and garden water hose.
- Drain any remaining water and detergent lines into a container.
Disconnect and Extract the Pump
- Remove the four mounting bolts securing the pump to the frame.
- Loosen the crankshaft set screw usually located under a protective cap.
- Slide the pump straight off the engine’s keyed shaft carefully.
If the pump sticks, gently tap it with a dead-blow mallet to loosen it. Do not pry unevenly as this can damage the coupling, and no puller is needed if the shaft is clean.
Disassemble Pump Housing Components
Now take the pump apart for detailed inspection of internal mechanisms. Proper disassembly technique prevents loss of small parts and avoids warping the housing.
Remove Housing Bolts
- Use a 13 mm wrench to remove the four housing bolts slowly.
- Loosen them in a diagonal pattern to prevent warping the casing.
- Tap the housing lightly with a mallet if it is stuck tight.
As the halves separate, hold the wobble plate with your finger to keep internal parts from falling out. Losing orientation here makes reassembly difficult.
Drain and Inspect Oil
- Pour oil into a clear container and check its condition carefully.
- Milky color means water contamination requiring pump replacement.
- Metal flakes indicate severe internal wear necessitating a new unit.
- Dark sludge suggests an overdue oil change that needs cleaning.
If the oil is clean, you may only need to replace seals or valves. Dirty oil often signals deeper problems within the crankcase.
Replace Unloader Valve and Seals
Focus on the most common failure points including valves, seals, and the unloader mechanism. These components account for the majority of pressure washer performance issues.
Remove the Unloader Valve
- Pry off the cap with a flathead screwdriver gently.
- Remove the small shield underneath the cap.
- Unscrew the two Torx 30 screws holding the white plastic housing.
- Lift off the housing while keeping the spring intact.
Inspect the stem for corrosion, bending, or pitting carefully. On the Carture K2400HH, a bent shaft causes pressure loss after trigger release. Replace the entire unloader if you see any damage.
Extract and Test Valves
Each pump has six plastic valves consisting of three intake and three exhaust units.
To remove:
1. Pull off the three small plastic keepers carefully.
2. Remove the internal spacer beneath the keepers.
3. Use needle-nose pliers to pull out valve seats.
4. Remove the top plate to access the next three valves.
5. Unscrew plugs to reach the final set of valves.
Test each valve by blowing into the inlet to ensure air passes. Try to suck back to confirm no air comes through. If it leaks, replace it immediately. Discard any valve with cracks, warping, or melted tops.
Replace Seals and O-Rings
- Remove rubber seals from piston bores gently.
- Install new ones from the rebuild kit carefully.
- Lubricate lightly with pump oil before insertion.
Dry seals tear easily during reassembly, so lubrication is critical. Ensure every O-ring sits perfectly in its groove.
Clean and Inspect Before Rebuilding
A dirty pump fails again quickly, so clean every part thoroughly. Mineral deposits and debris cause blockages that lead to cavitation and overheating.
Flush All Passages
- Use clean water and a rag to wipe internal chambers.
- Clear any debris from the inlet and outlet ports.
- Remove any hose fragments broken off inside with pliers.
Mineral deposits or detergent residue can block flow and cause cavitation. A thorough cleaning ensures smooth water flow upon reassembly.
Check Piston and Wobble Plate
- Inspect ceramic pistons for cracks or chips carefully.
- Look at the wobble plate for scoring or pitting.
- Ensure the connecting rods move freely without binding.
Any visible damage means you must replace the pump entirely. Structural integrity is non-negotiable for safe operation.
Reassemble Pump Correctly
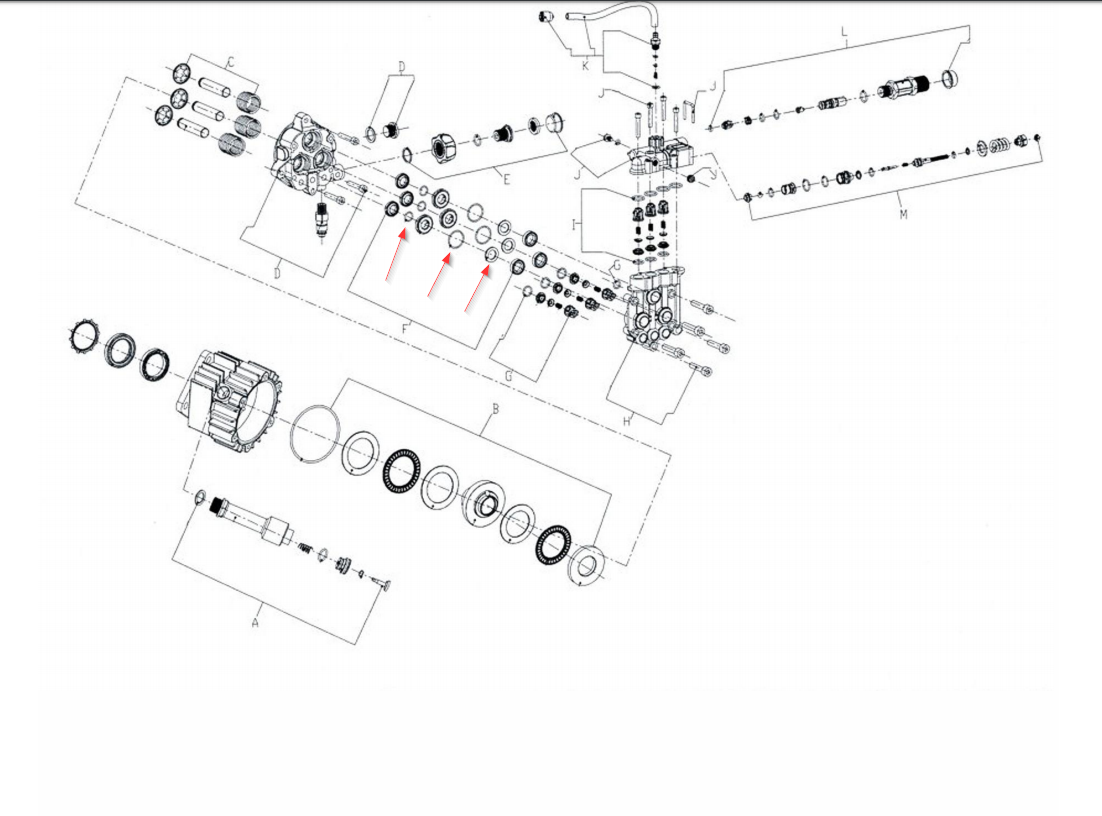
Rebuilding requires care, especially when handling fragile plastic parts. Follow the reverse order of disassembly while paying attention to torque specifications.
Install New Valves and Seals
- Insert new valves into their seats firmly.
- Replace all O-rings and gaskets with new ones.
- Reinstall spacers and keepers securely.
- Hand-tighten plugs without over-torquing.
Handle plastic components gently as they crack easily under pressure. Ensure every part clicks into place before proceeding.
Reinstall the Unloader
- Place new gaskets on the unloader body.
- Insert the spring and housing assembly.
- Secure with Torx 30 screws by hand first.
- Snug with a driver but never use an impact tool.
Brass threads strip easily, so hand-tightening is essential. Ensure the unloader moves smoothly within its housing.
Reattach Housing Halves
- Align the two housing sections precisely.
- Insert bolts and tighten diagonally in stages.
- Ensure even pressure to prevent leaks.
Uneven tightening can warp the housing and cause future leaks. Take your time to ensure a perfect seal.
Refill Oil and Reinstall Pump
Lubrication is critical for longevity and proper function of the internal components. Using the wrong oil can lead to premature wear and failure.
Add Fresh Pump Oil
- Fill to the dipstick mark using manufacturer-recommended oil.
- Do not use motor oil as it lacks the right additives.
- Check the sight glass after running and top off if needed.
Mount the Pump
- Slide the pump back onto the engine shaft, aligning the keyway.
- Tighten the four mounting bolts securely.
- Secure the crankshaft set screw firmly.
Ensure the coupling spins freely before starting the engine. Misalignment can cause vibration and premature wear.
Reconnect and Test System
Final steps before operation ensure everything works correctly and safely. Testing identifies leaks or assembly errors before full-power use.
Reattach Hoses
- Reconnect high-pressure, inlet, and detergent lines.
- Use new hose clamps if old ones are cracked.
Prime and Run
- Open the water supply fully.
- Pull the trigger to purge air from the system.
- Start the engine and let it run for 30 seconds.
- Check for leaks, steady pressure, and unusual noises.
Use a pressure gauge to confirm output matches specs like 3,000 PSI. Consistent pressure indicates a successful repair.
Prevent Future Pump Failures
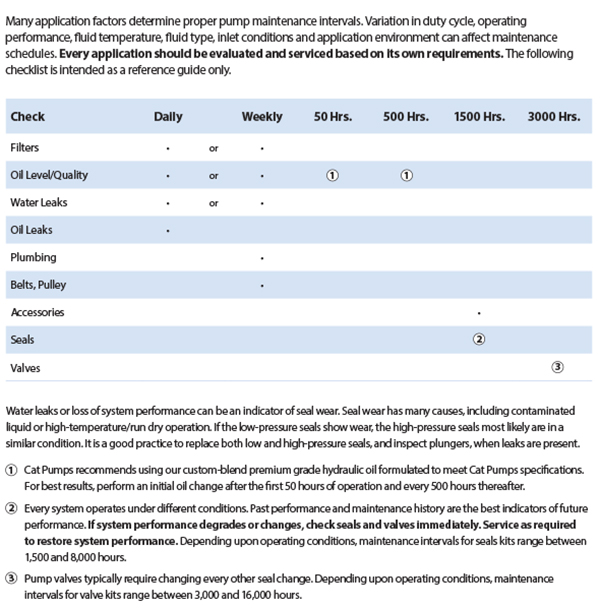
Most pump problems are avoidable with proper care and maintenance routines. Following these protocols extends the life of your equipment significantly.
Follow the 30-Second Rule
- Never leave the trigger off for more than 30–40 seconds while running.
- Hot water trapped in the pump can crack ceramic pistons.
- Turn off the machine during pauses to prevent thermal shock.
Never Run Dry
- Always ensure water flow before starting the engine.
- Dry running overheats seals and pistons in seconds.
Flush After Every Use
- Run clean water through the system for 1–2 minutes.
- Removes detergent residue that degrades seals.
Use Correct Chemicals
- Only use pump-safe detergents for cleaning.
- Harsh cleaners eat away at plastic valves and rubber seals.
Change Oil Regularly
- Check oil every 50 hours of operation.
- Change it annually or if contaminated.
- Use only pressure washer-specific oil.
Frequently Asked Questions About Pressure Washer Pump Repair
How do I know if my pressure washer pump is bad?
Signs include milky oil, cracked ceramic pistons, melted valves, or a scored crankshaft. If the pump makes grinding noises or leaks heavily from the crankcase, it likely needs replacement rather than repair.
Can I repair a pressure washer pump with milky oil?
No, milky oil indicates water has entered the crankcase, corroding bearings and rods. This is a catastrophic failure where replacement is the only safe and reliable long-term solution.
Why does my pressure washer lose pressure after pulling the trigger?
This specific symptom often points to a failed unloader valve, especially on models like the Carture K2400HH. The valve fails to redirect water flow properly upon re-engagement, causing total pressure loss.
How often should I change the oil in my pressure washer pump?
You should check oil every 50 hours and change it annually or immediately if contaminated. Regular oil changes prevent internal wear and extend the life of the pump significantly.
Is it worth repairing a cheap pressure washer pump?
If the unit is a low-cost big-box model with major damage, replacement is usually better. Parts costs can approach the price of a new pump assembly, making repair economically unviable.
Key Takeaways for Repairing Your Pressure Washer Water Pump
Knowing how to repair pressure washer water pump systems saves money and extends equipment life significantly. Focus on accurate diagnosis of symptoms like pressure loss or leaks before attempting any disassembly. Most issues stem from worn seals, valves, or the unloader, which are easily fixed with a rebuild kit.
Avoid catastrophic failures by adhering to the 30-second rule and never running the pump dry. If you find milky oil or cracked pistons, replace the entire unit rather than attempting a temporary fix. With proper maintenance and timely repairs, your pressure washer will deliver reliable performance for years.