How to Fix Washing Machine Suspension Issues
Is your washing machine violently shaking, walking across the floor, or making loud banging noises during the spin cycle? You’re not alone. A failing washing machine suspension system is one of the most common causes of excessive vibration, especially in Whirlpool, Maytag, Kenmore, and KitchenAid front-load and top-load models. The good news is that this issue is often fixable without replacing the entire appliance.
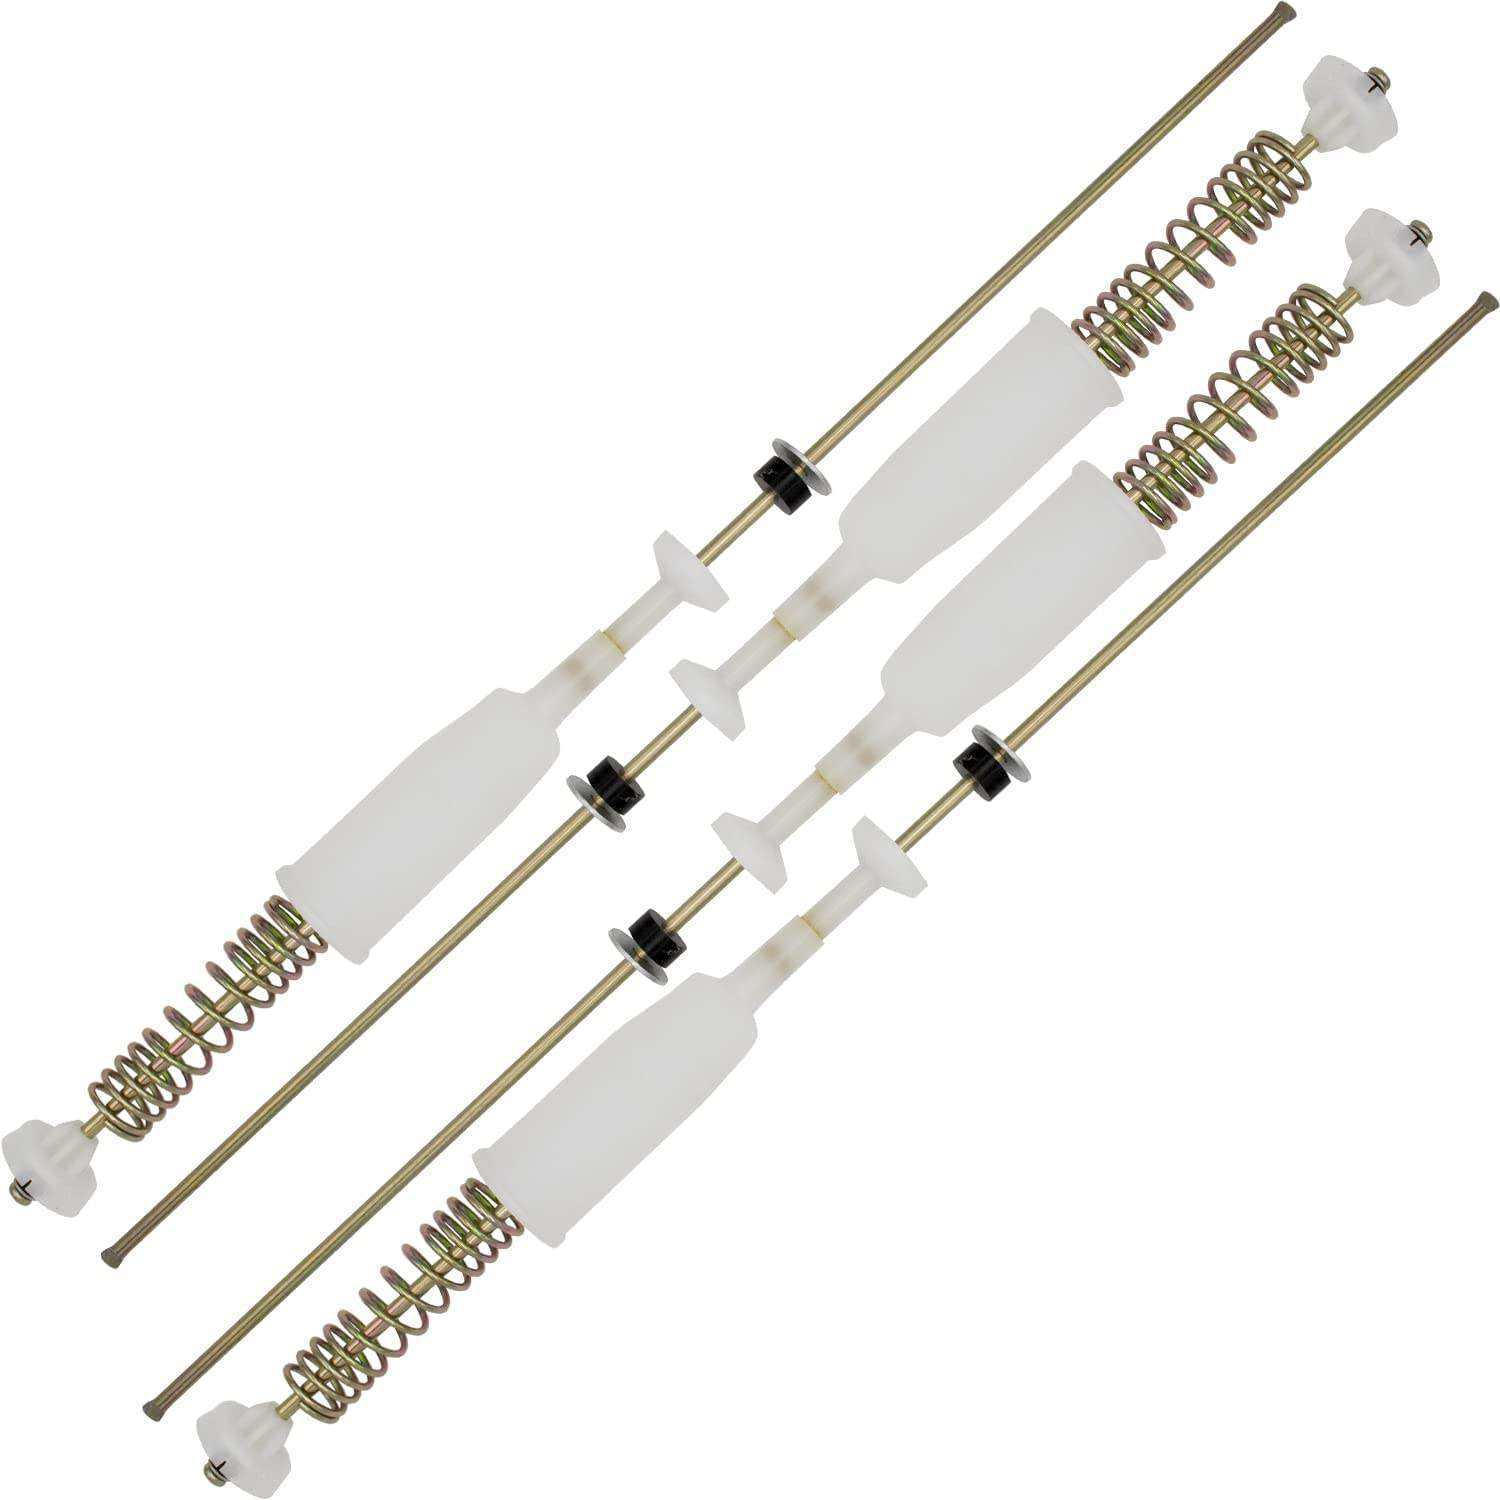
Suspension rods, also called shock rods or tub dampeners, absorb vibrations and stabilize the drum during high-speed spins. When they wear out, your washer becomes unstable, noisy, and inefficient. Left unaddressed, the damage can spread to the motor, drum bearings, or cabinet. In this guide, you’ll learn how to diagnose suspension failure, restore damping with low-cost fixes, or replace all four rods for a permanent solution.
Diagnose Suspension Failure Fast
Before grabbing tools, confirm the problem lies in the suspension system. These signs point directly to worn rods or dampeners.
Check for Excessive Tub Bounce
Press down firmly on the inner drum with both hands. If it rebounds like a basketball instead of moving smoothly and stopping, the suspension is compromised. This bouncy tub test is one of the most reliable indicators of failed bushings or lost damping.
Listen for Loud Thumping During Spin
A rhythmic banging noise, especially at high RPMs, means the drum is hitting the cabinet. This occurs when suspension rods no longer control vertical movement. The sound often worsens with unbalanced loads.
Look for Six Flashing LEDs
On many Whirlpool, Roper, and Kenmore models, six lights circling the pause/play button indicate an imbalance or suspension fault. While not a direct code for bad rods, it correlates strongly with tub instability and worn dampeners.
Inspect for Uneven Wear
Remove the rear panel and visually examine all four suspension rods. Look for cracked or missing plastic glide cups, leaking fluid or dry crumbling rubber bushings, and bent rods or loose mounting points. If one rod shows severe wear, assume the others are equally degraded even if they look fine.
Why Suspension Rods Fail Over Time
Suspension rods do not break all at once. They degrade gradually due to repeated stress and material fatigue. Understanding the root causes helps you choose the right repair.
Rubber Bushings Lose Damping Ability
Inside each rod is a soft, sponge-like rubber bushing that cushions movement. Over seven to ten years, it hardens, cracks, or disintegrates. Once gone, the spring cannot dampen motion effectively, leading to violent shaking.
Damping Grease Dries Out
Some rods rely on a special anti-grease compound to resist motion and smooth operation. When it dries or leaks, the rod loses resistance, allowing jerky movement and increased vibration.
Plastic Components Crack Under Stress
Glide cups, bearing retainers, and locking tabs are made of plastic. Years of compression and expansion cause them to crack or deform, letting the rod shift out of alignment.
Overloading Accelerates Wear
Washing heavy items like comforters or rugs repeatedly strains the suspension. Uneven loads create imbalance forces that wear out rods faster, especially if done regularly.
Pro Tip: Even if the spring looks intact, the real failure is usually in the bushing or grease. Do not assume you need full replacement. Restoration may be enough.
Repair Without Replacing: Rebuild the Bushings
If your rods are intact but bouncy, try rebuilding the internal rubber bushings. This low-cost method restores damping without buying new parts.
Cut Rubber Hose to Replace Worn Bushings
Remove the rod from the washer. Push the spring out using a flathead screwdriver to expose the degraded rubber. Trim any remaining rubber flush with the rod end. Cut a half-inch triangular wedge from a rubber hose such as fuel line or appliance hose. Insert the wedge into the rod is base. It should fit snugly and not fall out. The triangular shape locks it in place during compression, acting as a new buffer to restore some shock absorption.
Lubricate for Smooth Operation
Apply a light coat of white lithium grease to the new rubber piece before reinserting the spring. This reduces friction and prevents squeaking.
Note: This is a temporary fix. Expect three to twelve months of service. But it is free or nearly free and buys time for a full replacement.
Restore Damping With Anti-Grease Compound

For moderate wear, applying a specialized anti-grease compound can revive old rods without disassembly. This method is faster, cleaner, and lasts longer than DIY bushing fixes.
Buy the Right Damping Compound
Use a product designed specifically for suspension rods. It is thicker than regular grease and resists breakdown under pressure. Cost runs about ten to fifteen dollars, which is one-fourth the price of new rods.
Apply Step-by-Step
Remove the rear panel, which uses three screws. Lift the main lid by pulling forward half an inch, then lifting up and tilting back. Pull each rod upward to release the top glide cup. Slide the rod out from the lower mount. Clean the shaft with a rag to remove old grease and debris. Wear gloves, then smear the compound along the rod shaft. Push the rod up and down repeatedly to work the compound into the dampener. Reinstall the rod and secure the glide cup. Repeat for all four corners. Skipping one side creates imbalance.
Why It Works
The compound penetrates deep into the rod, restoring resistance and damping. Users report six to twenty-four months of quiet operation after treatment, ideal for older machines where full repair is not cost-effective.
Pro Tip: Apply more compound than you think you need. Overuse does not hurt performance and extends repair life.
When to Replace All Four Suspension Rods

If rods are cracked, leaking, or completely bouncy, replacement is the only reliable fix. Do not replace just one. Always do all four.
Signs Full Replacement Is Needed
Rods are bent or leaking fluid. Plastic glide cups are shattered. Previous repairs failed. The washer still shakes after bushing or grease fixes. The machine is seven or more years old with original rods. Suspension components wear at the same rate. Replacing only one creates uneven damping, leading to rapid failure of the others.
Use the Right Part: W10780048 Kit
The W10780048 suspension rod kit fits most Whirlpool, Maytag, KitchenAid, Amana, and Kenmore models built on shared platforms. It includes four complete rods with redesigned bearing cups for better durability.
The part number is W10780048. It includes four rods and updated plastic retainers. Compatibility is confirmed on Whirlpool-built machines with timer knob on top. Where to buy includes AppliancePartsPros.com, RepairClinic.com, and Amazon.
Warning: Some deep-drum models need longer rods. Always verify fit using your model number.
Tools You Will Need for Replacement
You do not need advanced tools, but having the right ones makes the job faster and safer.
A quarter-inch nut driver removes panel and hinge screws. Pliers disconnect water and drain hoses. A cordless screwdriver speeds up disassembly. Work gloves protect hands from sharp edges. Two-by-four wooden boards, three stacked, support the drum during repair. Optional items include a lanyard to secure the open lid and towels to catch water.
Step-by-Step Rod Replacement
Follow these steps to replace all four suspension rods safely and effectively.
Unplug and Shut Off Water
Unplug the washer from the wall. Turn off hot and cold water valves. Place towels under hoses to catch drips. Never work on a powered or pressurized machine.
Remove Rear Panel and Hoses
Disconnect the drain hose by loosening the clamp with pliers, pulling the hose off, and letting residual water drain into a bucket. Remove fill hoses by unscrewing from back of washer, noting hot and cold orientation. Take off the rear panel by removing one central screw, swinging the panel aside, and removing two hinge screws.
Support the Drum
This is critical. The drum is heavy. Letting it hang by the rods risks injury and damage. Place three stacked two-by-four boards under the pulley or drum support. Lower the drum gently onto the wood. This removes weight from the rods, making removal easy.
Warning: Never skip drum support. Unsupported weight can bend rods or crack mounts.
Remove Old Rods
Reach under each corner and lift the rod to release the top glide cup. Press the locking tabs on the bearing and lift it off. Slide the rod out from the lower mount. For rear rods, gently bend to clear obstructions. Avoid sharp kinks. Inspect old rods for wear patterns. Hardened rubber or cracked plastic confirms system-wide failure.
Install New Rods W10780048
Lubricate both ends with white lithium grease using a thin layer only. Insert the hook end through the top hole from above. Let the spring base rest on the frame. Guide the lower end into the tub is mounting cup. Snap on the new plastic retaining cup. Ensure it clicks securely. Work diagonally, installing front-left and rear-right first, then the other two. This keeps the tub balanced.
Pro Tip: If access is tight, lay the washer on its back to install rods more easily.
Reattach Pressure Hose If Present
Some models have a pressure hose clipped to a rod. Reconnect it before closing up. Then attach the hose to the pressure switch with no kinks or pinches.
Reinstall Upper Bearings
Lower the top panel and align tabs. Insert one hinge screw to hold it. Lay the washer on its back. Pull rear rods out slightly and snap on upper bearing cups. Return washer upright. Fully close the lid, remove lanyard, and tighten all hinge screws. This ensures bearings seat properly.
Reconnect Hoses and Panel
Reattach fill hoses by hand-tightening, then snugging with pliers without overtightening. Reconnect drain hose by pushing fully on and clamping securely. Replace rear panel by aligning tabs and securing with screw.
Recalibrate the Washer Whirlpool/Kenmore
After suspension work, recalibrate the drum balance. Turn control knob left three times, right once, left once, right once. Select Rinse cycle. Press Start. Wait five minutes for calibration to finish. This resets spin dynamics and prevents false error codes.
Test the Repair
Plug in the washer. Turn water back on. Run a high-speed spin cycle with a balanced load. Watch for no vibration or walking, smooth acceleration, quiet operation, and firm damped tub movement when pressed. Success means your washer should now run like new.
Maintain Suspension Longevity
Even with new rods, proper care extends life and prevents repeat failures.
Replace All Rods at Once
Always replace all four, even if only one looks bad. Mismatched damping causes imbalance and shortens the life of new parts.
Lubricate Properly
Use a thick, tacky gear grease on rod ends and glide points. Avoid over-lubricating, which attracts dirt and degrades rubber.
Avoid Overloading
Do not wash heavy items like rugs or comforters frequently. Distribute laundry evenly. Single bulky items create imbalance forces that wear rods faster.
Level the Washer
Ensure all feet are flat and locked. An unlevel washer increases stress on the suspension system.
Repair vs. Replace: Cost and Longevity Compared
The bushing fix costs zero to five dollars, takes ten to twenty minutes, lasts three to twelve months, and works best for light wear and temporary fixes. Anti-grease costs ten to fifteen dollars, takes twenty to thirty minutes, lasts six to twenty-four months, and works best for moderate wear and budget repairs. Full replacement costs forty to sixty dollars, takes forty-five to seventy-five minutes, lasts five to ten years, and works best for severe wear and permanent fixes.
Bottom Line: If your machine is seven or more years old, full replacement is the best long-term value.
Know When to Call a Pro
While most suspension repairs are DIY-friendly, call a technician if the drum bearing is noisy with grinding or rumbling, shock absorbers or springs are also failing, the washer still vibrates after new rods, or you are uncomfortable tilting or supporting the drum.
Final Thoughts on Fixing Washing Machine Suspension
A shaky, noisy washer does not mean replacement time. In most cases, washing machine suspension repair solves the problem fast, affordably, and effectively. For minor bounce, try the rubber bushing fix or anti-grease compound. For severe vibration, replace all four rods with the W10780048 kit. Always support the drum, replace in pairs, and recalibrate afterward. With the right approach, you can eliminate vibration, extend your washer is life by three to five years, and save hundreds compared to buying new. No special skills are required, just a few tools, the right parts, and this guide.
Frequently Asked Questions About Washing Machine Suspension Repair
How Do I Know If My Washing Machine Suspension Is Bad
Press down on the inner drum. If it bounces back like a basketball instead of staying firm, the suspension is worn. Loud thumping during spin cycles and visible shaking or walking across the floor are also clear signs of suspension failure.
Can I Replace Just One Suspension Rod
No. Always replace all four rods at once. Suspension components wear at the same rate. Replacing only one creates uneven damping, which causes the new rod to fail quickly and leaves you with the same vibration problem.
How Long Does Suspension Repair Last
It depends on the method. The rubber bushing fix lasts three to twelve months. Anti-grease treatment lasts six to twenty-four months. Full rod replacement with the W10780048 kit lasts five to ten years under normal use.
Is Washing Machine Suspension Repair Worth It
Yes. A new washing machine costs several hundred to over one thousand dollars. Suspension repair, whether using anti-grease or full replacement, costs under sixty dollars and can extend your machine is life by three to five more years.
Do I Need Special Tools to Replace Suspension Rods
No. A quarter-inch nut driver, pliers, cordless screwdriver, work gloves, and three stacked two-by-four boards are sufficient. These are common household tools, making this a beginner-friendly DIY repair.
What Is the W10780048 Kit and Will It Fit My Washer
The W10780048 is a complete suspension rod kit with four rods and redesigned bearing cups. It fits most Whirlpool, Maytag, KitchenAid, Amana, and Kenmore models built on Whirlpool platforms, specifically those with the timer knob on top. Always verify fit using your model number before purchasing.