How to Level a Washing Machine: Quick Steps
Is your washing machine shaking, banging, or walking across the floor during the spin cycle? You are not alone. Over 60% of washer vibration issues stem from improper leveling, and even a slight tilt of just 1/8 inch can throw off balance, leading to loud noises, premature wear, and potential damage to your floors or appliance. The fix is properly leveling your machine.
A level washing machine ensures smooth, stable operation by allowing the drum to spin freely without hitting internal walls. This reduces stress on suspension systems, prevents error codes like LG’s “UC” or “LE,” and extends the life of your appliance. Whether you own a top-loader or front-loader, the process is simple, quick, and requires only a few basic tools. In this guide, you will learn how to level any washing machine in under 30 minutes with step-by-step instructions, pro tips, and model-specific advice.
Essential Pre-Leveling Checks
Before adjusting the legs, confirm these critical setup steps are complete. Skipping these checks can lead to inaccurate leveling and potential damage to your machine.
Remove Shipping Bolts on Front Loaders
Front-loading washers ship with transit bolts that lock the drum in place during transport. These bolts must be removed before operation or leveling. If left installed, they prevent the drum from floating freely, causing excessive vibration and internal damage.
Locate 2-4 bolts at the back of the washer. Use a wrench or the included tool to unscrew them completely. Keep the bolts stored safely for future moves. Plug any holes with the provided caps if included.
Running a front-loader with shipping bolts in place can void the warranty and destroy the suspension system. This is one of the most common mistakes that causes vibration problems.
Ensure the Machine Is Empty
Leveling must be performed with an empty washer. A loaded drum shifts weight and gives false stability readings. Even damp clothes can throw off balance and lead to incorrect adjustments.
Position in Final Location
Never level on a ramp, dolly, or temporary surface. The washer must be fully pushed into its permanent spot, away from walls, cabinets, and dryers. Even slight contact with surrounding objects can mask wobbling and create false stability readings.
Tools Required for Leveling
Using the right tools ensures accurate and safe leveling. Do not rely on short torpedo levels or visual cues alone.
Must-Have Tools
A 2-3 foot bubble level is essential. Long enough to span the top casing, it provides accurate readings across the entire frame. Avoid short levels as they miss frame-wide tilt.
An adjustable wrench or crescent wrench is needed for loosening jam nuts and turning leveling feet. A socket wrench with swivel joint helps reach rear feet in tight spaces. A flashlight lets you see under the machine and check floor condition.
Optional but Helpful Items
Anti-vibration pads prevent slipping on tile, vinyl, or laminate surfaces. A wooden 2×4 block temporarily supports the machine when adjusting rear legs. Precision shims compensate for uneven floors, but never use cardboard or wood scraps as they compress over time.
A smartphone level app can help with initial checks, but always verify with a physical bubble level for final adjustments. The phone app lacks the precision needed for fine-tuning.
Understanding Your Washer’s Leveling Feet
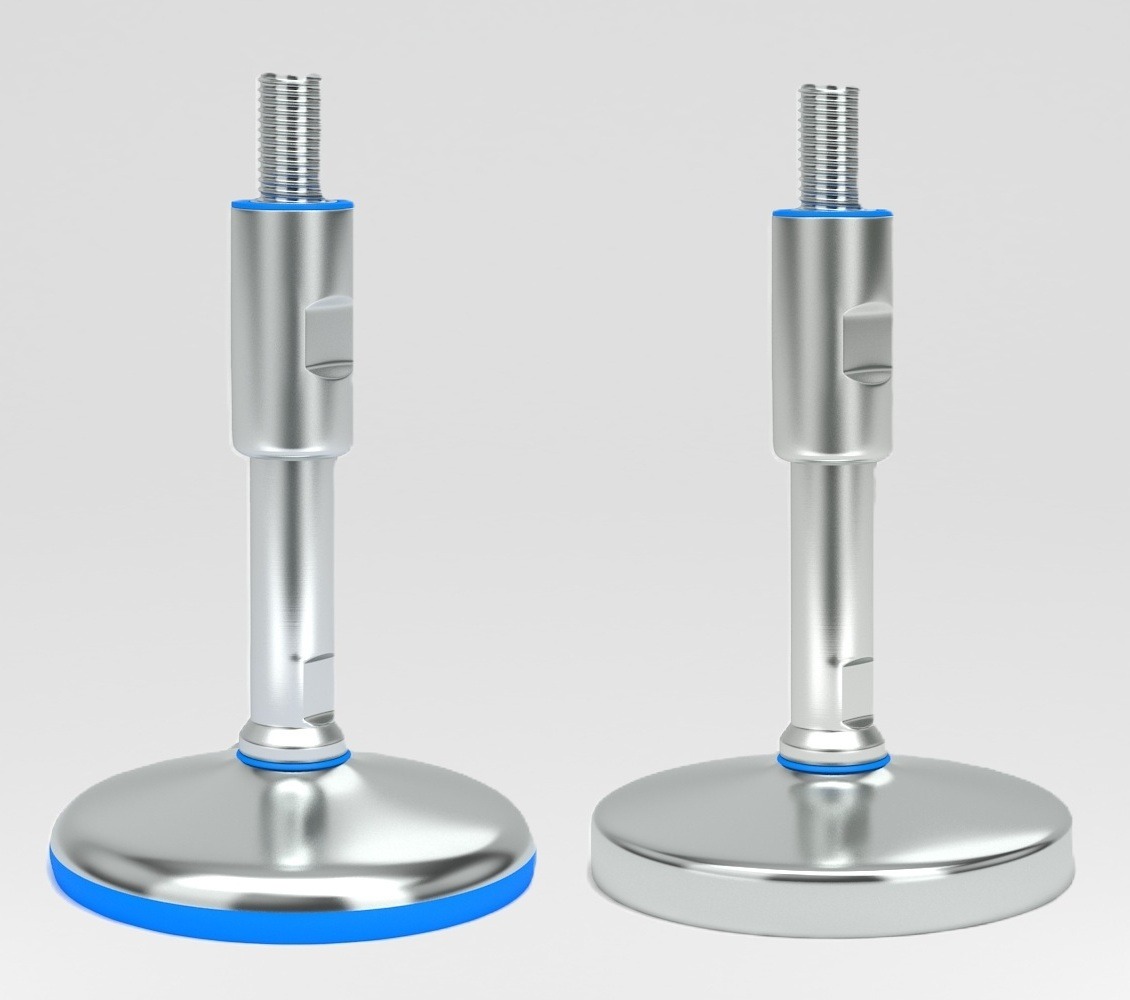
Knowing your washer’s foot type ensures you adjust correctly. Different machines use different mechanisms.
Neoprene or Nylon Legs
These rubberized feet grip the floor and are found on budget and mid-tier models. When tightened, the leg digs slightly into the frame to reduce movement. They are less precise but work well on stable surfaces.
Threaded Legs with Jam Nuts
This design is standard on high-end washers including LG and Samsung models. The adjustment requires loosening the jam nut first, rotating the foot to raise or lower the corner, then retightening the jam nut against the frame to lock the height.
On LG models specifically, you must loosen jam nuts before adjusting as they are locked in place at the factory. This prevents the legs from shifting during high-speed operation.
How to Level a Top-Load Washer
Top-loaders require front and side leveling to ensure stability during high-speed spins. The process differs slightly from front-loaders.
Use the Casing, Not the Lid
Never place the level on the lid, especially on modern models with curved tops. The lid is not flat and will give false readings. Correct placement is on the top edge where two panels meet, such as the front-right corner.
Adjust Front Legs First
Place the level across the front edge of the top casing. Observe the bubble position. If off-center, the machine is tilted.
Adjust the front-right leg using these directions. Turning clockwise lowers the foot and raises that corner. Turning counter-clockwise raises the foot and lowers that corner. Recheck the level after each adjustment, then repeat for the front-left leg.
Check Side-to-Side and Front-to-Back
Rotate the level to check side-to-side balance by placing it along one side edge. Check front-to-back by positioning from front to back corner. Adjust rear legs if they are adjustable on your model.
After all adjustments, push down firmly on each corner. No rocking should occur. If the machine wobbles, continue adjusting until all four feet provide solid contact.
Alternative: Water Surface Method for Top Loaders
This method uses water as a natural level indicator and requires no tools. It works surprisingly well for quick checks.
Step-by-Step Process
Slide the washer into its final position. Open the lid and pour water into the tub until it reaches just below the pulsator. Look at the waterline around the pulsator to determine level. If the pulsator is centered in the water ring, the machine is level. If water is deeper on one side, the washer is tilted toward that side.
Adjust the front leveling feet accordingly. Turn clockwise to raise a low corner. Turn counter-clockwise to lower a high corner. Recheck water alignment after each adjustment.
This method is accurate because water always finds level. It is particularly useful when you do not have a bubble level readily available.
How to Level a Front-Load Washer
Front-loaders spin faster and require more precise leveling than top-loaders. Follow these steps carefully.
Step 1: Loosen Jam Nuts
Use a wrench to loosen the lock nuts on both front leveling feet. Do not remove them completely. Just loosen enough to allow foot rotation. On LG models, this step is required before any adjustment can occur.
Step 2: Adjust Front Feet
Turn the foot counter-clockwise to raise the machine. Turn clockwise to lower the machine. Adjust one foot at a time and recheck level after each change. Most leveling is done via the front feet since rear legs are often fixed or self-leveling.
Step 3: Retighten Jam Nuts
Once level, hold the foot in place and tighten the jam nut against the washer frame. This locks the height and prevents vibration-induced shifts. On some models, turning counter-clockwise tightens the nut. Check your manual for specific direction.
Step 4: Final Stability Test
Place the level on top casing and check both front-back and side-side levels. Push each corner firmly. No rocking or wobbling should occur. All four feet must touch the floor solidly.
Advanced Tips for Perfect Leveling

These techniques help achieve precision and handle challenging situations.
Diagnose Tilt Direction Correctly
Place the level on the front corner to check front-to-back tilt. If the bubble leans forward, the machine tilts backward. For side-to-side tilt, if the bubble leans toward you on the left, the back-left corner is the lowest point. Target the low corner for adjustment.
Support the Machine When Adjusting Rear Legs
If rear legs are adjustable, lean the washer slightly forward and slide a 2×4 block under the rear corner for support. Use a socket wrench with extension to turn the leg. Remove the support and recheck level after adjustment.
Always support the front while adjusting the rear to prevent tipping. This technique provides the leverage needed without risking injury or damage.
Use a Solid Reference Point
Measure level from the metal casing, not plastic trim or the lid. The ideal spot is the corner where two panels meet. This ensures accurate full-frame assessment rather than measuring a curved or warped surface.
Post-Leveling: Calibration and Testing
Do not skip this final step. Many modern washers need recalibration after leveling to operate correctly.
Run Calibration Mode
Calibration mode is available on LG, Samsung, and other front-loaders. It allows the control system to recalibrate drum balance and adjust motor behavior. The process takes 3-5 minutes depending on model.
Activation varies by brand. Check your owner’s manual for the specific button combination or service mode entry procedure. Running calibration after leveling maximizes performance and ensures the machine detects imbalance accurately.
Perform a Rinse and Spin Test
Follow this test load procedure. Add approximately six pounds of laundry such as towels. Select the RINSE and SPIN cycle. Start the machine and observe during high-speed spin.
Listen for banging or clunking. Watch for walking or shaking. Feel for vibration through the cabinet. Some vibration is normal, but sustained movement across the floor means the machine is still unlevel.
If instability occurs, stop the machine and pull it forward. Recheck level and foot contact. Retighten jam nuts and repeat adjustment if needed.
Troubleshooting Common Leveling Problems
Even after proper leveling, issues can arise. Here is how to address them.
Machine Still Vibrates
Uneven floor, carpet compression, or loose jam nuts cause continued vibration. Install a 3/4 inch plywood platform under the washer for uneven floors. Place the washer on a solid board if carpet is the issue. Retighten all jam nuts against the frame.
One Leg Does Not Touch the Floor
This is likely due to frame binding or a jam nut tightened too tight. Loosen the jam nut and manually screw the foot down until it contacts the floor. Retighten the nut to lock position.
Washer Walks During Operation
Slick floors like tile or vinyl cause this problem. Install non-skid pads or rubberized stability mats. Ensure neoprene feet are clean and gripping the floor properly.
Error Codes Appear
LG models may display “UC” for unbalanced load or “LE” for motor error when poor leveling is detected. Relevel the machine and run calibration mode. Confirm shipping bolts are removed on front-loaders.
Model-Specific Leveling Advice

Different brands have specific requirements. Know your machine before adjusting.
LG Front-Load Washers
LG washers require precise leveling due to high-RPM spins up to 1,400 RPM. Always loosen jam nuts before adjusting feet. Use the included wrench for best fit.
Run the RINSE and SPIN cycle to test stability. The machine may display “UC” or “LE” error codes if unlevel. Address these codes by re-leveling and running calibration.
Pedestal Installations
Level the pedestal first, not the washer. Washer feet should be fully retracted and locked. Only adjust the pedestal’s leveling feet. Secure the washer to the pedestal with provided bolts.
Adjusting the washer’s feet on a pedestal unit causes misalignment and can void the warranty. This is a critical distinction from standard installations.
Floor Requirements and Installation Environment
The floor condition affects leveling success. Address floor issues before attempting to level the machine.
Choose the Right Floor
Ideal surfaces are concrete, tile, or solid wood. Avoid carpet, vinyl plank, or flexing subfloors. Carpet compresses over time and loses contact with leveling feet, causing instability.
Check Floor Level First
Use a level on the floor itself before installing the washer. If the floor is unlevel, washer feet may not compensate adequately. Install a rigid platform like 3/4 inch plywood or use precision shims under feet. Consult a contractor for subfloor repair if needed.
A washer on an unlevel floor will never stay level. Fix the floor first, then level the machine.
Long-Term Maintenance for Stable Performance
Keep your washer stable for years with these maintenance practices.
Recheck Level Periodically
Check level after moving the machine, following floor renovations, or if new vibrations appear. Vibration can gradually loosen jam nuts over time.
Inspect Leveling Feet Annually
Look for wear, cracking, compression, or corrosion. Replace damaged feet with OEM parts. Pay special attention if the washer sits on carpet, as compression is more likely.
Keep Jam Nuts Tight
Vibration loosens nuts over time. Retighten every 6-12 months to maintain stability. Check and clean feet and floor quarterly to ensure proper grip.
Frequently Asked Questions About Leveling a Washing Machine
How do I know if my washing machine is unlevel?
Signs include excessive vibration, loud banging during spin cycles, the machine walking across the floor, or error codes like “LE” or “UC” appearing. You can also place a level on the machine casing to check.
Can I level a washing machine on carpet?
It is not recommended. Carpet compresses under weight and loses contact with leveling feet over time. If you must use carpet, place a solid plywood board underneath for support.
Do I need to remove shipping bolts on top-loaders?
No. Shipping bolts are only installed on front-loading washers. Top-loaders do not have them. Always remove transit bolts on front-loaders before operation.
How often should I recheck my washer’s level?
Check after any move, renovation, or when vibration problems appear. As a general rule, inspect during annual appliance maintenance. Vibration can gradually loosen jam nuts.
What causes one leg to not touch the floor?
This usually happens when the jam nut is tightened too tight against the frame, preventing the foot from extending fully. Loosen the nut, manually extend the foot, then retighten.
Key Takeaways for Leveling Your Washing Machine
Leveling is a simple step that dramatically improves performance and longevity. Always use a 2-3 foot bubble level on the machine casing, never the lid. Remove shipping bolts on front-loaders before any other steps.
Adjust front legs first, then rear if needed. Loosen jam nuts before turning feet and retighten after leveling. Check level in both directions and perform a push test to ensure no rocking occurs.
Run calibration mode on smart washers and test with a rinse and spin cycle. Use non-skid pads on slippery floors. For pedestal units, level the pedestal only, not the washer.
A few minutes of proper leveling saves hours of noise, repairs, and frustration. Do it right the first time, and your washer will run smoothly for years.