How to Install a Washing Machine Pan: Step-by-Step Guide
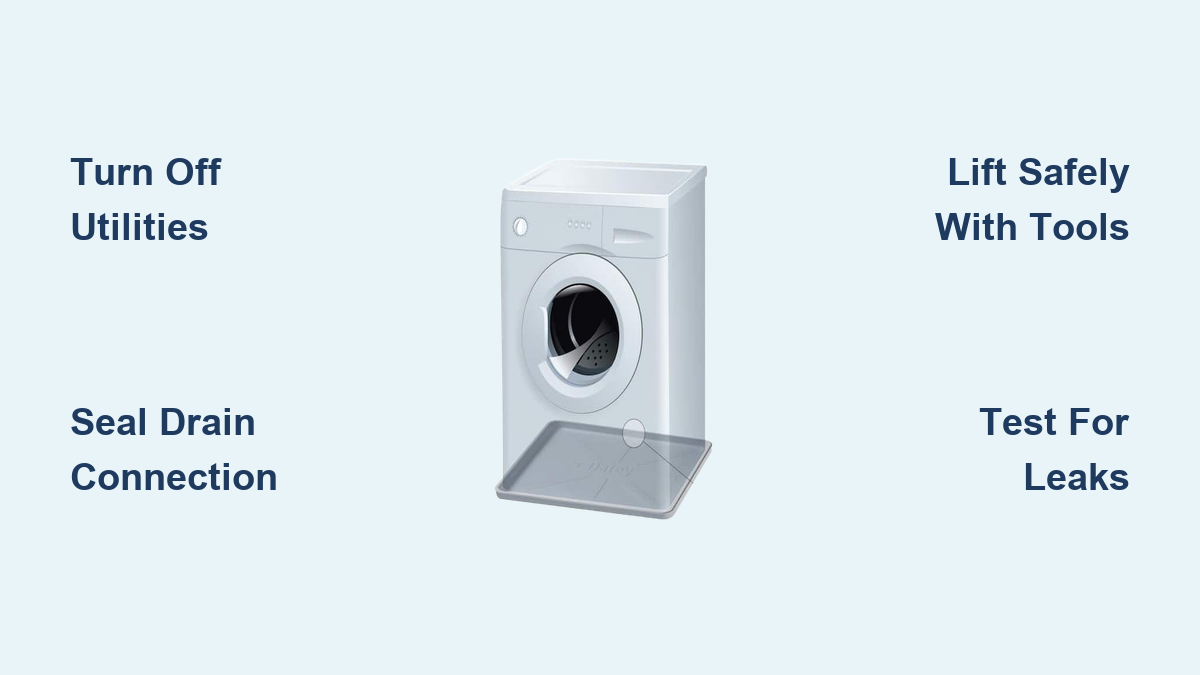
Every year, thousands of homeowners face costly water damage from undetected washing machine leaks. A single cracked hose or condensation drip can lead to warped floors, mold growth, and structural issues, especially in upstairs laundry rooms. Installing a washing machine pan is one of the most effective ways to prevent this damage. This guide will walk you through the complete installation process, from preparing the area to testing for leaks.
Whether you are upgrading an existing setup or installing a new washer, you will learn multiple methods for positioning the pan without disconnecting your machine, sealing the drain properly, and ensuring long-term protection. Choose the approach that fits your space, available help, and physical capability.
Prepare the Installation Area
Before moving the washing machine, proper preparation ensures safety and prevents damage to your home.
Turn Off Utilities
Shut off both water and power to the washing machine to eliminate hazards during installation:
• Close hot and cold water supply valves behind the washer
• Unplug the unit from the electrical outlet
• Turn off the circuit breaker controlling the laundry room
Never work on a plugged-in washer. Even a small leak near electricity can be dangerous.
Clear the Space
Remove laundry, cleaning supplies, and obstacles around the machine. Give yourself at least 2 to 3 feet of clearance on all sides for safe maneuvering. Protect walls and baseboards with furniture blankets or moving pads to avoid scuffs during movement.
Gather Required Tools and Materials
Have everything ready before starting the installation:
• Washing machine pan (27 by 30 inches standard)
• 100% silicone sealant
• 1-inch PVC drain connector and locking nut
• Gasket
• Adjustable step bit (up to 1 3/8 inches)
• Level
• 2×4 lumber (for ramp or walking methods)
• Lifting straps (optional)
• Rags and gloves
Double-check that your pan includes a pre-drilled hole for the drain and fits your washer model, especially important for front-load units with lower clearance.
Modify the Pan for Drainage

Most pans require minor modification to connect the drain properly and create a watertight seal.
Locate and Enlarge the Drain Hole
Find the pre-marked center point on the pan base. Use an adjustable step bit to drill out the hole to approximately 1 1/4 inches, just large enough for the PVC connector. Drill slowly to avoid cracking plastic or metal. Stop at the second-to-last step of the bit to prevent over-enlarging. Flip the pan and lightly drill from the back to remove burrs that could interfere with sealing.
Test-fit the PVC connector before applying sealant. It should slide in snugly without forcing.
Seal the Drain Connection
A watertight seal prevents slow leaks that defeat the purpose of the pan. Clean both sides of the pan around the hole with a dry rag. Apply a continuous bead of 100% silicone sealant around the top rim of the hole, on the threads of the PVC connector, and on the underside where the gasket will sit. Insert the PVC connector from the top down. Slide the gasket under the pan, centered over the hole. Thread the plastic locking nut onto the connector from below. Hand-tighten only until snug, overtightening can crack plastic or warp the pan.
Run a bead of silicone along the outer edge where the pan meets the floor. This fully seals the perimeter and prevents water from escaping underneath. Allow the silicone to cure for 24 hours before placing the washer or testing for leaks.
Lift and Position the Pan Safely
Moving a 180 to 200 pound washing machine requires careful planning. Choose the method that matches your strength, space, and available help.
Two-Person Lift Method
Best for quick installations with assistance. Two people stand on opposite sides of the washer. On a count, lift the machine 3 to 4 inches straight up using leg strength, not your back. A third person slides the pan underneath. Lower the washer gently into the pan.
Do not rest the washer on the pan side walls. Only the base should support the weight. This method is fast but physically demanding. Use only if all participants are injury-free and coordinated.
Use Lifting Straps for Safety
Ideal for solo installers with help. Tilt the washer slightly backward. Slide forearm or waist lifting straps under the unit. Secure the straps and use body leverage to lift higher and safer than manual lifting allows. Slide the pan into place and lower the machine.
This approach reduces back strain and increases control. Straps are available online for under $30.
2×4 Walking Method
Perfect when ceiling clearance is limited. Move the washer forward slightly to clear the wall. Place the pan in position. Attach two 2x4s together to form a long runner and place them inside the front lip of the pan so they extend outward. Tilt the washer backward and walk it forward over the 2x4s until the front feet are over the pan. Tilt forward, then continue walking backward until fully seated. Once centered, tilt slightly and slide the 2x4s out.
This technique uses controlled tilting instead of full lifting, minimizing physical strain.
2×4 Ramp Method
Best for tight spaces or heavy machines. Move the washer aside temporarily. Position the pan. Build a ramp by fastening three 2x4s vertically to form an I-beam. Lay two more 2x4s across the top to create a flat ramp surface. Angle the ramp against the front of the pan. Lift the front of the washer and slide it up the ramp into the pan. Once the back clears, lower it down. Carefully remove the ramp pieces from underneath.
Ensure the ramp height clears the pan walls. Test with a broom handle first.
Hire Professional Help if Needed
If you are unsure about lifting, hire professional movers through services like Handy or local appliance installers. They have the tools and experience to handle heavy appliances safely, especially important in multi-story homes. Confirm they understand not to rest the washer on the pan edges during placement.
Level the Washer After Installation

Even a slight imbalance causes vibration, noise, and premature wear on your machine.
Check with a Level
Place a bubble level on top of the washer. Check both front-to-back and side-to-side alignment. Adjust the leveling feet at the base by turning clockwise to raise or counterclockwise to lower. Use a wrench if needed, but do not force it.
Rock the washer gently after adjusting. If it moves, tighten the lock nuts on the feet. Recheck leveling after the machine is fully seated in the pan. The pan should sit flat on the floor with no rocking.
Connect and Route the Drain Line
Proper drainage ensures the pan works when needed to catch overflow water.
Use an Indirect Drain System
Most plumbing codes prohibit direct sewer connections unless a P-trap and vent are installed. Instead, use an indirect drain. Attach the PVC drain pipe from the pan to a basement floor drain or laundry tub. Route the hose so it empties above the receptacle, not submerged. Secure the line with clips to prevent kinking.
An indirect drain prevents sewer gas from backing up into your laundry room while still allowing overflow to drain safely.
Avoid Common Drain Mistakes
Do not let the drain hose dip below the pan, as this creates a siphon effect. Do not cap the drain, water must be able to escape. Keep the line short and straight for best flow.
If you do not have a nearby floor drain, consider installing a condensate pump to lift water to a sink or utility drain.
Add Vibration Control
Reduce noise and movement during spin cycles with optional accessories.
Install Anti-Vibration Pads
Place rubber or gel pads under each foot of the washing machine or between the pan and floor. These pads minimize walking across the floor, reduce noise transmission through walls and floors, and protect vinyl, hardwood, and tile surfaces.
Use pads rated for heavy appliances. Standard furniture pads will not suffice. These are especially valuable in upstairs laundry rooms where vibration travels easily through the structure.
Test for Leaks and Finalize Setup
Never assume the job is done until you have tested the installation thoroughly.
Perform a Leak Test
Plug in the washer and turn water valves back on. Run a short rinse cycle with no load. During the cycle, inspect the drain connector for seepage, the silicone seal around the pan edges, and the floor under and around the pan.
If you see moisture, stop the cycle, dry the area, and reapply silicone as needed.
Final Checks
Confirm the washer is still level after testing. Ensure hoses are not kinked or twisted. Verify the drain line is not obstructed.
Choose the Right Pan for Your Washer

Not all pans are created equal. Match the design to your machine type for the best fit.
Standard Pans for Top-Load Washers
Standard pans feature full-height sides of approximately 2 1/8 inches. They work well with traditional top-loading machines but require lifting for installation.
Front-Load Washer Pans
Front-load pans have a lower front wall to accommodate door clearance. They are often shorter in depth and easier to slide onto ramps during installation.
Open-Front Trench Drain Pans
These innovative designs from manufacturers like Killarney Metals allow the washer to slide straight in from the front with no lifting required. They hold up to 2 gallons and are ideal for DIYers who want to avoid heavy lifting. These pans require secure anchoring and proper slope toward the drain but eliminate the biggest risk of installation.
Maintain Your Pan Long-Term
A well-installed pan can last over 10 years with basic care.
Annual Inspection Checklist
Look for rust, cracks, or warping in metal or plastic. Check silicone seals for drying, cracking, or separation. Ensure the drain line is clear and flush with water if clogged. Clean debris from the pan using a wet-dry vacuum or sponge.
Reapply Sealant Every 3 to 5 Years
Silicone degrades over time. Re-seal the drain connection and perimeter every few years to maintain waterproof integrity. Mark the installation date on the pan with a permanent marker for easy tracking.
Follow Code and Best Practices
While not always required, drip pans are strongly recommended by professionals.
International Residential Code Guidelines
IRC M2701.5 requires drip pans with a 1-inch deep pan and drain line for washing machines installed above occupied spaces. The drain must discharge to a trapped receptor, outdoor location, or indirect waste receptor.
Even if your local code does not enforce this, installing a pan is a smart investment. One leak can cost thousands in repairs. A pan costs less than $100.
Insurance and Home Value Benefits
Many insurers offer premium discounts for water damage prevention measures. A documented pan installation may also increase buyer confidence during resale.
Frequently Asked Questions About Installing a Washing Machine Pan
Do I need to disconnect my washing machine to install a pan?
No, you can install a washing machine pan without disconnecting hoses or electrical lines. Several methods allow you to lift or maneuver the machine over the pan, including two-person lifting, lifting straps, 2×4 walking methods, and ramp systems. For the easiest option, consider an open-front trench drain pan that requires no lifting at all.
What size washing machine pan do I need?
Standard washing machine pans measure 27 by 30 inches with side heights of approximately 2 1/8 inches. However, front-load washers may require pans with lower front walls for door clearance. Always verify that the pan fits your specific washer model before purchasing.
How do I prevent sewer gas from coming through the pan drain?
Use an indirect drain system that routes water to a basement floor drain or laundry tub rather than connecting directly to the sewer line. This prevents sewer gas from backing up while allowing overflow to drain safely. An indirect drain eliminates the need for a P-trap in most residential installations.
How often should I reseal the washing machine pan?
Reapply silicone sealant every 3 to 5 years or sooner if you notice cracking, drying, or separation. Regular inspection helps catch degradation before it leads to leaks. Mark the installation date on the pan to track when resealing is due.
Can I install a washing machine pan myself, or do I need a professional?
Most homeowners can install a washing machine pan themselves using the methods described in this guide. However, if you are uncomfortable lifting a 180 to 200 pound appliance or have physical limitations, hiring professional movers is a worthwhile investment. They have the experience and equipment to handle heavy appliances safely.
Key Takeaways for Installing Your Washing Machine Pan
Installing a washing machine pan is a simple upgrade with outsized benefits for protecting your home from water damage. By following these steps, you will create a level, watertight, and code-compliant setup that works silently behind the scenes until it is needed.
The most important steps include preparing safely by turning off utilities and clearing the space, sealing thoroughly with 100% silicone on all connections and edges, lifting smartly using helpers or ergonomic aids rather than risking injury, and testing completely with a trial wash cycle before relying on the system.
Whether you use lifting straps, a 2×4 ramp, or opt for a no-lift trench pan, the key is proper positioning with the washer resting on the pan base only, never on the side walls. Regular annual inspections and resealing every few years will ensure your protection lasts for the life of your washing machine.