How to Replace Washing Machine Valve – Step-by-Step Guide
A sudden leak behind your washing machine can spell disaster—water damage, mold, and costly repairs. Often, the culprit is a failing water supply valve. Replacing a washing machine valve isn’t just about fixing a drip; it’s a proactive step to prevent flooding, maintain water pressure, and extend the life of your appliance. The good news? This repair is well within reach for most DIYers with basic tools and a little patience. Whether your valve is dripping, corroded, or simply outdated (over 10–12 years old), this guide walks you through every step—from shutting off the water to final leak testing—using only the facts and best practices from expert plumbing sources.
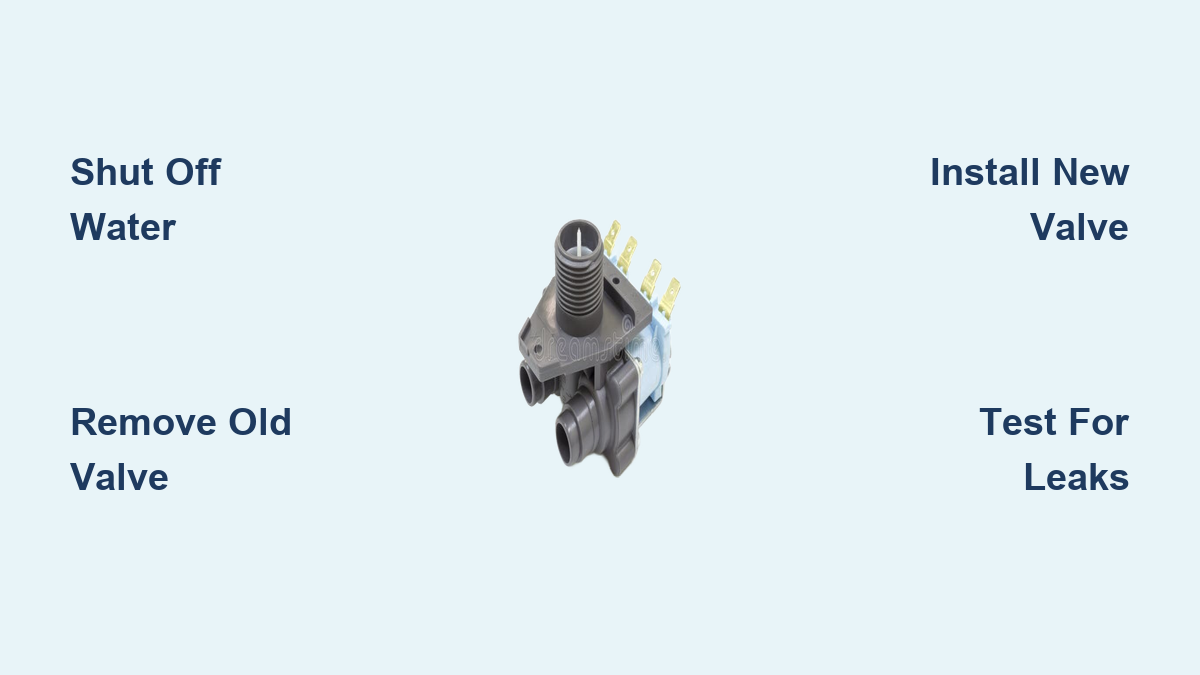
Shut Off Water Supply
Before touching any plumbing, stop the flow of water. Locate both the hot and cold shutoff valves near your washing machine and turn them clockwise until fully closed. If the valves are stiff or leak slightly when turned, don’t force them—shut off the main water supply to the house instead. This is especially critical in multi-unit buildings where shared lines could affect neighbors.
Release System Pressure
Even after shutoff, water remains trapped in the pipes. Open a nearby faucet—like a utility sink or bathroom tap—to drain residual pressure and water. You may hear a hiss or see a brief spurt; this is normal, especially in older plumbing systems. Expect some dripping from the supply lines once disconnected.
Manage Leftover Water
Use a towel or small bucket under the valve and hoses to catch runoff. If cutting copper lines and water persists, use a SharkBite cap with a removal tool to seal the pipe temporarily. This allows dry, safe work without draining the entire home system.
Pro Tip: Take photos before disconnecting anything. Labeling and orientation matter—especially when both new valves look identical.
Remove Old Valve Assembly
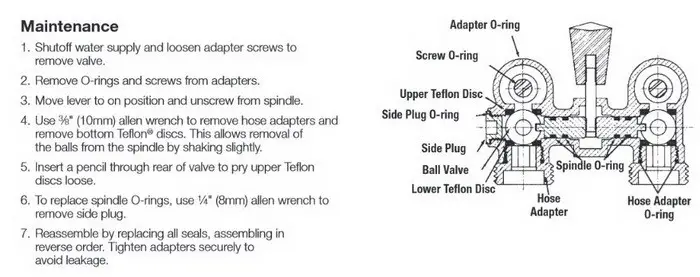
With water off and pressure released, begin disassembling the old valve setup. Work methodically to avoid damaging surrounding walls or pipes.
Disconnect Supply Hoses
Use pliers or an adjustable wrench to disconnect the hot and cold supply hoses from the back of the washing machine. If connections are seized, gently tap the wrench with a mallet or use a second wrench as a lever. Inspect hoses for cracks, bulges, or corrosion. If they’re over 5–7 years old, replace them now—don’t risk a future burst.
Remove Valve Cover and Mounting Screws
Remove the plastic access panel or valve box. It’s typically held by screws or friction-fit caps. Use a stubby screwdriver or 90° ratcheting tool if space is tight. Pry off caps carefully—mineral buildup can fuse them in place.
Unscrew the mounting screws securing the valve body to the wall. Keep them if they’re in good condition; new valves may have different thread sizes, and reusing originals with new O-rings often ensures a better fit.
Unscrew Old Valves from Pipes
Use two wrenches: one on the top compression nut and one on the valve body. This prevents twisting the supply pipe, which could crack a wall fitting or solder joint. Turn counterclockwise to loosen.
If the valve is corroded, apply penetrating oil and let it sit for 10–15 minutes. Gently rock the valve back and forth while loosening—don’t force it. If it breaks free unevenly, clean the pipe threads thoroughly before installing the new valve.
Inspect Internal Seals
Once removed, check the O-rings and gaskets inside the old valve or fittings. One may be visible; another could be lodged deeper. These seals degrade over time and are the most common cause of leaks—even if the valve body looks fine.
Expert Note: Never reuse old O-rings. Replace them every time, even if they appear intact. Rubber deteriorates with age and heat, losing elasticity.
Prepare for New Valve Installation
Now that the old valve is out, prepare the plumbing for the new unit. Your approach depends on whether you’re using threaded or push-fit (e.g., SharkBite) connections.
Clean and Deburr Pipes
For both copper and PEX lines, ensure the pipe ends are clean, square-cut, and deburred. Jagged or beveled edges prevent proper sealing in push-fit valves. Use a compact pipe cutter for smooth, perpendicular cuts. File down any burrs inside or outside the pipe.
If access is tight, a small hacksaw can help—but follow up with a reaming tool to smooth the edge. A poorly cut pipe is the #1 cause of push-fit leaks.
Mark Insertion Depth (Push-Fit Only)
On push-fit valves, check the manufacturer’s insertion depth mark. Use a permanent marker to draw a line on the pipe at this point. When installing, push until the line disappears into the fitting—it should click audibly.
Install New Washing Machine Valve
With clean, prepped pipes, it’s time to install the replacement valve. Accuracy here ensures a long-lasting, leak-free connection.
Apply Teflon Tape (Threaded Valves)
For threaded connections, wrap 4–6 layers of Teflon tape around the male pipe threads. Start from the second thread—leaving the first bare helps prevent tape from entering the valve. Wrap counterclockwise (as you face the end of the pipe) so the tape doesn’t unravel when screwing on the valve.
Pull the tape taut as you wrap—don’t stretch it. Alternatively, use pipe dope for a stronger seal, especially on older threads. Apply a thin, even coat.
Warning: Over-wrapping causes bulges that prevent full tightening and lead to leaks.
Connect Push-Fit Valves
For SharkBite or similar push-to-connect fittings, slide the valve straight onto the pipe until it clicks. Hold firm pressure—don’t wiggle. If the line mark is still visible, it’s not fully seated.
These fittings accept copper, PEX, or CPVC, but verify compatibility. No glue or tools are needed.
Hand-Tighten and Align
Start threading or pushing the new valve by hand. Ensure it’s aligned straight—angled valves stress connections and make hose attachment difficult. For threaded valves, if you feel resistance early, back off and restart to avoid cross-threading.
Once hand-tight, use wrenches to fully seat the valve. Apply firm, even pressure—but don’t over-tighten. The goal is a snug, sealed joint, not a stripped thread.
Secure with Mounting Screws
Attach the valve body to the wall using screws. If the new valve’s screw holes don’t match, reuse the original screws with new O-rings. This hybrid method maintains thread compatibility while ensuring a watertight seal.
Real-World Tip: A user-reported success using old screws with new seals prevented leaks and eliminated the need for wall modifications.
Label Hot and Cold Valves
After replacement, both valves may look identical—especially if both are blue. Don’t guess later.
Mark Clearly with Waterproof Labels
Use waterproof tape or a permanent marker to label one valve “HOT” and the other “COLD.” Place the label on the handle or body where it’s visible after installation.
If hoses aren’t color-coded, label them too. This prevents accidental cross-connections that can damage your machine or reduce cleaning efficiency.
Pro Tip: Take a photo of the final setup for future reference—especially helpful when troubleshooting or hiring a plumber.
Restore Water and Test for Leaks
Now comes the critical phase: bringing water back without causing a flood.
Gradually Reopen Water Supply
Slowly turn on the main water valve (or individual shutoffs if using them). Open and close the valve a few times in small increments—this stages the pressure and prevents water hammer, which can blow out weak joints.
Wait 30 seconds between each increment. In multi-unit buildings, full pressurization may take longer.
Inspect Every Connection
With water on, visually check all joints—valve bodies, pipe connections, hose fittings—for drips or moisture. Use a dry paper towel to wipe and inspect suspect areas.
Pay close attention to:
• Threaded joints (common leak points)
• Push-fit connections (ensure no gaps)
• Valve mounting screws (seals can fail)
Some leaks appear only after 5–10 minutes of pressure. Don’t rush.
Run a Test Wash Cycle
Reconnect the supply hoses to the washing machine. Start a short hot water cycle—this tests both temperature lines and full system performance.
After the cycle, check behind the machine for pooling water or dampness. Even a slow drip can cause major damage over time.
Critical Insight: A joint that’s “mostly dry” now may leak under sustained pressure. If in doubt, turn off water and re-tighten or reseal.
Final Verification and Maintenance
Success isn’t immediate—it’s confirmed over time.
Monitor for 24–48 Hours
Leave the system pressurized and check for leaks multiple times over the next day or two. Delay any drywall repairs until you’re certain the area stays dry.
Most delayed leaks occur at threaded joints due to settling or thermal expansion.
Long-Term Durability Tips
• Inspect valves every 6–12 months for stiffness, corrosion, or seepage.
• Replace valves every 10–12 years, even if they seem fine.
• Upgrade to braided stainless steel hoses—they resist bursting and last longer than rubber.
• Replace supply hoses every 5–7 years, regardless of condition.
Cost-Saving Note: DIY valve replacement costs under $50 in parts and takes under one hour—far cheaper than emergency water damage repair.
Troubleshooting Common Issues
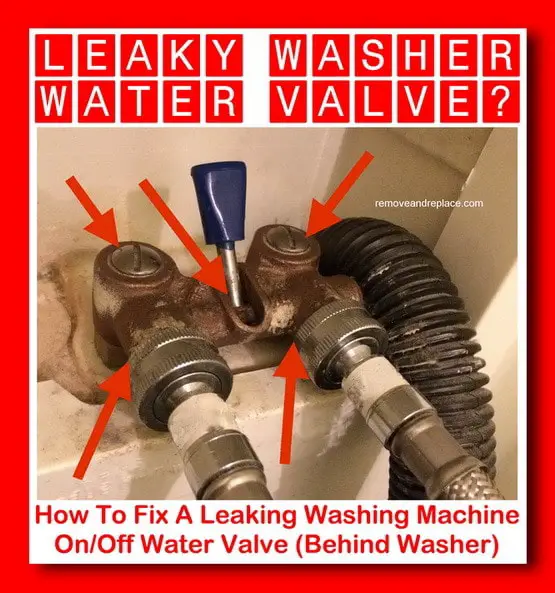
Even careful work can hit snags. Here’s how to fix them fast.
No Water Flow After Installation
• Check valve handles: Are they fully open?
• Verify main supply: Did you reopen the main shutoff?
• Inspect filter screens: Some valves have built-in screens that trap debris—remove and rinse if clogged.
Leaking at the Connection
• Threaded joint? Likely insufficient Teflon tape or loose fit. Turn off water, disassemble, reapply tape, and retighten.
• Push-fit? Check for burrs or improper insertion. Cut pipe square and reinstall.
• Mounting screw leak? Tighten slightly or replace the screw’s O-ring.
Valve Is Hard to Turn
Internal debris may be blocking the stem. Remove and flush the valve, or replace it. Ensure the handle isn’t hitting the wall—adjust mounting position if needed.
When to Call a Plumber
While most valve replacements are DIY-friendly, call a pro if:
• You encounter cross-threaded or damaged main lines
• The wall pipe moves when you turn the wrench (indicates weak support)
• You’re working with galvanized steel or lead pipes
• Leaks persist after multiple re-sealing attempts
Frequently Asked Questions About Replacing a Washing Machine Valve
How long does it take to replace a washing machine valve?
Most installations take under one hour with standard tools. The process involves shutting off water, removing the old valve, installing the new one, and testing for leaks.
Can I replace a washing machine valve myself, or do I need a plumber?
This is a manageable DIY project for most homeowners with basic plumbing skills. You’ll need a pipe wrench, pliers, Teflon tape or push-fit fittings, and a screwdriver. However, call a plumber if you encounter damaged main lines, galvanized steel or lead pipes, or if leaks persist after proper installation.
What causes washing machine valves to fail?
Valve failure typically stems from degraded internal seals and O-rings rather than complete mechanical breakdown. Corrosion, mineral buildup, and age (over 10–12 years) also contribute to failure.
How do I know if my washing machine valve needs replacing?
Signs include visible leaks, dripping even when fully shut off, stiff or difficult-to-turn handles, corrosion or mineral buildup on the valve body, and age exceeding 10–12 years.
Should I replace the supply hoses when replacing the valve?
Yes. If your hoses are over 5–7 years old, cracked, bulging, or showing signs of wear, replace them simultaneously. Upgrading to braided stainless steel hoses provides added durability and burst resistance.
How much does a washing machine valve replacement cost?
DIY replacement costs under $50 in parts. Professional installation costs significantly more due to labor fees, making this a cost-effective DIY project.
Key Takeaways for Replacing Your Washing Machine Valve
Replacing a washing machine valve is a smart, cost-effective upgrade that protects your home from water damage. By following these essential steps—shutting off water properly, releasing system pressure, replacing all seals and O-rings, using correct Teflon tape or push-fit techniques, and testing thoroughly—you ensure a reliable, long-lasting repair.
The most common mistakes that lead to future leaks include reusing old O-rings, over-wrapping Teflon tape, making jagged pipe cuts for push-fit connections, and rushing the pressurization process. Take your time with each step, and monitor the system for 24–48 hours before considering the job complete.
Stay proactive by inspecting valves every 6–12 months, replacing valves every 10–12 years, and upgrading to braided stainless steel hoses. Never ignore a drip—what starts as a small leak can become a major flood. Your peace of mind is worth the effort.