How to Replace a Washing Machine Hose
A burst washing machine hose can unleash over 150 liters of water in minutes, flooding your basement, ruining floors, and costing thousands in repairs. Yet most homeowners wait until disaster strikes. Replacing your washing machine hoses is a simple 30-minute DIY task that prevents catastrophic water damage. Whether you are upgrading from aging rubber hoses or maintaining your home’s safety, this guide shows you exactly how to replace a washing machine hose safely, correctly, and without leaks.
You do not need to be a plumber. With just a wrench, a bucket, and the right replacement hoses, you can eliminate one of the most common sources of household water damage. Here is everything you need to know, from choosing the best hoses to installing them with confidence.
Choose the Right Replacement Hose
Pick Braided Stainless Steel or Smart Hoses
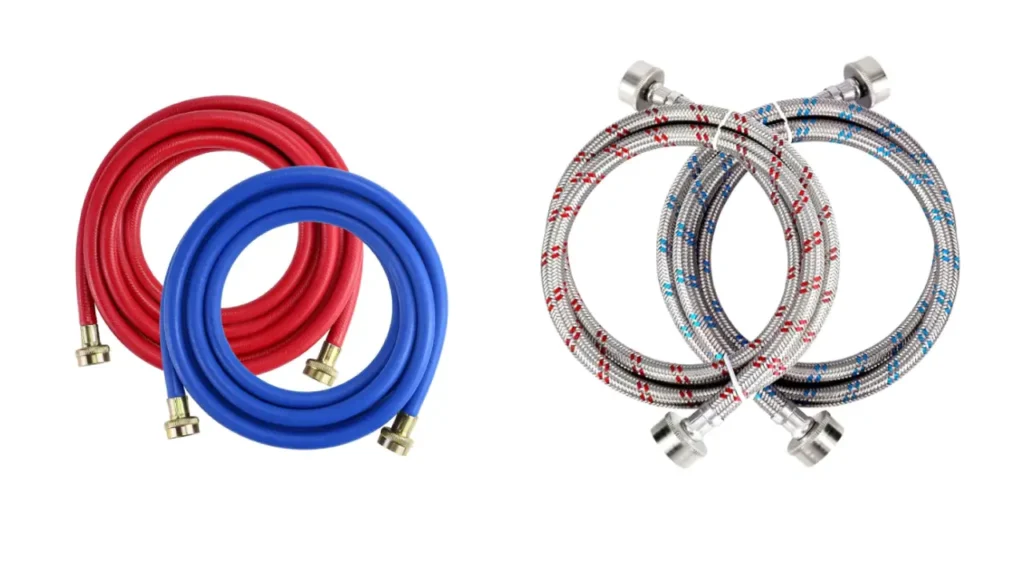
Skip rubber hoses entirely. They swell, crack, and fail without warning, often at the worst possible moment. Upgrade to braided stainless steel hoses instead, which last 10 to 15 years and resist bursting under constant pressure. These cost approximately $10 per set and are marketed as burst-proof by most manufacturers when installed properly.
For maximum protection, consider flood prevention smart hoses. These feature leak detection sensors and automatic shutoff valves that stop water flow the moment a rupture is detected. Some models even include manufacturer-backed insurance coverage for water damage, making them ideal for basements, upstairs laundry rooms, or homes left unattended for extended periods.
Match Standard 3/4-Inch Connections
All modern washing machines and water supply valves use 3/4-inch garden hose thread fittings. No special sizing is required. Simply ensure your new hoses match this universal standard. Most replacement hoses are sold as hot and cold pairs, pre-labeled with red and blue rings for easy identification.
Select the Correct Hose Length
Choose hoses between 5 and 7 feet long. This range provides enough slack to pull the machine forward for cleaning without straining connections. Avoid overly long hoses, which can kink, coil, and restrict water flow.
Gather Tools and Prepare the Work Area

Essential Tools and Supplies
Collect these items before starting your replacement project. You will need new washing machine hoses, an adjustable wrench or pliers, a bucket to catch residual water, and old towels or a tarp to protect your flooring.
Optional but helpful items include Teflon tape for metal supply valve threads, safety glasses to guard against unexpected spray, and masking tape with a marker to label valves if needed.
Shut Off Water and Unplug the Machine
Turn off both hot and cold water supply valves behind the machine by rotating them clockwise until tight. Even after shutting off the water, several ounces remain in the lines, so be ready for a small spill.
Unplug the washing machine from the electrical outlet. While not strictly required for the hose swap, this follows appliance safety best practices and eliminates any electrical risk in wet areas.
Protect the Floor and Position Bucket
Lay down a tarp or old towels under the connections. Place a bucket beneath the hose fittings to catch leftover water that will drain when you disconnect the old hoses.
Disconnect the Old Washing Machine Hoses
Remove the Supply Side First
Start by disconnecting the hose from the water supply valve, not the machine. This approach lets you test for residual pressure. Turn the fitting slightly and let any remaining water drain into the bucket before fully removing the hose.
Use pliers or a wrench to loosen the nut by turning counterclockwise. If the connection is stuck, apply steady pressure. Do not force it, or you risk damaging the valve.
Detach from the Machine Inlet
Once the supply end is free, disconnect the other end from the washing machine inlet valves. Turn counterclockwise again. Hold the machine inlet with one hand while loosening to prevent twisting and potential damage.
Set the old hoses aside. If they are rubber, dispose of them properly. Do not reuse old hoses.
Inspect and Clean the Inlet Screens
Locate the Filter Screens
Inside each inlet valve on the back of the washing machine, you will find small mesh filter screens. These trap sediment and prevent clogs but can become blocked over time, especially in homes with well water.
Clean or Replace Clogged Screens
Remove each screen with your fingers or a small tool. Rinse them under running water and use a soft brush if needed. Look for mineral buildup or debris.
Replace damaged or missing screens. Spare kits are available at hardware stores. Cleaning these during hose replacement ensures full water flow and prevents future performance issues.
Install the New Hoses Correctly
Connect to Water Supply Valve First
Attach the red hot hose to the hot water valve and the blue cold hose to the cold valve. Hand-tighten clockwise until snug.
Then use pliers for one-quarter turn more. Do not overtighten. Overtightening strips threads and damages fittings, which is a leading cause of post-installation leaks.
Apply Teflon Tape on Metal Valves
If your supply valves are metal, wrap 2 to 3 layers of Teflon tape clockwise around the threads before attaching the hose. This improves the seal.
Never use tape on plastic connections like those on the washing machine inlet. Tape can cause cracking and improper sealing.
Attach Hoses to the Washing Machine
Connect the other ends to the H and C inlets on the machine. Match red to H and blue to C. Hand-tighten first, then apply one-quarter turn with pliers.
Ensure hoses are straight, not kinked or twisted, and have slight slack so the machine can be pulled forward later for maintenance.
Check Connections Before Restoring Water
Verify Proper Alignment and Slack
Double-check that hoses are color-matched correctly, with no kinks, pinches, or tension. Confirm connections are tight but not over-torqued. Also ensure the drain hose is secure in the standpipe to prevent backflow.
Inspect for Clear Water Path
Make sure the inlet screens are reinstalled and nothing blocks water flow. A missed screen or debris can reduce pressure and trigger error codes on some machines.
Test for Leaks and Run a Test Cycle
Turn On Water Slowly
Open both hot and cold supply valves slowly by turning counterclockwise. Doing this gradually prevents water hammer, a pressure surge that can loosen new fittings.
Watch for Drips at Connections
Immediately inspect both ends of each hose. Look for even small droplets or moisture.
If you spot a leak, turn the valve off, then slightly tighten the leaking connection, no more than one-eighth to one-quarter turn. Over-tightening is the number one cause of post-installation leaks.
Run a Short Test Wash Cycle
Plug the machine back in. Run a short cold wash cycle to simulate real pressure.
Stay nearby and check connections every few minutes. Most leaks appear within the first 10 minutes of pressurization.
Maintain Your Hoses for Long-Term Safety
Inspect Hoses Every Six Months
Set a reminder to check hoses twice a year. Look for cracks, bulges, or rust spots. Check for dampness or mineral stains at fittings. Tighten any loose connections by hand.
Vibration from spinning can loosen nuts over time, so regular checks are essential.
Replace Every Five Years
Rubber hoses should be replaced every 3 to 5 years. Braided stainless steel hoses can last 10 to 15 years, but inspect them regularly. Smart hoses may last the life of the machine.
Replace both hoses at once, even if only one looks worn. Mismatched hoses create uneven risk.
Keep Spares On Hand
Store a backup set of hoses in your utility closet. If a hose bursts, you can make a temporary fix fast and avoid a full flood.
Avoid These Common Installation Mistakes
Do Not Mix Hose Types
Never use one rubber and one stainless steel hose together. The weaker rubber hose becomes a liability, defeating the purpose of upgrading.
Do Not Use Garden or Plumbing Hoses
Standard garden hoses are not rated for washing machine pressure cycles and can burst. Always use hoses specifically labeled for washing machine use.
Do Not Overtighten Connections
Snug plus one-quarter turn with tools is enough. Cracked fittings from overtightening are common and preventable.
When to Call a Professional Plumber
You See Corroded or Damaged Valves
If supply valves are rusted, leaking, or will not shut off, do not force them. A plumber can replace the valve safely.
Connections Will Not Seal After Multiple Attempts
Persistent leaks may indicate worn threads or damaged inlet ports. A professional can assess and repair the issue before water damage occurs.
You Are Upgrading to Smart Hoses
Some flood prevention hoses require specific orientation, such as the sensor end facing the water supply. If instructions are unclear, consult a technician.
Frequently Asked Questions About Replacing Washing Machine Hoses
How Often Should I Replace My Washing Machine Hoses?
Replace rubber hoses every 3 to 5 years as a precaution. Braided stainless steel hoses can last 10 to 15 years with regular inspection. Smart hoses may last the lifetime of the appliance.
Can I Replace Just One Hose?
Always replace both hoses at the same time, even if only one appears worn. Using mismatched hoses creates uneven failure risk and defeats the purpose of proactive maintenance.
Do I Need to Turn Off Water After Every Use?
No. Modern braided stainless steel and smart hoses are reliable enough for continuous use. Simply turn off the water supply when leaving home for extended periods, such as vacations.
What Happens If I Do Not Use Teflon Tape?
Teflon tape is optional for metal supply valves but improves the seal. Never use it on plastic washing machine inlet connections, as it can cause cracking.
How Do I Know If My Inlet Screens Are Clogged?
Reduced water flow, longer fill times, or error codes on your washing machine often indicate clogged inlet screens. Clean them during hose replacement to prevent these issues.
Key Takeaways for Replacing Your Washing Machine Hose
Replacing a washing machine hose is one of the easiest and most impactful home maintenance tasks you can perform. By upgrading to braided stainless steel or smart hoses, using proper tools, and following these step-by-step instructions, you drastically reduce the risk of costly flooding. The entire job takes under 30 minutes, costs less than $20, and gives you peace of mind every time you run a load of laundry.
Remember to always turn off water before starting, connect hoses color-coded to matching valves, and test for leaks before running a full cycle. Inspect your hoses every six months and replace them every five years, or sooner if you notice any signs of wear. Doing this now protects your home before disaster strikes.