How to Remove Washing Machine Drum
Is your washing machine making grinding noises, vibrating violently, or leaking water from underneath? These symptoms often point to failing drum bearings or damaged seals. Removing the washing machine drum is the essential first step for diagnosing and fixing these issues. Whether you own a Panasonic top-loader or a Samsung front-loader, this guide covers every tool, technique, and troubleshooting tip you need to safely extract the drum and restore your machine’s performance.
Power Off and Prepare Your Washing Machine for Drum Removal
Before starting any repair, disconnecting power and preparing your workspace prevents electrical shocks and makes the job safer and smoother.
Unplug and Turn Off Water Supply
Unplug the washing machine directly from the wall outlet. Never rely solely on the power button. Turn off the water supply valves and disconnect the inlet hoses if you need to access the front panel. Move the machine to a clear, well-lit area with enough room to lay out screws and panels during disassembly.
Secure the Machine During Work
Tape the lid shut on top-loaders to prevent it from swinging open while you work. For front-loaders, tilt the machine backward slightly with support to access rear components. Place a soft mat or towel underneath to protect your flooring and reduce vibration during the process.
Pro Tip: Photograph each step of disassembly. These photos become invaluable when reconnecting wires, hoses, or mounting brackets during reassembly.
Essential Tools for Removing a Washing Machine Drum
Having the right tools on hand prevents frustration and protects your machine from damage during removal.
Core Tool Kit
Gather these essential tools before starting your repair. A socket wrench or impact wrench handles high-torque nut removal. Flat-head screwdrivers pry off covers and release clamps. Phillips and Torx screwdrivers remove control panels and internal fasteners. Nylon rope or thick washing line creates friction inside the drum to prevent rotation when loosening stubborn nuts. A beveled-edge chisel with a hammer breaks loose corroded fasteners. Use a container with compartments to organize screws by their location.
Specialized Tools for Stubborn Cases
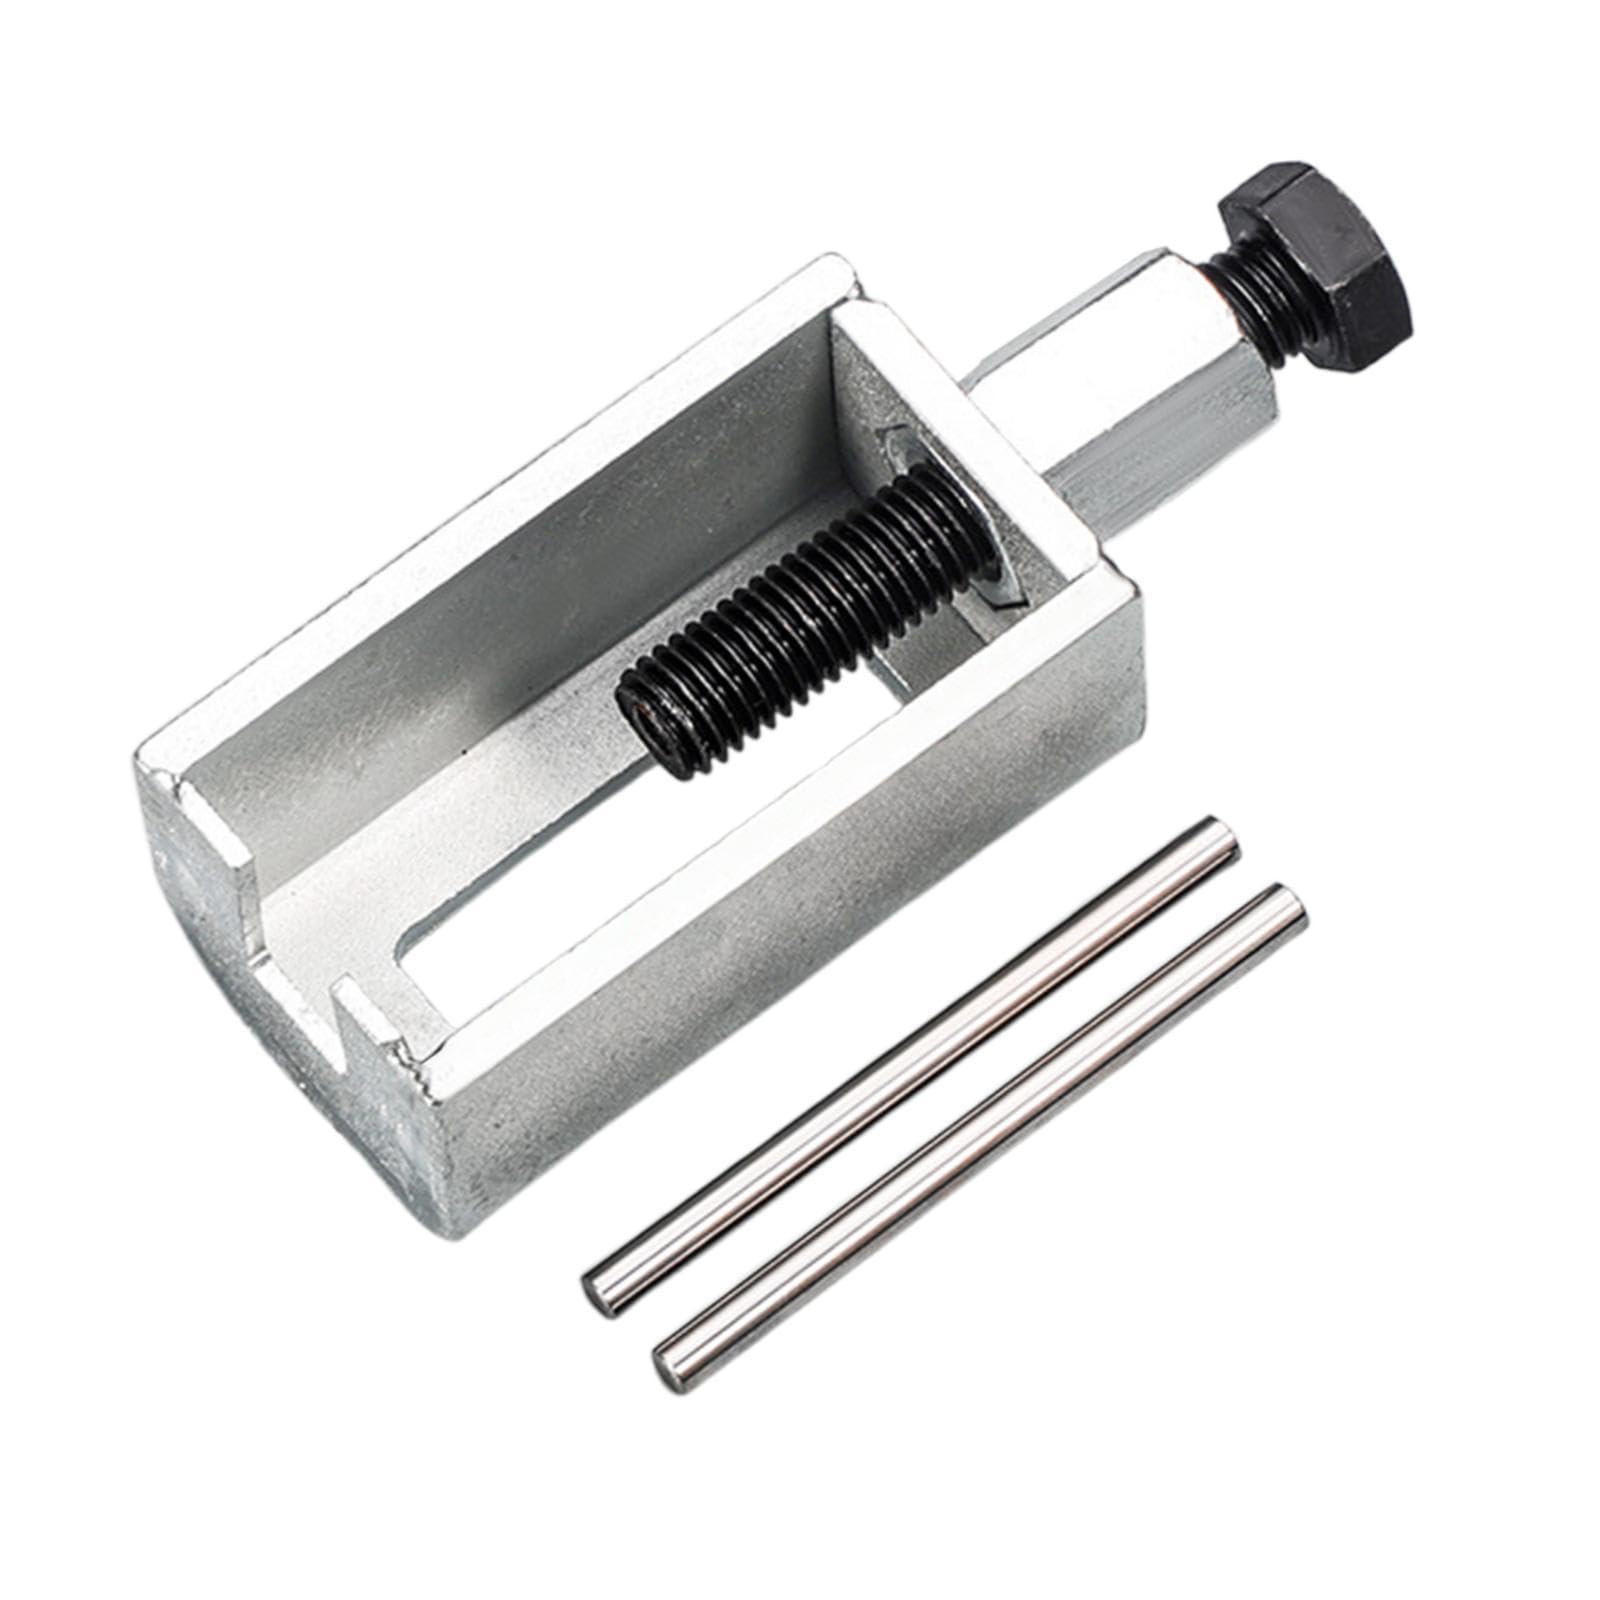
Some drums require additional equipment beyond basic hand tools. Agitator removal hooks (ganchos) lift agitators evenly from top-loaders. A three-arm puller extracts stuck drums or seized shafts. A spring tool or pick removes door seal retaining rings from front-loaders. A model-specific tub nut wrench fits unique nut profiles that standard sockets cannot grip.
Warning: Never force a component that refuses to budge. Forcing stripped threads or cracked plastic housings creates more problems than it solves.
How to Remove a Top-Loader Drum (Panasonic Models)
Top-loading washers like the Panasonic MVWC565FW0 use a central agitator secured by a tub nut at the base. This process requires patience, especially when dealing with age-related corrosion.
Extract the Agitator First
Locate the two opposing holes at the base of the agitator. Insert agitator removal hooks (ganchos) into both holes and pull straight upward with even pressure. If the agitator sticks, tap the base lightly with a rubber mallet. For severely stuck agitators, use a two-arm puller with the central screw pressing against the transmission shaft.
Visual Cue: Once the agitator lifts off, you will see the tub nut in the center of the drum.
Loosen the Tub Nut
Attach a socket wrench to the tub nut and turn counter-clockwise. The Panasonic MVWC565FW0 uses a left-hand thread, meaning it loosens counter-clockwise rather than the standard clockwise direction. If the drum spins instead of the nut turning, feed nylon rope into the drum cavity to create friction against the inner walls and prevent rotation.
For seized nuts, apply penetrating oil around the threads and let it sit for 15 to 30 minutes. Use a beveled-edge chisel and hammer, tapping gently around the nut’s edge in small increments to break corrosion. Alternate between tapping and wrench attempts until movement begins.
Expert Note: Slight thread damage from this process typically does not prevent nut reuse unless the threads are completely stripped.
Remove the Drum Cover and Pull Out the Drum
Remove the flat metal washer beneath the nut. Unscrew the eight screws securing the drum cover on Panasonic models, removing any small cover plates first. Lift the cover straight off without tilting it. Pull the drum straight upward. A rubber seal may remain on the shaft and can be removed by hand.
If the drum won’t budge, insert a two-arm puller’s arms into the drum flange holes and position the central shaft against the transmission hub. Turn the screw slowly to apply gradual upward force until the drum releases.
How to Remove a Front-Loader Drum (Samsung Models)
Front-loading washers require more extensive disassembly due to their enclosed construction and complex suspension systems.
Remove Top and Front Panels
Press the central lock to remove the powder dispenser. Unscrew the two rear screws securing the top panel, slide it forward, and lift it off. For the front panel, remove Phillips screws from the control board back, disconnect electrical connectors by pressing bottom clamps, and unscrew top and side panel screws. Carefully lower the front panel away from the machine.
Detach the Door Seal and Retaining Ring
Pull back the rubber gasket from the front opening. Locate the spring-loaded retaining ring behind it. Use a pick or pliers to release the ring, starting at the bottom where gravity works in your favor. Slide the seal into the drum cavity to free up working space.
Warning: Never cut or stretch the door seal. A torn gasket causes water leaks during operation.
Disconnect Internal Components and Extract the Drum
Tilt the washer backward with support to access rear components. Disconnect shock absorbers from the base and outer tub. Release suspension springs if your model has them. Unplug motor connectors and the pressure switch hose. Label all wires for easy reconnection.
Support the drum’s weight with one hand and pull forward gently. The drum should slide out along the shaft. If stuck, use a puller as described in the top-loader section and check for retaining clips or adhesive residue blocking movement.
Breaking Loose Seized Nuts and Stuck Drums

Corrosion and age make some components extremely difficult to remove. These techniques handle stubborn parts without causing damage.
Free a Frozen Tub Nut
Apply penetrating oil around the nut threads and wait 15 to 30 minutes. Insert nylon rope inside the drum to prevent rotation. Use an impact wrench or socket with a cheater bar for additional leverage. If still stuck, tap a beveled-edge chisel around the nut with a hammer, alternating between tapping and wrench attempts.
Avoid: Using heat on plastic components, as this causes melting or warping.
Use a Puller for Stubborn Drums
Insert two puller arms into the drum flange holes. Position the central shaft against the transmission hub. Turn the central screw with a ratchet, applying incremental upward force with each rotation. Continue until the drum releases completely. Clean flange holes before inserting the puller to ensure proper engagement.
Signs Your Washing Machine Drum Needs Removal
Removing the drum without confirming the underlying issue wastes time and effort. Watch for these symptoms indicating bearing or seal failure.
Common Failure Indicators
Excessive vibration during the spin cycle often signals worn bearings. Grinding or squealing noises during operation point to bearing damage. Water pooling under the machine suggests failed seals. Clothes remaining wet after the spin cycle indicates poor water extraction. Visible shaft play when moving the drum side-to-side confirms bearing failure.
Fact: Any lateral movement in the drum shaft means the bearings are likely shot and require replacement.
Ignoring these signs leads to motor damage, water leaks, or complete drum seizure.
Replacing Bearings and Seals After Drum Removal
With the drum out, you can inspect and replace internal components to restore full functionality.
Select Quality Replacement Bearings
Use manufacturer-recommended or OEM-equivalent parts. For Samsung models, Part 2598 is the larger outer bearing and Part 22597 is the smaller inner bearing. Both are often Ariston-made (Italian), known for quiet operation and long lifespan.
Avoid: Generic or unmarked bearings. Ukrainian and Russian variants tend to be noisier and wear faster.
Install Bearings Correctly
Press bearings into their housings using an arbor press rather than hammering directly. Ensure perfect alignment to prevent premature failure. Replace rear seals if they show cracks or wear. Some seals require lubrication, while others are dry-fit only.
Reassembling and Testing Your Washing Machine
Proper reassembly determines whether your repair succeeds or creates new problems.
Reinstall Components in Reverse Order
Slide the drum back carefully without forcing it. Reconnect shock absorbers, springs, and hoses. Reattach the door seal and retaining ring. Reconnect all wiring and the control board. Replace top and front panels in their original positions.
Run a Test Cycle
Plug in the machine and restore water supply. Run a short spin cycle with no load inside. Watch for smooth, quiet operation without vibration or leaks.
Success Sign: A silent spin cycle indicates proper bearing installation and correct alignment.
Key Differences: Top-Loader vs Front-Loader Drum Removal
| Task | Top-Loader (Panasonic) | Front-Loader (Samsung) |
|---|---|---|
| Main Fastener | Tub nut under agitator | Front panel and seal |
| Thread Direction | Counter-clockwise (left-hand) | N/A (slides out) |
| Key Tool | Socket wrench + nylon rope | Puller + spring tool |
| Agitator Removal | Required | Not applicable |
| Drum Extraction | Pull straight up | Slide forward |
| Common Issues | Seized nut, stuck agitator | Stuck drum, torn seal |
Frequently Asked Questions About Removing a Washing Machine Drum
Why does my washing machine drum shake violently during spin cycles?
Violent shaking typically indicates failed drum bearings. When bearings wear out, they allow excessive play in the shaft, causing imbalance and vibration. Removing the drum confirms bearing condition and allows replacement.
Can I remove a washing machine drum without professional help?
Yes, with the right tools and this guide, DIY removal is entirely possible. Top-loader drums are generally simpler, requiring basic hand tools. Front-loaders need more disassembly but follow logical steps. Patience and careful organization prevent mistakes.
What happens if I don’t replace worn bearings after removing the drum?
Continuing to use the machine with bad bearings leads to complete bearing seizure, which can damage the motor, crack the drum, or cause water leaks. Early replacement saves costly repairs later.
Why does the tub nut on my Panasonic won’t turn?
Corrosion and mineral buildup cause nuts to seize. Apply penetrating oil, wait 30 minutes, and use a chisel to break the corrosion. The Panasonic MVWC565FW0 uses a left-hand thread (counter-clockwise to loosen), which surprises many technicians.
How long does drum removal and reassembly take?
Top-loader drums typically take 1 to 2 hours for experienced DIYers. Front-loaders require 2 to 4 hours due to additional panel removal and suspension work. First-time attempts add extra time for troubleshooting.
Should I replace both bearings even if only one shows wear?
Yes, always replace both bearings simultaneously. If one fails, the other is near end of life. Replacing both prevents premature second repair and ensures balanced performance.
Final Takeaways for Successfully Removing Your Washing Machine Drum
Removing a washing machine drum is challenging but achievable with proper preparation and technique. Always verify thread direction before loosening nuts, as some models like the Panasonic MVWC565FW0 use left-hand threads. Label every screw and connector during disassembly to simplify reassembly. Use OEM or high-quality replacement parts, especially for bearings, to ensure quiet long-term operation. Work slowly with seized components to avoid causing additional damage. Test thoroughly after reassembly by running an empty spin cycle before returning the machine to regular use.
With the right approach, you can diagnose bearing failure, clear trapped debris, or replace seals without calling a professional. The skills gained from this repair transfer to future maintenance tasks, making your washing machine last years longer.