Kenmore Washing Machine Maintenance Tips
If your Kenmore washing machine starts smelling musty, draining slowly, or flashing confusing error codes, the fix might not be a costly repair. It could just need routine maintenance. Regular care is the number one way to prevent breakdowns, extend your washer’s life, and keep clothes truly clean. Without it, residue builds up, mold grows in hidden spots, and sensors trigger false alerts. The good news is most issues are avoidable with simple monthly and quarterly tasks.
Kenmore washers include top-load, front-load, and high-efficiency models like the 600, Elite, and 90 Series. While reliable, front-load and HE units are especially prone to moisture retention and odor if not maintained. This guide covers exactly what to do, when, and how based on model-specific needs. You will learn how to run clean cycles, clear clogs, wipe seals, and prevent common errors with basic tools and supplies.
Activate the Clean Washer Cycle on Front-Load Models

Front-load Kenmore washers rely on a dedicated Clean Washer Cycle to remove soap scum, kill mildew, and stop musty odors before they start.
Starting the Cycle Correctly
Turn the washer on. Press and hold the Excel Wash button for approximately three seconds until the cycle activates. Do not select another cycle after this, as it cancels the clean mode. Press Start/Pause to begin the cycle. Never add clothes, detergent, or fabric softener during this process.
Adding the Right Cleaner
Use liquid chlorine bleach and fill the bleach dispenser to the max line. Overfilling causes immediate release and reduces effectiveness. For powder cleaner, place it in the main wash compartment of the detergent drawer. For tablet cleaner, drop it directly into the drum. Only use cleaners made for front-load washers or liquid chlorine bleach. Never mix different types of cleaners.
Post-Cycle Care
After the cycle ends, leave the door slightly open using the built-in magnet or a small wedge. This allows air circulation, drying the drum and seal to prevent mold. Run this cycle once a month, or more often if you notice odors or have heavy usage.
Run a Tub Clean Cycle for Kenmore 600 Series
For Kenmore 600 Series and similar models, a tub clean cycle clears buildup that triggers the Clean Washer light and sensor errors.
Using Vinegar or Commercial Cleaner
Pour two cups of white vinegar into the drum or detergent dispenser. Alternatively, use a powdered washing machine cleaner as directed on the product label. Both options work effectively for monthly maintenance.
Running the Hot Water Cycle
Select the hottest water setting on your washer. Run the cycle without clothes or any detergent. After completion, wipe the drum and seal if any residue remains. This monthly step stops false alerts, keeps sensors accurate, and reduces bacteria in hard-to-reach areas.
Use Sanitize Cycle for Top-Load Models
Kenmore and Kenmore Elite top-load washers benefit from a sanitize or self-clean cycle to maintain hygiene and performance.
How to Run the Sanitize Cycle
Choose the sanitize or self-clean option on your control panel. Use hot water only and run without any additives unless your manual specifies otherwise. This cycle removes biofilm, detergent gunk, and bacteria from the tub and internal parts.
Why Monthly Sanitize Matters
This cycle is especially useful if you wash towels, workout clothes, or cloth diapers. Running it once a month maintains peak cleanliness and prevents residue from accumulating in areas that are difficult to reach during regular washes.
Clean the Drain Pump Filter
A clogged drain pump filter is a top cause of slow drainage, error codes, and Clean Washer alerts. This maintenance task takes about 15 minutes and requires minimal tools.
Locating the Filter
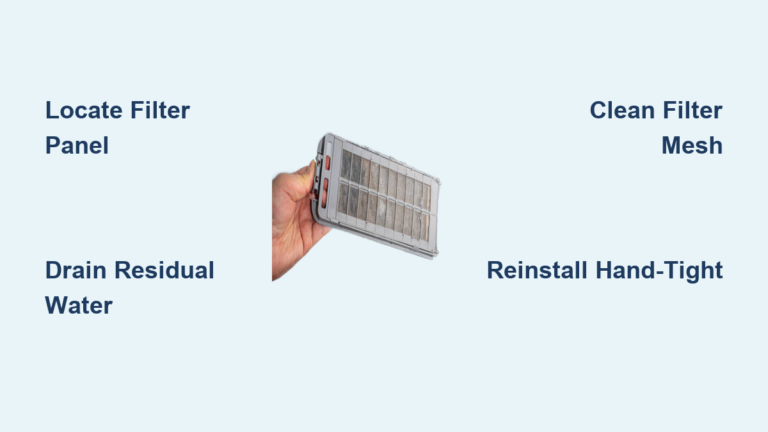
The drain pump filter is on the bottom left front of the washer, behind a small access panel. Open the panel for better visibility and easier access during cleaning.
Draining Water Safely
Lay down paper towels around the work area. Pull out the drain hose slightly and remove the cap on top. Hold the hose upward to stop initial water flow, then point it down into a cup or basin. Approximately two cups of water will drain. Allow it to empty fully to avoid spills on your floor.
Removing and Cleaning the Filter
Turn the filter counter-clockwise to unlock it. Some models require pressing inward while turning due to child-safe design. Pull the filter out and check for lint, hair, coins, buttons, screws, and sludge buildup. Rinse the filter under hot water, scrubbing with a brush to remove stubborn debris. Clean the rubber O-ring thoroughly, as this seals the filter and prevents leaks.
Reinstalling the Filter
Wipe the filter seat and sump area with a paper towel. Remove any debris stuck inside the housing. Reinsert the filter and turn clockwise until tight. Replace the drain hose cap and access panel. Perform this task every three to six months, or more frequently if you wash pets, towels, or large loads regularly.
Clear Detergent Dispenser Buildup
Soap and fabric softener residue clogs dispensers, leading to poor cleaning results and overflow during cycles.
Removing the Dispenser Drawer
Pull the drawer out fully. Lift up or press the release tab, which varies by model. Soak the drawer in warm, soapy water for several minutes to loosen residue.
Scrubbing All Compartments
Use an old toothbrush to clean all compartments thoroughly. Focus on the bleach and fabric softener sections, as they gunk up fastest. Rinse well and dry completely before reinserting. Perform this task every one to three months, especially if dispensing seems slow or you notice residue around the dispenser opening.
Maintain the Agitator Base on Top-Load Models
Top-load Kenmore washers collect gunk under the agitator, causing odors and leaving residue on clothes.
Accessing the Base
Pop off the agitator cap with a flat tool like a putty knife. Unscrew the center bolt if visible. Lift the agitator slightly without pulling it completely out unless your manual instructs otherwise.
Cleaning and Drying
Wipe the base and shaft with a damp cloth. Remove any slime or buildup you find. Dry thoroughly before reassembling the agitator. Clean this area every one to three months to prevent musty smells and keep the agitator moving smoothly.
Clean the Door Seal and Drum on Front-Load Models
Front-load models are mold magnets due to the rubber door gasket trapping moisture and detergent residue.
Wiping the Door Boot Seal Weekly
Open the door and inspect the folds of the rubber seal. Use a microfiber cloth dampened with vinegar or a one-to-ten bleach solution. Scrub crevices with a soft brush to remove mold and debris. Dry completely after cleaning.
Keeping the Drum Clean
Wipe the inner drum with a damp cloth after running clean cycles. Remove any stains or film you notice. Never use abrasive pads, as they damage protective coatings. If the seal is cracked, torn, or heavily moldy, replace it promptly.
Prevent Odors and Musty Smells
Bad smells indicate moisture and residue are breeding bacteria in your washer.
Identifying Root Causes
Common causes include a wet door seal, detergent buildup, using non-HE detergent, and keeping the door closed after washing. Humid climates accelerate these issues significantly.
Quick Fixes for Odor Prevention
Run monthly clean cycles with bleach or vinegar. Wipe the door seal every week. Use HE detergent only, as it produces fewer suds. Leave the door slightly ajar after each use. These steps stop mold before it starts and keep your washer fresh.
Stop False Clean Washer Alerts
The Clean Washer light does not always mean the tub is dirty. It could indicate a sensor issue instead.
Common Triggers
Residue on sensors, a clogged drain filter, or a dirty detergent dispenser can all trigger this alert. The light may stay on even after running a clean cycle if these components are not addressed.
How to Reset It
Run a full Clean Washer Cycle. Clean the drain pump filter. Remove and scrub the detergent dispenser. Wipe sensor areas if they are accessible, typically near the drum or door. If the light stays on, consult your model manual for a reset procedure specific to your washer.
Fix Drainage Problems Fast
Slow or failed drainage often points to a blockage rather than a mechanical failure.
Checking the Filter First
A clogged drain pump filter is the number one cause of drainage issues. Clean it following the procedure outlined earlier in this guide.
Inspecting the Drain Hose
Make sure the hose is not kinked or compressed behind the machine. Check for clogs by disconnecting and running water through it. Ensure the standpipe is between 30 and 96 inches high for proper drainage.
Preventing Future Clogs
Check all pockets before washing clothes. Remove coins, buttons, and debris regularly. Use a lint trap in the drain hose if your model recommends it. Clean the filter every three to six months to avoid ND or F02 error codes.
Decode Common Error Codes
Many error codes indicate maintenance-related issues rather than mechanical failures.
Understanding the LE Code
The LE code means a motor lock or control issue. However, it is often caused by excessive suds from non-HE detergent. Fix this by using HE detergent, avoiding overloading, and running a rinse cycle to clear excess suds.
Understanding ND and F02 Codes
ND means no drain, and F02 indicates a long drain error. Both typically require cleaning the drain pump filter and checking the hose for blockages. These are rarely serious issues and often resolve with basic filter maintenance.
Flashing Lid Lock Issues
A flashing lid lock usually means water remains in the tub. Fix this by running a drain cycle or cleaning the drain filter. Once the water is removed, the lock should release.
Model-Specific Maintenance Tips
Each Kenmore series has unique maintenance needs based on its design.
Kenmore 300 Series
These models are prone to vibration. Check leveling monthly and clean the filter regularly due to the HE design. Address any wobbling promptly to prevent component damage.
Kenmore 400 Washer
If the lid lock is flashing, clean the drain filter and check for standing water. This often resolves the issue without requiring a service call.
Kenmore 80 Series
This top-load series with an agitator requires cleaning under the base monthly. Watch for detergent buildup in the dispenser, which can cause poor cleaning results.
Kenmore 90 Series
These older mechanical models may experience agitation failure if the wig wag mechanism is worn. The mechanical fuse may trip if overloaded. Reset it and avoid overloading in the future.
Kenmore Calypso
This low-water-use design requires monthly cleaning to prevent odors. Run hot water cycles with vinegar to maintain freshness.
Kenmore Elite HE and HE3 Models
These front-load or HE top-load models need the Clean Washer Cycle run monthly. Clean the door seal, filter, and dispenser regularly. Address the LE code by checking for suds issues and motor problems. These models clean exceptionally well but require more diligent care than top-load alternatives.
Gather Essential Tools and Supplies
You do not need special equipment for most maintenance tasks. Basic supplies work well for routine care.
Tools You Will Need
A cup or basin catches drain water during filter cleaning. Paper towels clean spills and wipe components. Microfiber cloths wipe seals and surfaces without scratching. An old toothbrush scrubs dispenser crevases. A Narwhal 6-in-1 driver removes panels or screws when needed. A digital multimeter tests pump or fuse functionality for advanced troubleshooting.
Cleaning Supplies to Keep on Hand
Stock liquid chlorine bleach, white vinegar, commercial washer cleaner in your preferred form, and HE detergent for regular washing. Having these supplies ready makes monthly maintenance simple and quick.
Follow a Simple Maintenance Schedule
Stick to this plan to avoid breakdowns and keep your washer running optimally.
| Task | Frequency | Best For |
|---|---|---|
| Run Clean Washer or Sanitize Cycle | Monthly | All models, especially front-load |
| Clean Drain Pump Filter | Every 3 to 6 months | All, critical for HE models |
| Clean Detergent Dispenser | Every 1 to 3 months | 600 Series, front-load models |
| Wipe Door Seal | Weekly | Front-load models |
| Clean Agitator Base | Every 1 to 3 months | Top-load models |
| Inspect Drain Hose | Every 6 months | All models |
| Check Error Codes | After clean cycle | All models |
Set phone reminders or mark your calendar. Consistency is the key to preventing major issues.
Trust User-Tested Results
Real owners confirm that regular maintenance works effectively.
What Owners Report
Monthly cleaning stops odors and significantly reduces service calls. Skipping O-ring or seal cleaning leads to mold, especially in basements or humid climates. The hold Excel Wash trick reliably starts the clean cycle when performed correctly.
Performance Insights
Front-load models like Elite with Steam clean best but require more care. Top-load washers are less mold-prone but collect gunk under agitators. Understanding your model type helps you prioritize the right maintenance tasks.
Warranty and Lifespan
Most Kenmore washers include a one-year limited warranty. Maintenance is not required by warranty but dramatically extends service life. Well-maintained units often last 10 to 15 years, making the small time investment worthwhile.
Key Takeaways for Kenmore Washing Machine Maintenance
Regular maintenance is the smartest way to protect your investment, avoid costly repairs, and keep your laundry fresh. Running a clean cycle monthly with bleach, vinegar, or a commercial cleaner removes residue and prevents mold. Cleaning the drain pump filter every three to six months stops drainage issues and false alerts. Wiping the door seal weekly and leaving the door ajar after each use prevents moisture buildup that leads to musty odors. Removing and cleaning the detergent dispenser and agitator base regularly keeps all components working properly. Using only HE detergent in high-efficiency models prevents suds-related error codes like LE. Responding to Clean Washer alerts promptly avoids sensor inaccuracies and ensures your washer self-diagnostics remain reliable. Checking diagnostic codes when problems repeat helps identify issues before they worsen. Maintaining accurate load balancing and avoiding overloading reduces mechanical strain and extends component life.
With just a few minutes each month, you can prevent approximately 90% of common washing machine problems. Regular Kenmore washing machine maintenance is not just about keeping your appliance clean. It is the most effective strategy for ensuring reliable performance, avoiding expensive repairs, and enjoying fresh laundry for years to come.
Frequently Asked Questions About Kenmore Washing Machine Maintenance
How often should I run the Clean Washer Cycle on my Kenmore?
Run the Clean Washer Cycle once per month. Increase frequency if you notice odors, have heavy usage, or live in a humid climate. Front-load models benefit most from monthly cleaning.
What causes the musty smell in my Kenmore washing machine?
Musty smells come from moisture trapped in the door seal, detergent residue buildup, and mold growing in hidden areas. Prevent this by leaving the door open after washing, using HE detergent correctly, and running monthly clean cycles.
Can I use regular detergent in a Kenmore HE washing machine?
No. High-efficiency models require HE detergent only. Regular detergent creates excessive suds that can trigger error codes, damage the motor, and reduce cleaning performance.
Where is the drain pump filter located on my Kenmore washer?
The drain pump filter is on the bottom left front of the washer, behind a small access panel. Open the panel to access the filter for cleaning every three to six months.
How do I activate the Clean Washer Cycle on a Kenmore front-load washer?
Turn the washer on. Press and hold the Excel Wash button for approximately three seconds. Do not select another cycle afterward. Press Start/Pause to begin without adding clothes or detergent.
Why does my Kenmore display the LE error code?
The LE code typically indicates a motor lock issue, but it is often caused by excessive suds from non-HE detergent or overloading. Use HE detergent, avoid overloading, and run a rinse cycle to clear suds.