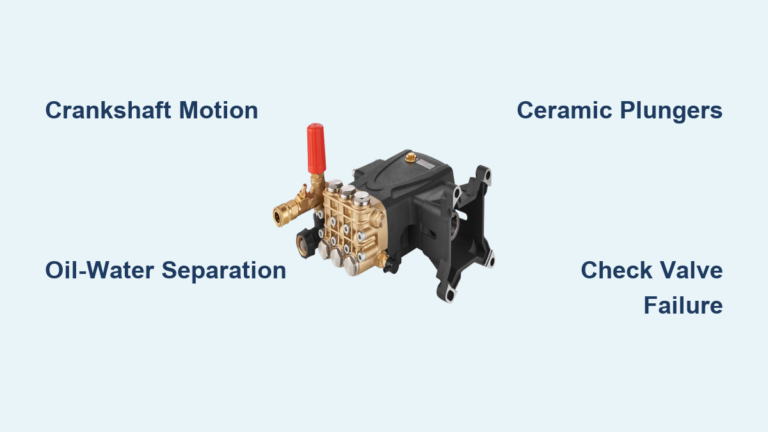
Pressure Washer Engine Repair Guide
Does your pressure washer refuse to start despite your best efforts? You are likely facing a failure in one of three core systems: fuel, air, or ignition. Most owners assume the engine is seized, yet over 80% of no-start cases stem from a clogged carburetor caused by old gas.
You can fix most pressure washer engine repair issues at home with basic tools and a methodical approach. This guide walks you through verifying fuel delivery, testing for spark, and cleaning your carburetor to get your unit running again.
Verify Fresh Fuel Supply Before Disassembly

Start your diagnosis by confirming the engine receives clean, fresh gasoline. Old fuel is the single most common cause of pressure washer failures because it leaves varnish behind.
Check Fuel Quality and Switch Position
Stale fuel evaporates and leaves deposits that clog tiny carburetor passages. Ethanol blends absorb moisture which degrades rubber hoses and seals over time.
* Use non-ethanol fuel whenever possible for your equipment.
* Drain old fuel if the machine sat unused for more than 30 days.
* Ensure the fuel valve is in the ON position to allow flow.
Test for Fuel Delivery to Carburetor
Even with a full tank, fuel may not reach the combustion chamber due to blockages.
* Disconnect the fuel line at the carburetor and place it in a container.
* Turn the fuel switch on and watch for free flow.
* Check for kinks or clogs if no fuel comes out of the line.
Pro Tip: If fuel does not flow, blow air back through the line from the carburetor end to dislodge debris.
Inspect Airflow and Filter Condition
A restricted air supply prevents proper combustion and causes hard starts or immediate stalling. You must ensure the engine breathes freely.
Remove and Test Air Filter
A dirty or oil-soaked filter suffocates the engine by limiting oxygen intake.
* Pull out the air filter and inspect it for grime or oil saturation.
* Perform the removal test by starting the engine without the filter installed.
* Replace the filter if the engine runs better without it.
⚠️ Warning: Never run the engine long without a filter. Dirt ingestion can destroy the cylinder walls.
Clean or Replace Filter Based on Type
Different filter materials require specific cleaning methods to restore function.
* Wash foam filters with soapy water, dry them, and lightly oil them.
* Replace paper filters immediately if they appear dirty or damaged.
* Reinstall the filter only when it is fully dry to prevent hydrolock.
Test for Strong Ignition Spark
No spark means no combustion, so you must test the ignition system before assuming mechanical failure. A weak spark will not ignite the fuel mixture.
Remove and Ground Spark Plug Safely
Follow these steps to prepare the spark plug for testing.
1. Disconnect the spark plug wire from the top of the plug.
2. Use a spark plug socket to remove the plug from the engine.
3. Reattach the wire firmly to the spark plug.
4. Rest the metal base of the plug against the engine block to ground it.
Crank Engine and Observe Spark Gap
Use a power drill to turn the engine crankshaft clockwise for a faster, safer test.
* Attach a socket to the drill and engage the flywheel nut securely.
* Crank the engine for 3–5 seconds while watching the spark plug gap.
* Look for a bright blue spark jumping across the gap.
✅ Good sign: A bright blue spark jumps the gap consistently.
❌ Bad sign: An orange spark, weak flicker, or no spark at all.
Replace Faulty Ignition Components
Replace the spark plug first if the spark is weak since it is inexpensive.
* Suspect a failed ignition coil if there is no spark at all.
* Test the stop switch wiring for continuity to find shorts.
* Check for coils that fail only when hot if the engine dies when warm.
Expert Note: Some coils fail only when hot. If the engine starts cold but dies when warm, suspect the coil.
Diagnose and Remove Carburetor Assembly

If fuel, air, and spark are confirmed, the carburetor is likely clogged internally. You must disassemble it for a complete cleaning.
Confirm Need for Disassembly
Proceed with removal only if specific conditions are met.
* Fuel reaches the carburetor freely.
* The air filter is clean and unrestricted.
* A strong blue spark is present at the plug.
* The engine still refuses to start.
Loosen Engine Mounts for Access
Many pressure washers have tight engine mounting that blocks carburetor removal.
* Loosen the engine bolts slightly without removing them completely.
* Gently tilt or shift the engine to expose the carburetor body.
* Look for a quick-release pin after removing three mounts on some models.
Disconnect Linkages and Fuel Lines
Label or photograph connections before disconnecting anything to ensure easy reassembly.
* Pinch and pull off the fuel line carefully.
* Remove the vacuum hose if your model has one.
* Rotate the carb to disengage Z-bend or 90-degree throttle linkages.
Caution: Don’t force linkages. Bending them alters throttle response and engine speed.
Remove Carburetor Bolts and Gaskets
Unscrew the two main mounting bolts holding the carburetor to the engine.
* Lift off the carburetor gently to avoid damaging connections.
* Preserve gaskets between the carb, intake, and block carefully.
* Never reuse torn gaskets as they cause air leaks and lean running.
Disassemble and Clean Carburetor Components
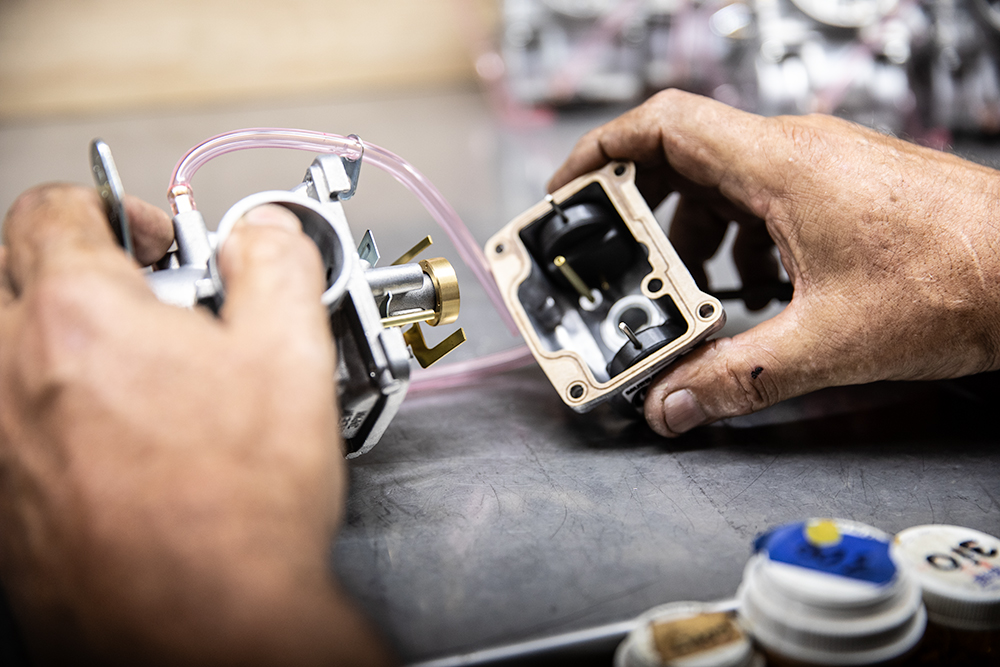
Complete disassembly is required to clean every passage and jet effectively.
Drain Float Bowl Residue
Place a container under the carburetor before starting this step.
* Unscrew the drain plug at the bottom of the float bowl.
* Allow all fuel to drain into your container.
* Handle over a tray since residual fuel remains inside.
Remove Float and Needle Valve
Slide out the retaining pin to access the internal components.
* Lift out the float and needle valve carefully.
* Hold your finger over the spring so it does not fly out.
* Check the float for cracks or fuel saturation that prevents regulation.
Extract Main Fuel Inlet Shaft
Turn the carburetor upside down to access the central shaft.
* Use a snug-fitting flathead screwdriver to unscrew the central shaft.
* Tap gently if the shaft feels stuck in place.
* Inspect the hole visually to see if light passes through.
Remove Shutoff Valve Gasket
Take out the small black gasket from the fuel inlet area.
* Clean it thoroughly with solvent or replace if cracked.
* Organize all parts on a magnetic tray or take a photo.
* Losing one tiny part can delay reassembly significantly.
Deep Clean with Tools and Solvent
Use a combination of chemical, air, and mechanical cleaning for best results.
Spray Carburetor Cleaner Generously
Apply canned carb cleaner to all ports, jets, and the float bowl.
* Let the solvent soak for 5–10 minutes to dissolve varnish.
* Avoid spraying harsh solvents on plastic components.
* Repeat application if heavy deposits remain visible.
Blow Out Passages with Compressed Air
Use an air compressor for higher pressure than canned air provides.
* Blow through every hole until air exits the opposite end.
* Hold the carb so debris does not get trapped inside.
* Focus on the main jet, idle circuit, and emulsion tube.
Clear Tiny Jets with Wire
Use unwound picture frame wire or piano wire for microscopic holes.
* Gently poke through tiny holes near the throttle plate.
* Never use a drill bit as it enlarges holes and ruins fuel mix.
* Verify all passages are open by shining a flashlight through them.
Reassemble Carburetor Correctly
Reassembly is the reverse of disassembly, but precision matters for sealing.
Reinstall Float and Inlet Shaft
Slide the needle valve and spring back into their positions.
* Reinsert the float and secure it with the retaining pin.
* Screw in the main fuel inlet until snug without over-tightening.
* Ensure the float moves freely up and down.
Replace Gaskets and Float Bowl
Install the fuel shutoff gasket and reattach the float bowl.
* Tighten screws in a cross pattern to avoid warping the bowl.
* Check for leaks by inspecting the bowl edges closely.
* Replace the gasket if the bowl still leaks after tightening.
Pro Tip: If the bowl leaks, the gasket is pinched or the bowl is cracked.
Reinstall Carburetor and Connect Systems

Now reassemble the engine side to prepare for the first start attempt.
Clean Mounting Surface Thoroughly
Wipe the engine block where the carburetor mounts securely.
* Remove any debris that could cause an air leak.
* Inspect the surface for cracks or damage.
* Ensure a flat, clean surface for the new gasket.
Reconnect All Lines and Linkages
Reattach the fuel line, vacuum hose, and throttle linkage.
* Fix split hoses by cutting out the damaged section.
* Join hoses with a connector and a new piece of hose.
* Verify all linkages move smoothly without binding.
Reinstall Air Filter and Pull Start
Put the air filter back in place to protect the engine.
* Reconnect the pull-start housing securely.
* Tighten engine mounts to their original torque.
* Double-check all connections before adding fuel.
Refuel and Start the Engine
Follow these final steps to bring your engine back to life safely.
Add Fresh Fuel and Engage Choke
Fill the tank with fresh, non-ethanol gasoline for best performance.
* Turn the fuel switch to the ON position.
* Set the choke to the full cold start position.
* Ensure the area is well-ventilated before starting.
Use Drill to Crank Initially
Reattach the drill to the crankshaft for the first start attempt.
* Crank clockwise for 5 seconds to draw fuel into the carb.
* Watch for signs of firing or sputtering.
* Stop immediately if you smell raw fuel without ignition.
Attempt Manual Start Procedure
Once the engine fires, let it run for 2–3 minutes to stabilize.
* Gradually close the choke as the engine warms up.
* A properly repaired engine should idle smoothly.
* Check for air leaks at gaskets if it stalls repeatedly.
If it stalls: Check for air leaks at gaskets or fuel starvation issues.
Distinguish Engine vs Pump Failure
Do not confuse engine problems with pump issues when diagnosing failures.
Engine Runs But No Pressure?
The engine is fine if it runs, so the problem is in the pump or water path.
* Check if the wand or nozzle is clogged with debris.
* Inspect the inlet screen inside the pump water inlet.
* Ensure your garden hose provides full water flow.
* Verify the pump is not frozen from winter storage.
Pump Repair or Replace Decision
Professional repair costs $125–$175 for a new pump plus labor fees.
* DIY pump swaps cost about $120 for aftermarket units.
* Replace the pump if the engine runs to save the unit.
* Never idle longer than 60 seconds without spraying water.
Prevent Future Engine Issues
Keep your pressure washer ready for next use with proper storage.
Follow Storage Protocol
Run the engine dry by turning off the fuel and letting it burn remaining gas.
* Remove the spark plug and add one teaspoon of oil.
* Pull the rope slowly to coat the cylinder walls.
* Reinstall the plug and store in a dry place.
Use Fuel Stabilizer and Change Oil
Add stabilizer to every tank if storing more than 30 days.
* Check engine oil after every 50 hours of use.
* Replace oil if it looks dirty or contaminated.
* Follow the manufacturer schedule for your specific model.
Frequently Asked Questions About Pressure Washer Engine Repair
Why won’t my pressure washer engine start after winter?
Old fuel left in the carburetor evaporates and leaves varnish that clogs jets. This is the most common cause of no-start issues after storage. Drain old gas and clean the carburetor thoroughly to fix it.
How do I know if my pressure washer pump or engine is bad?
If the engine runs but produces no water pressure, the pump is likely the issue. If the engine will not start or run at all, the problem lies within the engine fuel, air, or ignition systems.
Can I use regular gasoline in my pressure washer?
You should use non-ethanol fuel when possible to prevent moisture absorption. Ethanol blends degrade rubber components and create varnish that clogs the carburetor over time.
How often should I change the oil in my pressure washer engine?
Check the oil after every 50 hours of use and change it if it appears dirty. Regular oil changes extend engine life and ensure proper lubrication during operation.
What causes a pressure washer engine to stall after starting?
Stalling often indicates an air leak at the carburetor gaskets or fuel starvation from a clogged line. Check your gaskets for tears and ensure the fuel tank vent is not blocked.
Key Takeaways for Successful Pressure Washer Engine Repair
Most pressure washer engine repair cases involve fuel system issues rather than mechanical failure. By systematically checking fuel quality, airflow, and ignition spark, you can diagnose nearly any no-start problem. Cleaning the carburetor thoroughly remains the most effective solution for engines that refuse to start.
Start with fresh fuel and a clean air filter before attempting complex repairs. If these basics check out, a detailed carburetor cleaning will likely restore your machine to working order. Take your time during disassembly and keep your parts organized for a successful reassembly.