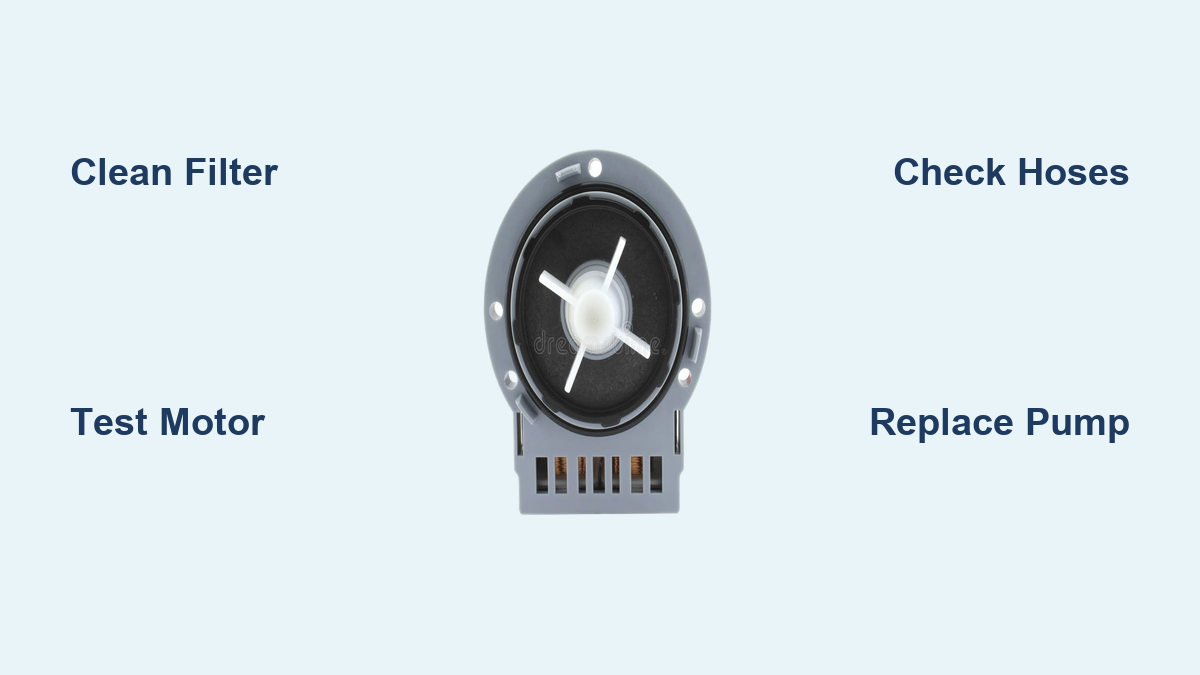
Washing Machine Pump Repair: Quick Fix Guide
Is your washing machine leaving water behind after the cycle ends? A faulty or clogged drain pump is one of the most common causes of poor drainage. The washing machine pump is responsible for removing all water from the tub during the drain and spin phases. When it fails, your machine may display error codes like “ND” or “F02,” stop mid-cycle, or leave clothes soaking wet.
Many assume a failed pump means full replacement, but 80% of pump issues are due to blockages, not motor failure. A simple cleaning of the filter or impeller often restores full function. Even electrical faults can be accurately diagnosed with a $10 multimeter. Whether you own a Samsung, LG, Whirlpool, GE, or Maytag, this guide walks you through every step from diagnosing the issue to safely replacing the pump if needed.
Diagnose Pump Failure Before Repairs
Before disassembling your machine, confirm the problem is pump-related. Misdiagnosis leads to unnecessary part replacements and wasted money.
Listen for Telltale Noises
During the drain cycle, stand near the machine and listen carefully to identify the issue:
- Humming or whirring means power is reaching the pump. The motor runs but water will not drain, which likely indicates a blockage.
- Grinding or clicking sounds suggest something is jammed in the impeller, possibly a coin, button, or hairpin.
- Buzzing with vibration means the motor struggles under load, which could be a partial clog or failing bearings.
- Complete silence during drain phase means no power is reaching the pump. This points to an electrical failure, wiring issue, or control board fault.
Check for Error Codes
Modern washing machines display pump-related errors to help diagnose the issue. Look for these common codes on your display:
- “ND” (No Drain) appears on LG and Whirlpool models.
- “F02” or “E1” shows up on Samsung and GE models.
- “SUD” may indicate over-sudsing that triggers a safety lockout.
These codes typically mean the control board timed out waiting for water to drain.
Rule Out Simple Causes First
Not all drainage issues stem from the pump. Check these simpler causes before proceeding with major repairs:
- Kinked or clogged drain hose
- Clogged standpipe or household drain
- Blocked spring siphon at the hose connection
- Excessive detergent causing foam lock
Use a wet/dry vacuum to pull water from the tub and hoses before proceeding with pump inspection.
Access the Drain Pump Safely
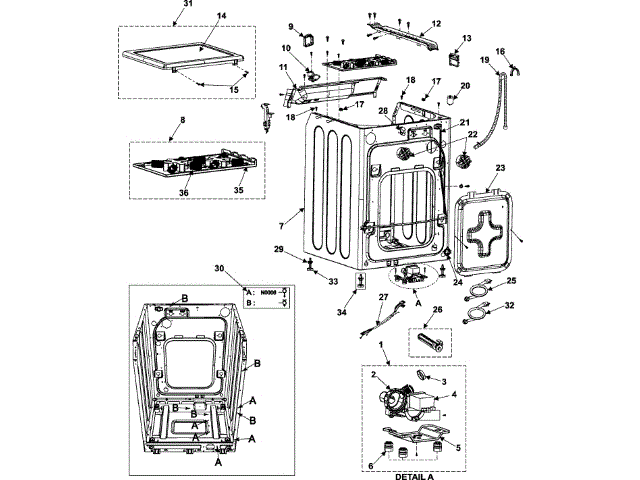
Always start with safety. Working on a live or water-filled machine risks shock, leaks, or damage to yourself and the appliance.
Power and Water Shutdown
Begin every repair by disconnecting power and preparing your workspace:
- Unplug the machine or turn off the circuit breaker before starting.
- Shut off water valves if removing internal panels.
- Wear rubber gloves to protect against dirty water and sharp edges.
- Place towels and a shallow tray under the front of the machine to catch spills.
Locate the Pump
In front-load washers, the pump is typically behind the bottom front access panel, near the base. It is a small, roundish component with two hoses attached. One hose connects from the tub, and the other leads to the drain.
Top-load models like some Samsung units often require rear access. Remove the back panel to expose the pump.
Remove the Access Panel
Follow these steps to access the pump area:
- Unscrew 2 to 3 Torx T15 or T20 screws at the bottom of the front panel.
- Pull the panel down and away from the machine.
- Set it aside carefully to avoid cracking plastic clips.
Take photos of wire connections and hose routing before disconnecting anything. This documentation prevents confusion during reassembly.
Clear the Drain Filter and Impeller
Most pump problems are solved right at this stage. No major disassembly is needed for common blockages.
Drain Residual Water
Position a bucket or basin under the filter cap, which holds up to 2 liters of water. Slowly unscrew the drain filter, which is usually a large twist-off cap. Let water drain gradually to avoid overflow. Remove the cap fully and pull out the filter.
Water may still be in the tub even after filter removal, so keep towels handy.
Remove Debris Manually
Inspect the filter and surrounding cavity for common blockages:
- Pull out lint, hair, coins, buttons, or elastic bands.
- Use tweezers or needle-nose pliers for stubborn items.
- Clean the filter mesh with warm water and a soft brush.
Test Impeller Movement
Look through the filter opening to see the impeller. Rotate it gently with your finger or a screwdriver. It should spin freely with slight resistance. If it is stuck or wobbly, there is a blockage or mechanical damage.
Soak a caked filter in white vinegar for 30 minutes to dissolve limescale and detergent residue before scrubbing.
Reinstall and Test
Rinse the filter and ensure the O-ring is seated properly. Screw the cap back in tightly but avoid over-torquing. Restore power and run a drain-only cycle. If water clears, the fix was successful.
Test Pump Electrical Function

Silent pumps need electrical verification. Do not replace the pump until you test it first.
Tools Needed
You will need a digital multimeter set to resistance (Ω) or continuity mode. These tools are inexpensive and available at any hardware store.
Disconnect and Test
Unplug the pump electrical connector. Set the multimeter to resistance mode. Touch the probes together to confirm a zero reading. Place the probes on the two pump terminals.
Interpret Results
Understanding the readings helps determine if replacement is necessary:
- 0.15 Ω to 5 Ω indicates the motor is good and the pump should run.
- OL (overload) or infinite resistance means burnt windings. Replace the pump.
- 0 Ω indicates a short circuit. The pump is faulty.
A reading outside the normal range means the motor coil is damaged and replacement is required.
Check Control Board Output
If the pump tests good but does not run, test the control board output. Reconnect power and start a spin-only cycle. Use the multimeter in AC voltage mode (V~). Probe the pump wires, such as CN402 on Samsung models. Expect 120V in North America or 230V in Europe when the pump is active.
No voltage means the control board relay is faulty, not the pump.
Remove the Washing Machine Pump
If cleaning fails or electrical tests confirm failure, remove the pump for replacement.
Disconnect Hoses
Use pliers to compress the spring clamp on the tub-to-pump hose, then pull straight off. Do the same for the drain hose. If a recirculation hose is present, detach it carefully. Insert a plastic ball or rag into open hoses to minimize spillage.
Unplug Electrical Connector
Take a photo of the wiring before disconnecting. On Samsung pumps, note the black wire orientation, which should be perpendicular to the shaft. Press release tabs to unclip the harness.
Remove Mounting Hardware
Unscrew 2 to 4 Torx T15 or T20 screws securing the pump. Some models require a 12mm socket. Gently wiggle the pump free. Do not force it.
Support the pump during removal to avoid stress on hoses and potential damage.
Deep Clean or Disassemble the Pump
For persistent clogs, open the pump housing for internal cleaning.
Tools Required
Gather these items before starting:
- Torx T15/T20 driver
- Flathead screwdriver
- Soft brush
- Compressed air
- White vinegar for descaling
Open the Housing
Remove three screws from the back of the pump. Gently pry apart the two housing halves. Avoid damaging the edge gasket or O-ring.
Inspect and Clean Internally
Remove fluff, hair, sand, or water stones from the chamber. Clean impeller blades thoroughly. Use compressed air to blow out hidden debris. Check the one-way valve at the outlet. Replace it if cracked or stiff.
Descaling with Vinegar
Soak non-electrical parts in white vinegar for 1 hour. This dissolves limescale and detergent sludge common in hard water areas. Rinse well before reassembly.
Know When to Replace the Pump
Cleaning fixes most issues. Replace only when specific conditions are met:
- Electrical test shows OL or 0 Ω
- Impeller is cracked, wobbly, or detached
- Housing is cracked or leaking
- One-way valve fails, causing backflow
- Burnt smell or charring appears on motor windings
- Excessive noise persists after cleaning
If the motor does not spin freely and tests electrically dead, replacement is required.
Choose the Right Replacement Pump
Avoid buying the wrong part. Compatibility is critical for successful repair.
Match Key Features
Ensure the replacement matches these specifications:
- Mounting pattern (screw holes and bracket)
- Hose port positions (inlet and outlet alignment)
- Electrical connector type (plug-in or terminal)
- Voltage rating (120V for North America or 230V for Europe)
Consider Aftermarket Options
OEM parts cost more, but aftermarket pumps offer same function at half the price. Always verify fit using your washing machine model number, which is found inside the door or on the back panel.
Install the New Pump Correctly
Bad installation leads to leaks or failure. Follow these steps carefully.
Position and Secure
Align the new pump with mounting holes. Insert and tighten 2 to 4 screws evenly. Do not overtighten. Ensure hose ports face the correct direction.
Reconnect Hoses
Slide hoses fully onto spigots. Reuse original clamps or install new ones. Compress the clamp with pliers and perform a tug test to confirm a tight fit.
Reattach Electrical Connector
Match wire colors. Black is live, and blue is neutral. On Samsung models, ensure the black wire is perpendicular to the shaft. Press until the harness clicks into place.
Never splice wires. Use only plug-compatible replacements.
Reassemble the Washing Machine
Reverse the disassembly process with care to avoid post-repair problems.
Reinstall Front Panel
Reconnect the door lock switch. Align the panel and insert the top screws. Reattach the door boot by stretching the rubber over the tub lip. Install the spring clamp starting at the 6 o’clock position. Use vice grips if outer spring pliers are unavailable.
Reconnect Control Panel
Plug in all wire harnesses and listen for the click indicating secure connection. Reinsert the detergent drawer and reinstall dispenser housing screws.
Replace Top Panel
Slide the panel forward and down. Secure with rear screws. Do not overtighten.
Return the machine to upright position and ensure it is level and stable before testing.
Test Drainage and Check for Leaks
Never assume the repair worked. Test thoroughly before regular use.
Run a Drain-Only Cycle
Select spin or drain mode. Confirm water evacuates in 2 to 3 minutes. Listen for smooth operation with no grinding or buzzing.
Perform Full Test Cycles
Run 2 to 3 complete washes including fill, drain, and spin phases. Monitor for complete drainage, unusual noises, vibration, or leaks.
Inspect for Leaks
After each cycle, check under the machine for puddles. Examine hose connections and pump seals. Confirm no drips from the filter or housing.
Successful repair means the machine drains fully, runs quietly, and shows no leaks.
Prevent Future Pump Problems
Avoid repeat repairs with simple maintenance habits.
Clean Filter Regularly
Clean the filter every 1 to 3 months with heavy use, or every 6 to 12 months for average use. Always drain water first before cleaning.
Clean the Spring Siphon Annually
The spring siphon is located at the drain hose connection to the standpipe. Remove it and flush with water. Mark your calendar for annual cleaning as a reminder.
Use Best Practices
Check pockets before washing to remove coins and small items. Use mesh laundry bags for small items. Run a monthly cleaning cycle with vinegar. Avoid overloading the drum.
Descaling the pump chamber yearly extends its life, especially in hard water areas.
Key Takeaways for Washing Machine Pump Repair
A clogged pump is often mistaken for a dead one. Before spending $50 to $150 on a replacement, clean the filter and test the motor. In most cases, that is all it takes.
Use the correct Torx driver to avoid stripping screws. Preserve all gaskets and O-rings, and replace them only if cracked. Keep the old pump until the new one proves functional.
Label wires and take photos during disassembly. A miswired connection can damage the motor or cause a short.
By following this structured approach, you will restore your washing machine performance quickly and confidently. Most repairs take under 90 minutes and cost nothing beyond a few towels and some vinegar.
Frequently Asked Questions About Washing Machine Pump Repair
How do I know if my washing machine pump is clogged?
Listen for humming or grinding noises during the drain cycle. Check if water remains in the tub after the cycle ends. Look for error codes like “ND” or “F02” on your display. A clogged pump often allows the motor to run but prevents water from flowing.
Can I repair a washing machine pump myself?
Yes, most pump issues are DIY-friendly. Blockages account for 80% of problems and can be cleared by cleaning the filter and impeller. Electrical testing with a multimeter helps determine if replacement is needed. Only complex cases or sealed units may require professional service.
How much does a replacement washing machine pump cost?
Replacement pumps range from $29 to $75 depending on brand and model. Aftermarket options cost significantly less than OEM parts. Always verify compatibility with your model number before purchasing.
How long does it take to replace a washing machine pump?
Most DIY repairs take 60 to 90 minutes, including diagnosis, removal, and reassembly. Simple filter cleaning takes only 15 to 30 minutes. Complex reassembly on front-load machines may add extra time.
What causes washing machine pump failure?
Common causes include foreign objects (coins, buttons, hairpins), lint and fiber buildup, detergent residue, limescale in hard water areas, and motor burnout from prolonged strain. Electrical failures like burnt windings also occur but are less common than blockages.