Whirlpool Washing Machine Maintenance Tips
Is your Whirlpool washer making strange noises, leaving clothes damp, or smelling musty? You are not alone. Over 70% of washing machine failures stem from preventable issues, most tied to poor maintenance. The good news is that with a few simple, regular care steps, you can extend your Whirlpool washing machine maintenance routine and keep your machine running like new for years.
This guide delivers a complete, step-by-step approach to Whirlpool washing machine maintenance using only manufacturer-endorsed methods. You will learn how to clean hidden buildup, reset electronic glitches, prevent mold, and optimize performance without calling a technician.
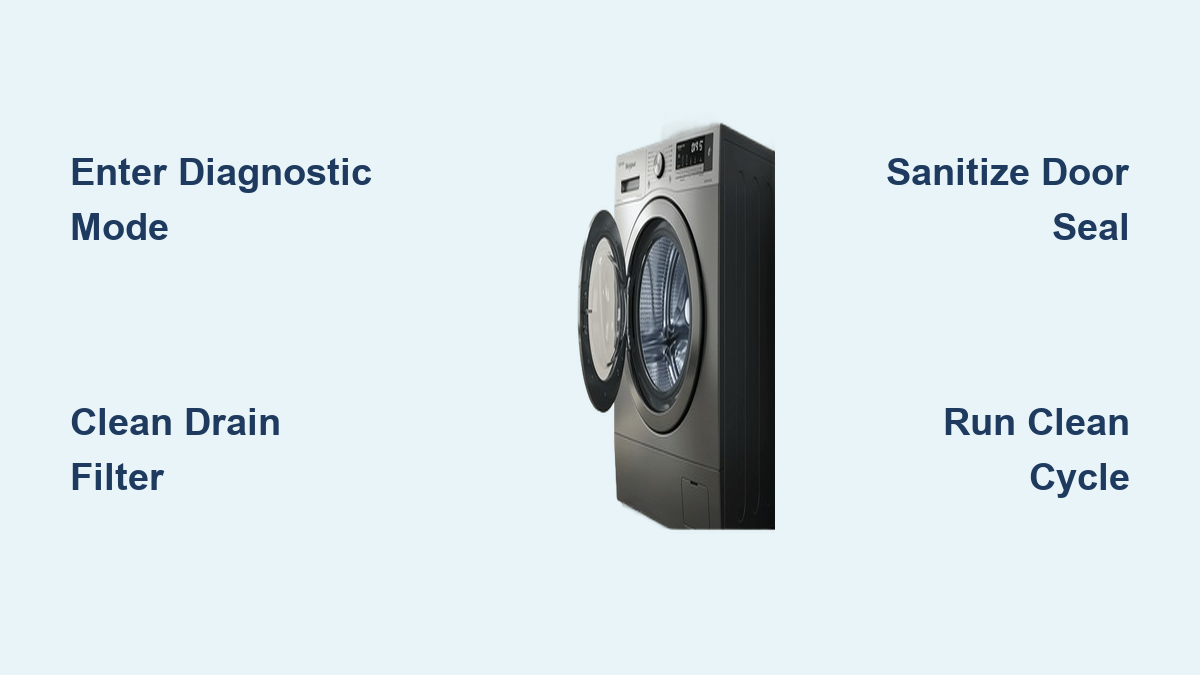
Enter Diagnostic Mode Correctly
If your washer is not spinning, draining, or responding to controls, start with diagnostics before disassembling anything. This first step in proper Whirlpool washing machine maintenance can save you time and money.
Confirm Your Model Supports It
Only vertical modular washers with six indicator lights can enter diagnostic mode. This includes Whirlpool, Maytag, and Kenmore models like Cabrio and Calypso. If your control panel has touch buttons instead of a dial, check your manual for compatible diagnostic methods.
Activate Diagnostic Lights
Turn the cycle dial to 12:00 position, which represents power off. Within 6 seconds, rotate three clicks right, then one click left, then one click right. If done correctly, all lights will blink rapidly, indicating successful entry into diagnostic mode.
Failure to respond? Unplug the washer for 30 seconds, then retry the sequence. Moisture or power glitches can interfere with the process.
Recalibrate After Errors
Diagnostic mode is not just for reading faults. It resets internal systems and often fixes common issues that arise from everyday use, making it a critical part of Whirlpool washing machine maintenance.
Run the Self-Test Cycle
Once lights are blinking, turn the dial four clicks to the right. Press Start to begin the self-test cycle, which runs for 2-3 minutes. The washer will fill with water, agitate briefly, and spin at low speed before automatically unlocking the lid.
This recalibration fixes problems like no spin cycle, stuck phases, or unresponsive buttons by resetting the motor, control board, and sensor alignment.
Perform a Factory Reset
Repeat the recalibration process with an empty drum to clear stored error codes. This step is particularly useful after moving the machine, power surges, or recurring faults. Use it as a first step in your Whirlpool washing machine maintenance routine.
Warning: Recalibration will not fix mechanical issues like broken belts or clogged pumps. If problems persist after this step, further inspection is needed.
Clean the Detergent Drawer Monthly
A clogged dispenser causes poor cleaning, residue on clothes, and moldy smells. Regular drawer cleaning is essential Whirlpool washing machine maintenance that takes only 15-20 minutes.
Remove and Soak Trays
Pull out the main drawer until it clicks open. Press the release tab to remove detergent, fabric softener, and bleach compartments. Soak all trays in warm, soapy water for 10 minutes to loosen buildup.
Scrub Hidden Buildup
Use an old toothbrush to clean spray nozzles, corners under the softener tray, and detergent slots where powder hardens. For stubborn residue, mix baking soda and water into a paste. Rinse thoroughly and air dry completely before reinserting.
Expert Note: Some models allow removal of the entire housing. Check your manual. Leftover moisture breeds mold, undoing your Whirlpool washing machine maintenance efforts.
Sanitize the Door Seal Weekly
Front-load models trap water in the rubber gasket, creating prime real estate for black mold. This weekly task is one of the most important Whirlpool washing machine maintenance steps for front-load owners.
Wipe All Folds and Crevices
Open the door fully and gently pull back the rubber door seal. Use a vinegar-dampened cloth to wipe every inch, paying special attention to the bottom lip where water pools, inner folds, and the area around the drain hole. For visible mold, use a soft brush dipped in vinegar.
Prevent Mold Growth
Leave the door ajar after each use to allow air circulation. Wipe the seal weekly even if it looks clean. Replace the gasket if cracked or permanently stained, as damaged seals compromise your Whirlpool washing machine maintenance efforts.
Fact: Mold in the seal is the number one cause of foul odors in front-load washers.
Clean the Drain Filter Every 2-3 Months
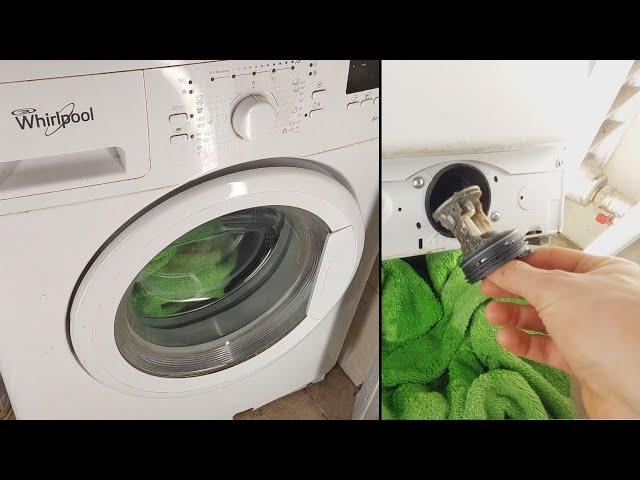
A blocked filter causes slow drainage, error codes like F02, and overflow risks. This quarterly task protects your pump and ensures proper drainage.
Locate the Access Panel
The filter is found at the bottom front of most Whirlpool models. Place a shallow tray or towel underneath before opening, as up to 2 cups of water may spill during removal.
Remove and Flush the Filter
Unscrew the round cap counterclockwise and pull out the filter slowly. Debris may come with it, so handle carefully. Rinse under running water and scrub the mesh with a brush. Shine a flashlight into the pump housing to check the impeller for obstructions like lint, coins, or buttons. Reinstall and tighten securely.
Caution: Never run the washer without the filter installed. It protects the pump from damage and maintains your Whirlpool washing machine maintenance schedule.
Deep Clean the Drum Monthly
Hidden grime inside the drum transfers to clothes and causes odors, even in machines that look clean. Monthly drum cleaning is fundamental Whirlpool washing machine maintenance.
Use an Affresh Tablet
Drop one Affresh tablet into the empty drum. Select the Clean Washer cycle and choose hot water if available. Run the full cycle, then wipe the drum dry afterward.
Why It Works: Affresh is formulated specifically for Whirlpool machines and dissolves soap scum, lime scale, and biofilm effectively.
Try Bleach for Tough Mold
Pour 1 cup of liquid chlorine bleach into the drum. Run the Heavy Soil or Clean Washer cycle with hot water. Wipe dry after the cycle completes.
Limit Use: No more than once every 6 weeks, as bleach can degrade rubber seals over time and undermine your Whirlpool washing machine maintenance efforts.
Natural Alternative: Vinegar and Baking Soda
Add 2 cups of white vinegar to the drum and 1/4 cup of baking soda to the detergent drawer. Run the hottest cycle available and leave the door open to dry.
Note: This method is less effective than Affresh or bleach for heavy buildup but is safe for frequent use.
Sanitize With Oxi for Allergies and Odors
For households with kids, pets, or allergy sufferers, Oxi cleaning provides deep sanitization that kills bacteria and removes organic soils.
Run the Sanitize Cycle
Add oxygen-based powder to the detergent drawer. Select the Sanitize with Oxi cycle if your model has it. Let the cycle complete, as water heats above 150 degrees Fahrenheit to eliminate 99.9% of common bacteria. Wipe the drum dry afterward.
Best Practice: Use every 2-3 weeks in high-traffic homes as part of your regular Whirlpool washing machine maintenance routine.
Deep Clean Under the Agitator

Top-load Whirlpool washers hide mold and soap scum under the agitator, out of sight but not out of mind. This annual deep clean removes trapped debris that causes odors and stains.
Remove the Agitator Core
Pry off the plastic cap at the agitator base. Use a 7/16-inch socket wrench to remove the central screw. Lift the upper and lower sections straight up to expose the inner drum cavity.
What You Will See: Yellow mold, crystallized detergent, and trapped lint are common findings that compromise your Whirlpool washing machine maintenance efforts.
Scrub Hidden Surfaces
Use a narrow brush or sponge to clean interior fins of the agitator, tub walls near the waterline, and the central shaft area. Flush hoses if biofilm is visible.
Pro Tip: Never touch the gray nut inside the agitator. Removing it requires special tools and risks permanent damage.
Reassemble and Run a Deep Clean Cycle
After cleaning under the agitator, reassemble carefully and run a final sanitizing wash to complete your Whirlpool washing machine maintenance.
Reinstall Components
Place the agitator back over the shaft and tighten the central screw with the 7/16-inch socket. Snap the protective cap back on. Reattach the back panel and secure with three rear screws.
Run a Heavy Soil Clean Cycle
Place an acidic cleaning tablet or crushed powder in the drum. Cancel auto drain by holding the button until lights go off. Select Regular Wash with Heavy Soil and Hot Water.
Why Not Clean Washer: The dedicated cycle may flush the tablet too early. The Heavy Soil setting retains water longer for full dissolution and deeper cleaning.
Prevent Odors Long-Term
Musty smells return if moisture and residue are not managed daily. Building these habits into your Whirlpool washing machine maintenance routine prevents recurring problems.
Daily and Weekly Habits
Leave the door open after each use to let air circulate. Wipe the door seal weekly with vinegar. Use HE detergent only, as regular detergent creates excess suds that trap dirt. Avoid overloading, as clothes need room to move for proper cleaning.
Fix Persistent Smells
If odor remains after cleaning, run a bleach cycle using 1 cup in the drum. Recheck the filter, seal, and dispenser. Inspect the drain hose for kinks or standing water. Replace the door gasket if cracked.
Key Insight: Odors are rarely in the drum. They are hiding in the seal, filter, or pump, so focus your Whirlpool washing machine maintenance efforts on these areas.
Optimize Performance by Usage
Tailor your Whirlpool washing machine maintenance to your household needs for best results.
For Large Families
Run Oxi or bleach cycles every 2 weeks. Clean the filter monthly. Use hot water more often to prevent grease buildup in your Whirlpool washing machine maintenance routine.
In Hard Water Areas
Minerals reduce cleaning power and clog components. Use Affresh every 3-4 weeks. Consider a water softener if scaling is severe, as this affects your Whirlpool washing machine maintenance effectiveness.
For Cold-Water Washers
Detergent does not dissolve well in cold water, leading to residue. Run a hot water clean cycle monthly to flush buildup as part of your Whirlpool washing machine maintenance schedule.
Maintenance Win: Proper care reduces service needs by up to 40%.
Follow a Monthly Maintenance Schedule
Stay ahead of problems with a simple routine that protects your investment.
Weekly Tasks
Wipe the door seal on front-loaders. Leave the door open post-wash to prevent moisture buildup.
Monthly Tasks
Run a Clean Washer cycle using Affresh or vinegar. Clean the detergent drawer to prevent clogs and mold. Inspect hoses for cracks or leaks.
Quarterly Tasks
Clean the drain filter every 2-3 months. Check the pump impeller for obstructions. These steps form the foundation of effective Whirlpool washing machine maintenance.
Annual Tasks
Deep clean under the agitator annually. Recalibrate at the first sign of trouble. These deeper Whirlpool washing machine maintenance tasks address hidden issues.
Lifespan Tip: Well-maintained Whirlpool washers last 10-14 years, double the failure rate of neglected units.
Know When to Call a Pro
Some issues go beyond DIY fixes. Recognize when professional help is needed in your Whirlpool washing machine maintenance journey.
Red Flags
Loud banging during spin indicates a worn tub bearing or unbalanced load. Water will not drain if the pump has failed, not just clogged. Error codes that persist after reset suggest a faulty control board. Leaks from the bottom mean damaged tub seal or hose.
Warranty Note: DIY maintenance does not void warranty unless you cause damage with improper repairs.
Frequently Asked Questions About Whirlpool Washing Machine Maintenance
How often should I run a clean washer cycle?
Run a clean washer cycle monthly using Affresh or an alternative cleaning method. This prevents soap scum and mold buildup that compromises cleaning performance and causes odors.
Can I use regular detergent in my Whirlpool HE washer?
No, use only HE detergent. Regular detergent creates excess suds that trap dirt, reduce cleaning efficiency, and promote mold growth, undermining your Whirlpool washing machine maintenance efforts.
Why does my Whirlpool washer smell musty?
Musty smells typically come from mold growing in the door seal, detergent drawer, or drain filter. Clean these components weekly and leave the door open between loads to prevent moisture buildup.
How do I enter diagnostic mode on my Whirlpool washer?
Rotate the cycle dial to 12:00, then within 6 seconds perform three clicks right, one click left, and one click right. All lights should blink rapidly if successful.
When should I clean the drain filter?
Clean the drain filter every 2-3 months or when you notice slow drainage, error codes, or unusual sounds during draining. This simple Whirlpool washing machine maintenance task prevents major issues.
Does cleaning my washer really extend its lifespan?
Yes. Regular Whirlpool washing machine maintenance can double your washer lifespan from 7 years to 14 years while reducing service calls by up to 40%.
Key Takeaways for Whirlpool Washing Machine Maintenance
Regular Whirlpool washing machine maintenance is not optional, it is essential for performance, efficiency, and longevity. From resetting electronic glitches to removing hidden mold, these steps empower you to keep your washer running at its best. Use Affresh monthly, clean the filter every few months, sanitize with Oxi when needed, and recalibrate at the first sign of trouble. A few minutes of care now saves hundreds in repairs later and ensures every load comes out fresh, clean, and odor-free. Your Whirlpool washer is an investment worth protecting through consistent maintenance.