Whirlpool Washing Machine Repair Guide
If your Whirlpool washing machine won’t spin, won’t drain, or displays an error code, you’re not alone. Millions of homeowners face these issues every year, and many can be resolved with basic tools and the right guidance. This guide provides step-by-step repair instructions, diagnostic tips, and proven solutions used by certified technicians and confident DIYers alike.
You’ll learn how to safely open your washer, identify failing parts like the lid switch, drain pump, or drive coupler, and make repairs that last using genuine Whirlpool OEM parts. We also cover when to call a pro, how to interpret error codes, and how to extend your machine’s life with simple maintenance.
Access Internal Components Safely
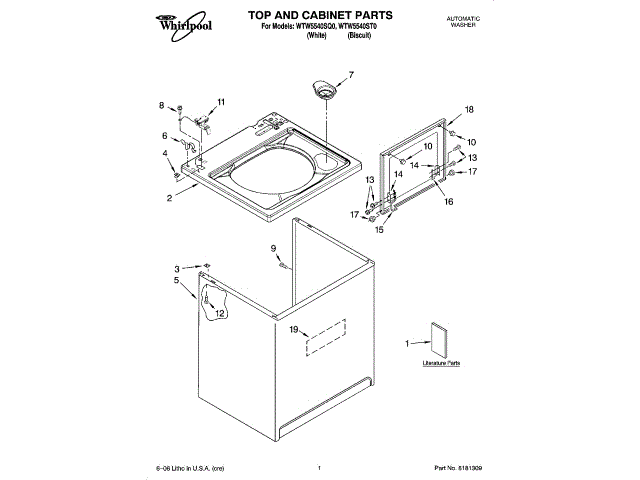
Before diagnosing mechanical or electrical faults, you must gain full access to the washer’s core systems. For top-load Whirlpool models, this means removing the cabinet to reach the motor, pump, control board, and suspension system.
Remove Control Console Correctly
Start by releasing the control console, which sits atop the washer. On many Whirlpool and Kenmore models, screws are hidden under snap-fit caps on the front edges.
• Check front left and right corners for these caps.
• Gently pull forward to pop them off and expose the screws beneath.
• Use a Phillips screwdriver to remove the screws.
If no screws appear on the front, look at the rear of the console. Some models use rear-mounted screws with unthreaded tips. Slide your finger under the screw head and lift it up about 1/8 inch to disengage it from the bracket. On newer models without screws, you may find plastic retaining clips near the lid switch on the left side. Push each clip toward the back of the machine to release. Avoid pressing down on the lid switch actuator because it’s fragile and easily broken.
Disconnect Lid Switch Before Proceeding
Once the console is loose, gently pull it forward to release side tabs from the cabinet top. Let it pivot backward onto its hinges. Locate the lid switch connector at the center rear and unplug it immediately. This prevents accidental startup and ensures safety during the repair.
Release Cabinet Mounting Clips
Two metal clips at the rear of the cabinet secure it to the frame. Insert a Phillips screwdriver into the front opening of each clip and push it toward the back of the washer to release the clip.
Remove Cabinet Without Damage
With clips disengaged, open the lid for clearance. Grip the front edge of the cabinet, tilt it backward, and pull slightly forward. The bottom edge is hooked under the frame, so tilting releases the hooks. Lift the cabinet off completely. Now you have full access to internal components for inspection and repair.
Diagnose No-Drain or ND Error
One of the most common Whirlpool washer problems is failure to drain water, often accompanied by an ND error code. This section walks you through the diagnostic process.
Check Drain Pump for Clogs
The drain pump, located at the front bottom of the tub, can become blocked by coins, buttons, or lint. To clear or replace the pump, unplug the washer first. Then remove the lower front panel to access the pump and place towels underneath because some water will spill. Disconnect the hoses from the pump, open the pump filter cap, and remove debris. Manually spin the impeller. If it doesn’t turn freely, replace the pump. Use genuine Whirlpool part W10259246 or a model-specific equivalent.
Test Pump Motor Continuity
If the pump is clear but still not working, test it with a multimeter. Set the meter to continuity mode, disconnect power, and remove wires from the pump terminals. Touch the probes to the terminals. If there’s no beep, the motor is dead and requires replacement. Use an OEM pump to ensure compatibility and warranty coverage.
Confirm Air Gap and Drain Line Are Clear
A clogged household drain line or blocked air gap can mimic pump failure. Disconnect the drain hose from the standpipe and blow air through it or flush with hot water. Ensure the hose isn’t kinked or installed too deep in the pipe. The maximum depth should be 6 inches.
Fix Lid Switch or Door Lock Failures

When your Whirlpool washer won’t start or won’t spin, the lid switch is often the culprit, especially in top-load models. Here’s how to identify and fix this common issue.
Identify Lid Switch Symptoms
Watch for these telltale signs that the lid switch has failed. The washer fills but won’t agitate or spin. The lid lock light stays off. An error code appears, such as Lid or a flashing lock icon.
Access and Replace the Switch
With the cabinet removed, locate the switch at the top center rear of the machine. Disconnect the wiring harness, remove the mounting screws, and pull out the assembly. Install a genuine Whirlpool lid switch, such as part W10411462 or a model-specific equivalent.
When installing the new switch, align the actuator arm correctly with the lid strike. Don’t overtighten the screws because the plastic housing cracks easily. Reconnect the harness securely. After replacement, run a Rinse/Spin cycle to verify proper operation.
Repair Drive System Failures
No agitation or spin? The problem may lie in the drive system, a common failure point in older Whirlpool top-loaders. This section helps you diagnose and fix these issues.
Inspect Drive Coupler for Wear
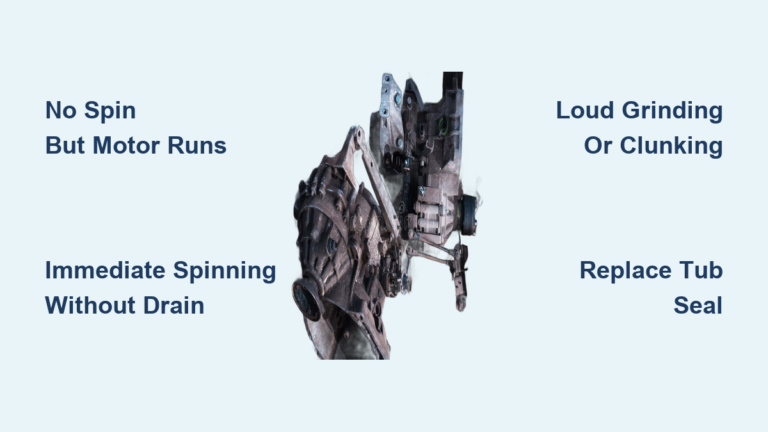
The drive coupler connects the motor to the transmission and wears out over time, especially in models from the early 2000s. Look for these signs of failure. The washer hums but the drum doesn’t move. There’s loud thumping during spin. You see visible cracks or missing rubber fins on the coupler.
To replace the drive coupler, remove the cabinet and motor. Pull off the old coupler halves from the motor shaft and transmission input. Press the new coupler halves into place and reinstall the motor while reconnecting the wires. This is a moderate-difficulty DIY repair taking approximately 45 minutes. Use OEM parts only because aftermarket couplers often fail prematurely.
Diagnose Motor or Transmission Issues
If the coupler is intact, test the motor using a multimeter to check for continuity. Listen for a hum. If the motor is silent, it may be dead. Transmission problems such as oil leaks or grinding noise usually require professional replacement due to complexity.
Clear Pressure Switch and Air Hose Faults
An overfilling or underfilling washer likely has a pressure switch or air hose issue. This section helps you identify and resolve these problems.
Locate the Air Dome Hose
This small rubber tube runs from the tub base to the pressure switch on the control panel. Check for kinks, cracks, or disconnections, especially during cabinet reinstallation. Blow through the hose to clear blockages.
Clean the Air Dome
The air dome at the tub end can get clogged with detergent residue. Disconnect the hose and use a wire or pipe cleaner to clear the port. Reconnect securely.
Test or Replace Pressure Switch
If the hose is clear but filling issues persist, test the switch with a multimeter. Replace it if there’s no continuity. Use part W10411457 or a model-specific equivalent. Always check hose alignment when reinstalling the cabinet because a kinked hose causes overfilling.
Replace Worn Suspension Rods
Excessive vibration, drum wobble, or the washer walking across the floor points to failing suspension rods. Here’s how to address this issue.
Identify Failing Rods
Look for bent rods or leaking fluid because they contain damping oil. Test each rod by pushing down on the tub. If it bounces excessively, the rods are weak and need replacement.
Replace in Pairs
Always replace all rods at once, even if only one looks bad. Remove the cabinet and top panel, then support the tub with wood blocks. Unscrew the rods from top and bottom mounts and install new OEM rods, such as part W10250682 or equivalent. Remove the supports and test. This repair reduces vibration and prevents further damage to bearings and seals.
Decode Whirlpool Error Codes
Modern Whirlpool washers use digital error codes to pinpoint problems. Understanding these codes saves time and helps you determine the right fix.
Common Error Codes and Fixes
The LF error code means Long Fill, caused by a clogged or malfunctioning water inlet valve. Fix this by cleaning inlet screens or replacing the water valve if solenoids fail.
The ND error code means No Drain, caused by a clogged drain pump, kinked hose, or failed pump motor. Fix this by clearing debris, testing the pump, or replacing it.
F codes such as F1 or F5 are model-specific and often indicate control board failure or sensor faults. Refer to your manual for specific guidance.
Lid lock errors stem from a faulty door lock assembly or misaligned strike. Replace the lock on front-load models or the lid switch on top-load models.
Use Mr. Appliance or a certified technician if codes persist after basic fixes.
Source Genuine Whirlpool Parts

Using OEM parts ensures reliability, safety, and warranty compliance. Here’s where to find genuine components.
Official Parts Channels
WhirlpoolParts.com serves as the primary source for genuine components. Search by your model number, found on the door rim or back panel. The site offers drain pumps, lid switches, drive couplers, hoses, and more.
Servicematters.com provides a technical hub for professionals. You can download service manuals, wiring diagrams, and firmware updates. This resource is essential for complex repairs like control board replacement.
Third-party options include Mr. Appliance and Turner Appliance Repair, which stock common parts for faster service. Use caution with independent sellers who may offer aftermarket versions. Always verify part compatibility using your full model number before ordering.
Decide: Repair or Replace
Not every broken washer needs a fix. Use this decision framework to choose wisely.
Repair If
Consider repair if the machine is under 8 years old, the problem is minor such as a lid switch or drain pump, the washer is under warranty or has an extended service plan, or the repair cost is less than 50% of a new unit.
Replace If
Consider replacement if the washer is over 10 years old, you’ve had multiple repairs, the issues involve the motor, transmission, or tub bearings, or you want higher efficiency because new HE models use 25% less water and energy.
Note that Turner Appliance Repair charges a $95 starting service fee, so compare this to new unit pricing before proceeding.
Prevent Future Failures
Extend your Whirlpool washer’s life with simple, regular maintenance.
Monthly Tasks
Run a clean cycle with affresh Washer Cleaner or a vinegar-baking soda mix. Wipe the drum and door gasket on front-load models. Clean the detergent dispenser.
Quarterly Checks
Inspect and clean the drain pump filter. Reset any error codes and monitor performance.
Annual Must-Dos
Check inlet hoses for bulges or cracks and replace them every 5 years. Test door seal integrity. Inspect suspension rods and shock absorbers.
Best Practices
Use HE detergent only because regular detergent causes suds lock. Don’t overload the machine because this stresses the motor and bearings. Level the machine by adjusting the feet to prevent vibration.
Final Verification After Repair
Never skip the test cycle after completing any repair.
Post-Repair Checklist
Reconnect all wires and connectors, especially the lid switch. Ensure the pressure-switch hose is not kinked. Reinstall the cabinet securely, listening for clip snaps. Plug in and close the lid.
Run a Test Cycle
Select Rinse/Spin or Quick Wash and watch for proper lid lock engagement, correct fill and drain, smooth agitation and spin, and no error codes or leaks. If issues return, double-check hose routing and electrical connections.
Frequently Asked Questions About Whirlpool Washing Machine Repair
How Do I Reset My Whirlpool Washing Machine?
Unplug the washer for 60 seconds, then plug it back in. This often clears minor error codes. If problems persist, you’ll need to diagnose the specific issue.
What Is the Most Common Problem With Whirlpool Washers?
Drain pump failure ranks among the most common issues. The pump can clog with debris or burn out, causing the washer to not drain and triggering an ND error code.
Can I Repair My Whirlpool Washer Myself?
Yes, many common repairs are DIY-friendly, including lid switch replacement, drain pump cleaning, and drive coupler replacement. However, complex electrical faults or internal mechanical failures require a certified technician.
How Long Do Whirlpool Washing Machines Last?
With proper maintenance, a Whirlpool washing machine typically lasts 10 to 13 years. Regular cleaning, hose replacement, and avoiding overloading extend the lifespan significantly.
How Much Does Professional Whirlpool Washer Repair Cost?
Service calls start at approximately $95, though costs vary by location and repair type. Minor repairs like lid switch replacement typically cost less than major component replacements.
Where Can I Find My Model Number for Parts?
The model number is located on the door rim or back panel of your washer. You’ll need this number to search for compatible OEM parts on WhirlpoolParts.com.
Key Takeaways for Successful Whirlpool Washing Machine Repair
Most Whirlpool washing machine repairs are within reach of a confident DIYer with the right tools and genuine parts. The most common issues involve the drain pump, lid switch, and drive coupler, all of which can be fixed with basic tools and OEM components. Always disconnect power before starting any repair, use only genuine Whirlpool parts for reliability and warranty compliance, and follow the maintenance schedule to keep your washer running strong for 10 to 13 years or more. For complex electrical faults or internal mechanical failures, rely on W Service, Mr. Appliance, or another Whirlpool-certified technician.