How to Calibrate a Washing Machine: Quick Steps
Is your washing machine shaking violently during the spin cycle? Does it fail to start, display error codes like 5E or LF, or shut down unexpectedly? Before calling a technician, the fix could be as simple as calibrating your washing machine. Calibration is a critical but often overlooked step that re-synchronizes the drum, motor, and sensors to ensure smooth, efficient operation.
Unlike a basic reset, calibration is a full system alignment that addresses mechanical and electronic components. It’s essential after installing a new unit, moving your washer, or replacing internal components like the motor, basket, or control board. Skipping this step can lead to poor performance, excessive vibration, and even long-term mechanical damage.
Why Washing Machine Calibration Matters
Calibration synchronizes the drum balance, load sensor, and motor control so your washer operates at peak efficiency. Without it, the machine cannot accurately detect load size, balance, or spin safely at high speeds. This misalignment often triggers error codes that disappear after proper calibration—no part replacement needed.
An uncalibrated washer places excessive stress on bearings, shocks, and the drive system. By reducing mechanical stress from imbalance, calibration helps prevent premature wear and extends your machine’s lifespan. Many users make unnecessary service calls for issues that a simple recalibration resolves.
When to Calibrate Your Washer
Calibration is required in specific situations and is not a routine maintenance task. You must calibrate after initial installation of a new unit and after any relocation, even over short distances. The vibration from movement can misalign internal components.
Calibration is also mandatory after replacing major internal components including the inner basket, drive assembly, motor, main control board, capacitor, suspension system, or shifter mechanism. If you notice excessive vibration during spin, cycles that fail to start or complete, or recurring error codes, calibration should be your first troubleshooting step.
Pre-Calibration Setup Requirements
Before starting calibration, you must prepare the machine properly. Failure to meet these conditions causes most calibration failures.
Essential Preparation Steps
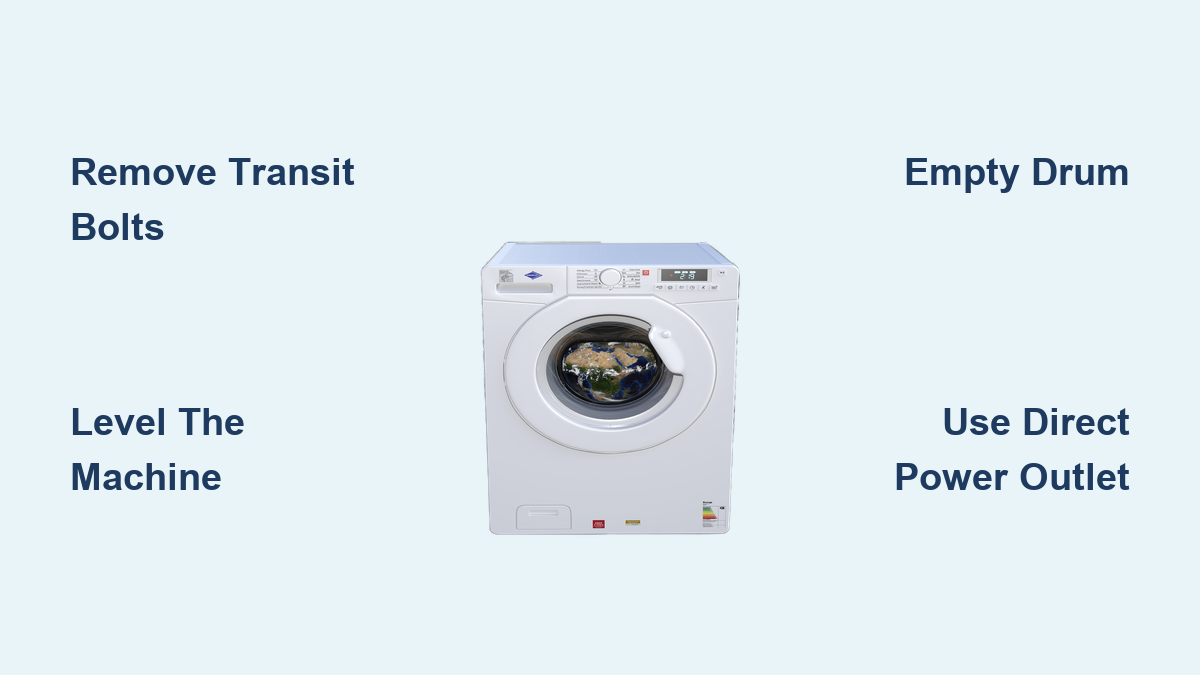
Remove all clothes and foreign objects from the drum. If water is present, the machine will drain it automatically before calibration begins. Locate and remove the transit bolts at the rear of the machine using a wrench or socket set. Leaving these in place prevents proper drum movement and causes severe vibration.
Use a spirit level to confirm the machine is stable on all sides. Adjust the leveling feet until the washer does not rock, then retighten the lock nuts. Ensure the door or lid is securely closed to activate the safety interlock.
Plug the machine directly into a grounded wall outlet. Avoid extension cords or power strips, as power fluctuations can interrupt calibration. Remove any items placed on top of the washer, as they can interfere with sensors.
Samsung Washing Machine Calibration Methods
Samsung offers multiple calibration methods depending on your model’s control interface. Try the method that matches your control panel.
Method 1: Temperature and Delay End Buttons
This method works for models with physical buttons and a digital display. Turn the machine off, then on again. Press and hold the Temperature and Delay End + buttons simultaneously for 3 seconds. The display should show “Cb” indicating calibration mode.
Press the Start/Pause button to begin. The drum rotates clockwise and anticlockwise for 3 to 4 minutes. Upon completion, “0” appears on the display and the machine turns off automatically. If “Cb” does not appear, try holding the buttons during startup instead of after.
Method 2: Functions Button with Navigation Dial
For models with a rotary dial and interactive screen, press and hold the Functions button. Use the navigation dial to select Calibration. Confirm using the OK button.
The drum rotates bidirectionally for approximately 3 minutes. Upon completion, “Calibration complete” appears on-screen and the machine powers down automatically.
Method 3: Touchscreen Settings Menu
Latest Samsung models with full-color touch displays offer the simplest method. Tap Settings on the main display. Select Calibration from the menu. Tap Start to begin the process.
The door locks automatically during calibration. The drum rotates in both directions for several minutes. Upon completion, the machine powers down automatically.
Whirlpool, Maytag, and Kenmore Calibration Steps

These brands use a service mode-based calibration procedure accessible via the cycle selector knob and LED indicators. This procedure applies to Whirlpool, Maytag, Kenmore (Sears-made), Roper, Amana, Admiral, and Crosley models.
Knob Sequence for Six LED Models
Set the cycle selector knob to the Normal position at 12 o’clock. Perform the following sequence with deliberate pauses between each step. Turn one click left, then three clicks right, then one click left, then one click right.
The LEDs for Sensing, Wash, Rinse, and Done should begin flashing simultaneously. Turn the knob four clicks clockwise to select Rinse mode. Press the Start button and allow the machine to run for approximately 3 minutes.
Calibration is complete when all indicator lights stop flashing and turn off.
Alternative Service Mode Entry
Turn the cycle selector knob counter-clockwise a few clicks from its current position. Then perform right stop, right stop, left stop, right stop. All LEDs illuminate except the far-right LED, indicating entry into Service Mode.
Rotate the knob until the third LED from the left lights up, which selects Calibration Mode. Press Start to begin calibration. The machine runs a brief cycle of 2 to 3 minutes, then shuts down automatically.
Reset vs. Calibration: Understanding the Difference
A reset is not equivalent to calibration. A reset clears temporary errors and reboots the control board but does not re-synchronize mechanical systems. Only calibration addresses the alignment of motor, drum, and sensors.
How to Perform a Basic Reset
Unplug the power cord from the wall outlet. Wait 2 minutes to discharge capacitors and reset the control board. Plug the machine back in. Settings return to default and a brief noise from the control panel indicates reboot.
For top-load models only, you can try lifting and lowering the lid six times within 10 seconds after plugging back in. This method does not work on all models and is not a substitute for calibration.
Troubleshooting Calibration Problems
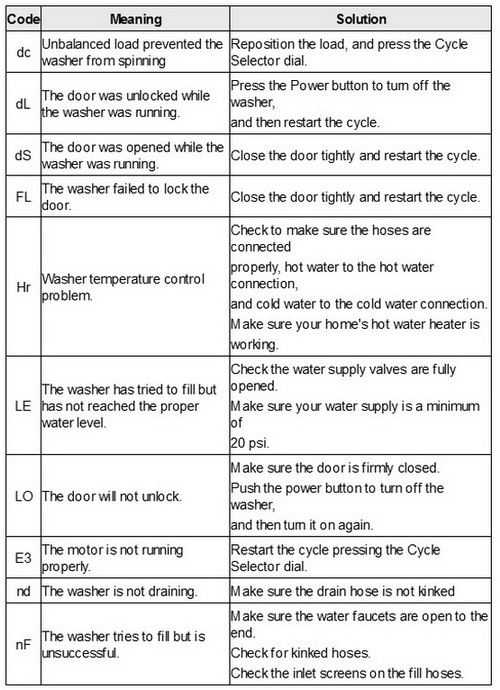
Most calibration failures stem from missed preparation steps. Here are solutions for common issues.
Common Problems and Solutions
Calibration does not start if the door is not fully closed. Ensure the door latch engages and check for obstructions or damage. No display response usually means buttons were not held long enough. Power off, then power on while holding required buttons for 3 seconds.
The “Cb” code not appearing on Samsung models indicates an incorrect button combination. Verify your model-specific method and consult Samsung Support if needed. Machine shaking after calibration means the unit is not level or transit bolts remain installed. Re-level the machine and remove all shipping bolts.
LEDs not flashing on knob models indicates incorrect sequence or timing. Repeat with deliberate pauses and ensure the knob starts at the correct position. Calibration cycles that interrupt mid-process usually result from power fluctuation. Use a direct wall outlet and avoid surge protectors during calibration.
How to Verify Successful Calibration
After calibration, run a test wash cycle with a small, balanced load to confirm proper operation. Verify that water fills and drains normally. Confirm the drum spins smoothly without vibration or noise. Ensure the cycle completes without errors and no error codes appear.
Successful calibration results in quiet, stable operation with improved efficiency. You may notice up to 20% reduction in water usage compared to an uncalibrated machine.
Frequently Asked Questions About Washing Machine Calibration
How long does washing machine calibration take?
Calibration typically lasts 2 to 4 minutes depending on the model. Most machines end with automatic shutdown, so no manual intervention is required when the process completes.
Do I need to add water for calibration?
No. The drum must be completely empty before calibration. If water is present, the machine will drain it automatically before the calibration process begins.
Can I skip calibration after moving my washer?
No. Skipping calibration after any relocation, even over short distances, can cause excessive vibration, poor performance, and trigger error codes. Always calibrate after moving your machine.
What happens if I don’t remove transit bolts?
Leaving transit bolts in place prevents proper drum movement and causes severe vibration during operation. This will prevent successful calibration and can damage internal components over time.
Why does my washer still shake after calibration?
If shaking persists after calibration, the machine likely was not properly leveled or transit bolts were not removed. Re-check leveling and verify all shipping bolts have been taken out.
Key Takeaways for Calibrating Your Washing Machine
Calibration is not optional after installation, relocation, or repair. It is the essential step that ensures your washing machine runs quietly, efficiently, and without error codes. The process re-synchronizes the motor, drum, and sensors to restore proper function.
Always prepare properly before calibrating. Empty the drum, remove transit bolts, level the machine, and ensure stable power. Follow your model’s specific procedure, whether using button combinations on Samsung or the knob sequence on Whirlpool and affiliated brands.
After calibration, run a test cycle to verify success. If problems persist, repeat the calibration process or consult manufacturer support for additional troubleshooting guidance.