How to Use a Pressure Washer
Grime-covered driveways, dingy siding, and mossy decks can make any home look neglected. A pressure washer cuts through years of buildup in minutes, but only if you know how to use a pressure washer correctly. These machines blast water at extreme force, capable of stripping paint, gouging wood, or injuring skin within seconds.
This guide walks you through every step from setup to storage. You’ll learn which safety gear matters most, how to pick the perfect day for cleaning, and which nozzle works for each surface. By the end, you’ll handle your pressure washer with the confidence of a pro.
Essential Safety Gear You Need Before Starting
Your safety comes first when handling high-pressure water. The stream can penetrate skin or send debris flying at dangerous speeds. Skipping protective gear puts you at risk of serious injury.
Protect Your Eyes with Impact-Rated Glasses
Always wear safety glasses or goggles rated for impact protection. Water kicks up dirt, stones, and loose material that can strike your eyes with surprising force. Regular sunglasses or prescription lenses offer no defense against flying debris.
Wear Closed-Toe, Slip-Resistant Footwear
Never operate a pressure washer barefoot or in sandals. Sturdy work boots or rubber-soled shoes protect your feet from spray recoil and wet, slippery surfaces. Choose footwear with deep treads to prevent falls on wet concrete or decking.
Dress for Splash and Flying Debris
Wear long pants and a long-sleeve shirt made of durable fabric. Even light mist can soak through thin clothing, and wind may blow spray back toward you. Avoid loose garments that could snag on the equipment.
Pro tip: Add waterproof gloves for better grip and skin protection, especially when working with detergent or running long cleaning sessions.
Choose the Best Weather Conditions for Cleaning
Timing your job right improves both results and safety. Weather affects drying time, spray control, and overall effectiveness.
Skip Rainy or Windy Days
Cleaning during rain dilutes detergent and prevents proper drying. Wind spreads mist unpredictably, risking overspray onto windows, electrical outlets, or your neighbor’s property. Wait for calm, dry conditions to get the job done right.
Pick Sunny, Calm Mornings or Afternoons
A dry, sunny day with minimal wind delivers the best results. Sun helps surfaces dry quickly and reveals spots you may have missed. Morning or early afternoon gives you enough daylight to finish without rushing.
Warning: Never use a pressure washer near overhead power lines or electrical boxes. Water conducts electricity, so maintain at least a 10-foot distance from any electrical source.
Clear and Prep Your Work Area
Preparation prevents accidents and boosts cleaning efficiency. A few minutes of setup saves hours of frustration later.
Move Furniture, Plants, and Decor Out of the Way
Take away patio furniture, potted plants, grills, and outdoor decorations. High-pressure spray can tip over items or force water into electronics and storage compartments. Anything you cannot move should be covered with plastic sheeting.
Sweep Loose Debris Before Washing
Use a broom or leaf blower to clear dirt, leaves, rocks, and cobwebs from the surface. Removing loose material prevents nozzle clogs and reduces splashback of grit during washing.
Shield Windows, Outlets, and Delicate Features
Cover outdoor electrical outlets, light fixtures, and HVAC units with plastic sheeting. Close nearby windows and doors. If cleaning near siding, shield windows with cardboard or plywood to avoid accidental etching from stray spray.
Expert note: Keep pets and children well away from the work zone, both during and after cleaning. Wet surfaces stay slippery for hours, and residual pressure in the hose can be hazardous.
Connect and Prime Your Pressure Washer
Proper setup prevents pump damage and ensures smooth operation. Rushing this step often leads to costly repairs.
Flush the Garden Hose Before Attaching
Before connecting, run water through the garden hose for at least 30 seconds. This flushes out sediment or rust, especially if the hose sat outside over winter. Debris can clog the pressure washer’s filter or valves.
Use an Outdoor-Rated Extension Cord
If your electric model needs power, plug it into a GFCI outlet. Use only extension cords rated for outdoor use that match the washer’s amperage. Indoor cords overheat quickly and pose serious fire risks.
Check for Kinks, Leaks, and Proper Water Flow
Connect the hose to the washer’s inlet and make sure it fits tight. Inspect the entire length for kinks or cracks. A restricted flow damages the pump. Turn on the water supply before powering the unit to prime the system and prevent dry running.
Purge Trapped Air from the System
With the trigger locked open, turn on the pressure washer. Hold it for 5 to 10 seconds to release trapped air. This stabilizes pressure and avoids sudden surges when you start spraying.
Never start the machine with a closed trigger and no water flow. This causes overpressurization and can damage internal components beyond repair.
Select the Right Nozzle for Each Job
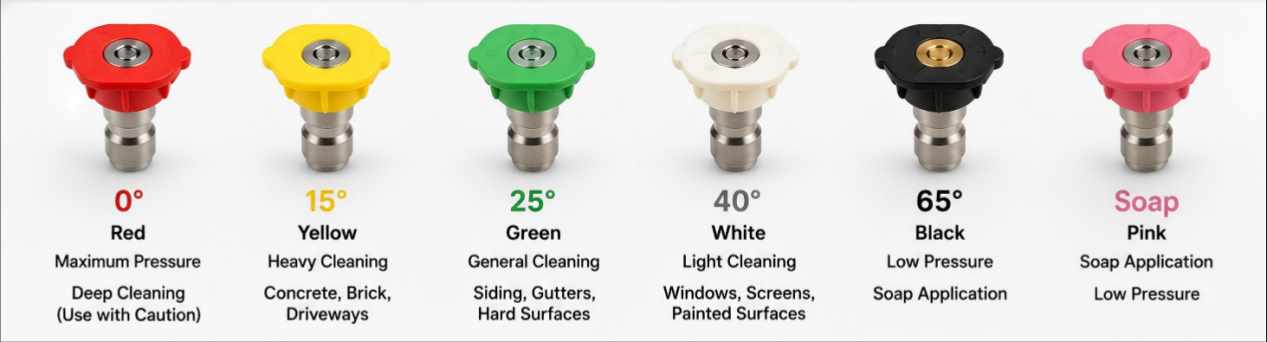
Nozzles control spray pattern and pressure. Using the wrong one damages surfaces or reduces cleaning power.
| Nozzle Angle | Pressure Level | Best For |
|---|---|---|
| 0° (Red) | Highest | Stubborn stains, graffiti, concrete etching |
| 15° (Yellow) | High | Driveways, sidewalks, heavy buildup |
| 25° (Green) | Medium | Decks, fences, general siding |
| 40° (White) | Low | Rinsing, delicate surfaces, detergent application |
| Soap (Black) | Very Low | Applying cleaning solutions |
Start with Wider Angles on Delicate Surfaces
Begin with a 40° or 25° nozzle to test how the surface reacts. You can always switch to a narrower tip for tougher spots. Never use a 0° nozzle on wood, vinyl, or soft stucco because its pinpoint stream carves grooves instantly.
Attach the Nozzle Before Turning On the Machine
Always secure the nozzle to the lance before starting the pressure washer. An unattached spray wand whips around dangerously under pressure and can cause serious injury.
Pro tip: Label your nozzles with colored tape if they are not color-coded. It speeds up changes between tasks and prevents costly mistakes.
Speed Up Large Jobs with a Surface Cleaner Attachment
Flat, expansive surfaces like driveways or patios clean faster and more evenly with the right tool.
Why a Surface Cleaner Beats Manual Spraying
A surface cleaner attachment:
- Distributes pressure evenly across the surface
- Prevents streaks and lines from manual spraying
- Reduces risk of damage from concentrated spray
- Cuts cleaning time by up to 50%
How to Operate a Surface Cleaner Correctly
- Attach the surface cleaner to the high-pressure hose.
- Lower it onto the surface before pulling the trigger.
- Move in slow, overlapping passes, just like mowing a lawn.
- Overlap each pass by half to ensure full coverage.
Warning: Don’t hover or hold the unit in one place. Prolonged exposure still etches concrete or damages pavers.
Master the Correct Spraying Technique
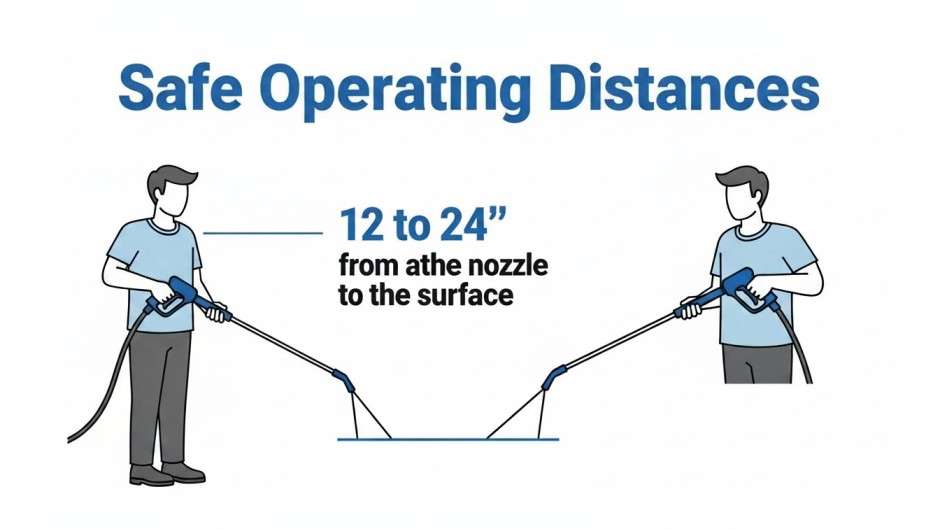
Technique determines both safety and cleaning performance. Even the right nozzle fails without proper motion.
Maintain a Safe Distance from the Surface
Hold the spray wand 12 to 24 inches away from the surface. Closer distances increase impact and risk damage. For delicate materials like cedar or vinyl, stay at least 2 feet back at all times.
Use Slow, Overlapping Horizontal Strokes
Move the wand in slow, side-to-side motions, overlapping each pass by 50%. This ensures even cleaning and prevents missed strips. Avoid vertical strokes on siding because water can seep behind panels.
Keep the Nozzle Moving at All Times
Pausing the spray in one spot, even for 2 to 3 seconds, etches concrete, splinters wood, or blows out grout. Keep the wand moving at a steady pace throughout the entire job.
Work Top to Bottom on Vertical Surfaces
Start at the top of walls or siding and work downward. This prevents dirty runoff from re-soiling clean areas below. Rinse as you go to maintain visibility.
Expert note: On multi-story homes, use a stable ladder and maintain three points of contact. Never overreach; reposition frequently instead.
Apply Detergent the Right Way

Detergent loosens grease, mold, and dirt so rinsing takes less time and pressure. Used incorrectly, it damages equipment and leaves residue.
Use Only Pressure Washer-Specific Cleaners
Never use dish soap, bleach, or household cleaners because they damage seals, pumps, and injectors. Choose formulated pressure washer detergents designed for your surface type, such as concrete, wood, or vinyl.
Switch to a Low-Pressure Nozzle for Soap
Use the 40° (white) or soap (black) nozzle before applying chemical. High pressure breaks down detergent before it can work. Connect the detergent siphon tube to the low-pressure line.
Let Detergent Dwell Before Rinsing
Spray detergent in overlapping horizontal passes, starting at the bottom to prevent streaks. Let it sit for 3 to 5 minutes without letting it dry. This dwell time breaks down grime effectively.
Flush the Detergent System After Use
Switch back to a 25° or 15° nozzle and rinse from top to bottom. Ensure all soap residue is gone because leftover detergent attracts dirt and causes discoloration. Fill the tank with clean water and run it through the system to prevent clogs.
Critical step: Cleaning the detergent tank after each use prevents residue buildup and keeps the injector working properly.
Shut Down and Store Your Equipment Properly
Proper shutdown extends your machine’s life and prevents damage. Skipping this step shortens equipment lifespan.
Release Pressure and Disconnect Hoses
- Power down the unit completely.
- Pull the trigger to release built-up pressure in the hose.
- Turn off the water supply and disconnect the hose.
Clean Nozzles and Drain Water Before Storage
Remove nozzles and clean them with a pin or thin wire if clogged. Store them in a labeled case. Drain water from the hose, especially in cold climates, because leftover water freezes and cracks components.
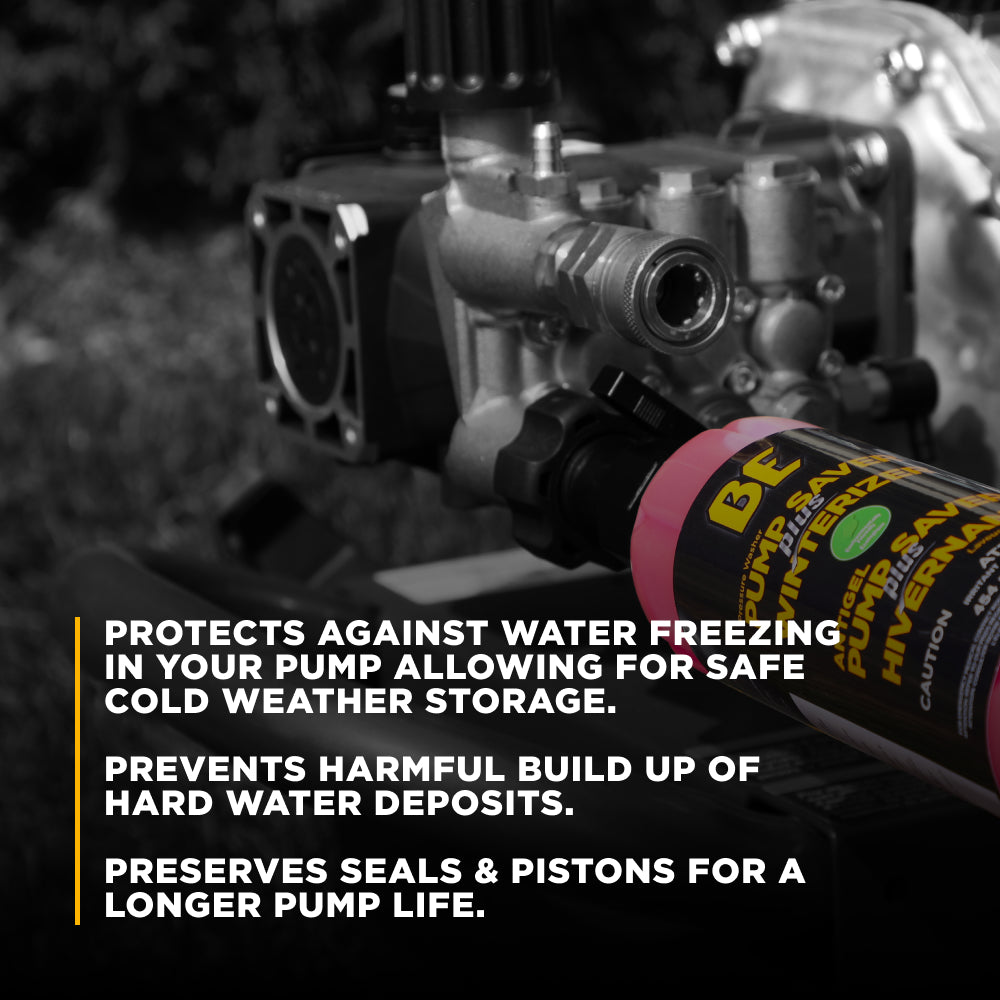
Winterize the Pump in Cold Climates
For cold-weather storage, use a pump saver antifreeze solution. Run it through the system to protect internal seals from freezing and cracking during winter months.
Pro tip: Wipe down the frame with a dry cloth to prevent rust and store indoors whenever possible.
Frequently Asked Questions About Pressure Washers
What PSI pressure washer do I need for home use?
For most home cleaning tasks like driveways, siding, and decks, a washer between 2,000 and 3,000 PSI works well. Light-duty tasks like patio furniture or cars need around 1,500 to 2,000 PSI. Higher PSI means more cleaning power but also more risk of surface damage.
Can a pressure washer damage concrete?
Yes, especially with narrow nozzles or when held too close. A 0° nozzle or holding the wand stationary can etch concrete permanently. Use a 25° or 40° nozzle and keep the wand moving to clean safely.
Is it safe to use a pressure washer on a ladder?
It is risky because the recoil can throw you off balance. If you must use a ladder, maintain three points of contact and never overreach. Extension wands or hiring a professional for multi-story work is safer.
What surfaces should I avoid pressure washing?
Avoid pressure washing asphalt shingles, windows, painted surfaces in poor condition, and delicate wood like cedar. These materials strip, crack, or splinter easily under high pressure. Always test a small area first.
How often should I service my pressure washer?
Perform basic maintenance after every use, including flushing the system and cleaning nozzles. Change the pump oil every 50 to 100 hours of use or once per season. Inspect hoses and seals annually for wear.
Can I use bleach in my pressure washer?
Only use bleach if your pressure washer is specifically rated for chemical use, and always dilute it properly. Household bleach in concentrated amounts damages seals and pumps. Pressure washer-formulated cleaners work better and protect your equipment.
Key Takeaways for Using a Pressure Washer Safely
Mastering how to use a pressure washer comes down to three essentials: proper preparation, correct technique, and consistent maintenance. Always wear safety gear, pick calm dry weather, and start with wider nozzles before moving to more aggressive options. Test small areas first and keep the wand moving to prevent damage.
Your next step is simple. Pick a sunny day, gather your safety gear, and start with a low-pressure test on an inconspicuous area. Once you see how the surface reacts, work your way up to full cleaning passes. With practice, you’ll tackle driveways, siding, and decks like a seasoned pro. For more home maintenance guides, visit familyhandyman.com.