How to Fix Washing Machine Water Leakage
A leaking washing machine is more than just a mess. It is a ticking time bomb for water damage, mold growth, and costly repairs. If you have noticed puddles around your washer, damp flooring, or musty smells, you are not alone. Water leakage in washing machines affects nearly every household at some point, and while it can stem from simple oversights like overloading, it may also signal serious internal failures. The good news? 85% of leaks are fixable with basic DIY skills. This guide walks you through every possible cause, how to diagnose the exact source, and step-by-step fixes.
You will learn how to pinpoint whether the leak happens during fill, drain, or when the machine is idle. You will discover why replacing hoses every 5 years is not just advice. It is a safety standard that can save you thousands in water damage. And you will get practical tips to prevent future leaks, from choosing the right detergent to installing flood-stop devices. Whether you are dealing with a dripping hose, a damaged door seal, or a mysterious puddle under the machine, this guide arms you with everything needed to stop the leak and keep it gone.
Identify When the Leak Occurs
The timing of the leak reveals the culprit. Diagnose by observing during a test cycle.
During Fill Cycle
If water appears when the machine is filling, the issue is in the inlet system.
• Check inlet hoses at the back for loose connections or bulging
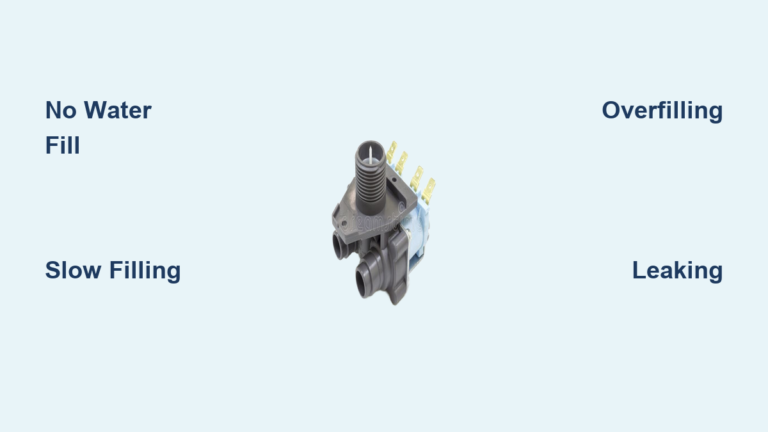
• Inspect the inlet valve. A slow drip when idle often means a failing valve
• Test water pressure. Over 80 psi can force water past seals even on new hoses
• Look for overfilling. If water keeps rising, the pressure switch may be faulty
Pro Tip: Wipe the drum dry, unplug the machine, and wait 6 to 12 hours. If water reappears, the inlet valve or control board is leaking.
During Wash or Spin Cycle
Leaks during agitation or high-speed spin point to mechanical stress or seal failure.
• Overloading is the number one cause. 35% of all leaks stem from too much laundry
• Front-loaders: Check the door gasket for tears or misalignment
• Top-loaders: Inspect the lid seal and tub cover
• Unbalanced loads cause violent shaking, loosening hoses or cracking internal parts
Visual Cue: Water spraying from the front? Likely a damaged gasket or overfill due to suds buildup.
During Drain Cycle
If the leak happens as water exits, the drain system is compromised.
• Drain hose: Look for cracks, kinks, or loose clamps
• Pump filter: A clog forces water backward, causing overflow
• Standpipe blockage: Test by disconnecting the hose and running a drain cycle into a bucket
Quick Test: If water flows freely into the bucket, the clog is in your home is plumbing, not the machine.
When Machine Is Off
Idle leaks are sneaky but serious.
• Faulty inlet valve is the most common cause. Mineral buildup prevents it from sealing
• Backflow can occur if the drain hose is inserted too deep into the standpipe
• Control board malfunction may trigger unintended fill cycles
Expert Note: A machine filling overnight? Turn off water valves until repaired.
Fix Loose or Damaged Hoses
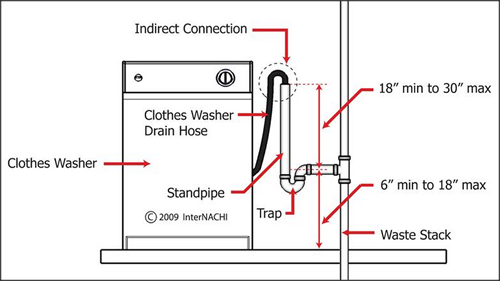
Hoses are the number one source of major leaks. Address them first.
Tighten Inlet Hose Connections
- Turn off water supply valves behind the machine
- Use an adjustable wrench to snug both ends of the hot and cold inlet hoses
- Do not over-tighten. This can crack fittings
- Replace worn rubber washers inside hose ends. Cost is under $5
Upgrade: Swap rubber hoses for stainless steel braided hoses. They resist bursting and last longer.
Replace Cracked Drain Hose
• Locate the hose at the back, connected to the drain pump
• Disconnect from the standpipe and pump, placing a towel underneath
• Inspect entire length for splits or soft spots
• Replace if damaged. Cost is $15 to $30
Installation Rule: Form a high loop 30 to 96 inches above floor to prevent siphoning.
Prevent Siphoning and Backflow
• Do not insert drain hose more than 4 to 6 inches into standpipe
• Secure the high loop with a hose clamp to the side of the machine
• Ensure the standpipe is properly vented. Gurgling sounds indicate poor airflow
Insurance Alert: Many insurers will not cover water damage from hoses older than 5 years.
Repair Door Seal or Lid Gasket
Front-loaders are especially prone to gasket leaks.
Inspect the Door Seal
• Open the door and examine the entire rubber gasket
• Focus on the bottom, where water, lint, and mold accumulate
• Feel for cracks, tears, or permanent folds
Warning: A brittle or swollen gasket must be replaced. Cleaning will not fix structural damage.
Clean Mold and Debris
• Mix equal parts white vinegar and water
• Use a soft brush to scrub the gasket weekly
• Wipe dry with a microfiber cloth
Pro Tip: Add a cup of vinegar to an empty hot cycle monthly to sanitize the entire drum.
Replace Damaged Gasket
- Unplug machine and remove front panel if needed
- Peel the old gasket from the door frame and tub lip
- Lubricate the new gasket with soapy water before installation
- Press evenly into place. Ensure no twists or gaps
Prevention: Leave the door ajar after each use to dry the seal and prevent mold.
Clear Clogged Drain and Pump

A clog forces water to escape where it should not.
Clean the Pump Filter
• Found at the front bottom of most front-loaders. Look for a small access panel
• Place a bucket underneath before opening
• Unscrew cap slowly. Water will spill out
• Remove lint, coins, hair, or socks
Maintenance: Clean monthly to prevent 40% of drain-related leaks.
Unclog the Drain Hose
• Disconnect from pump and inspect with a flashlight
• Use a plumber is snake or garden hose to flush blockages
• Reattach with a compression clamp. Never use zip ties
Check the Standpipe
• Remove hose from standpipe and flush with hot water
• Use a plumber is auger for stubborn clogs
• Ensure the pipe is at least 18 inches high and not blocked
DIY Shortcut: Run a drain-only cycle with the hose in a bucket. If water flows, the issue is in your home is plumbing.
Replace Faulty Inlet Valve
A failing inlet valve causes slow leaks when the machine is off.
Diagnose Valve Failure
• Unplug washer and turn off water
• Remove inlet hoses and inspect valve for rust, cracks, or debris
• Dry the drum and wait 6 to 12 hours. If water returns, the valve is faulty
Sign: Water dripping into the drum overnight? It is likely the inlet valve.
Replace the Valve
- Unplug machine and shut off water
- Place towels under the valve
- Disconnect inlet hoses and electrical connectors. Usually red, white, blue
- Remove two Phillips screws and pull out the valve
- Install the exact model replacement. Match part number
- Reconnect hoses and wires
- Test for leaks
Prevention: Clean inlet screens annually with vinegar to prevent mineral buildup.
Fix Leaking Drain Pump
Water pooling under the machine during drain? The pump may be cracked.
Locate and Inspect the Pump
• Access via front or bottom panel
• Shine a flashlight during a drain cycle. Look for drips near the pump
• Check hose connections for looseness
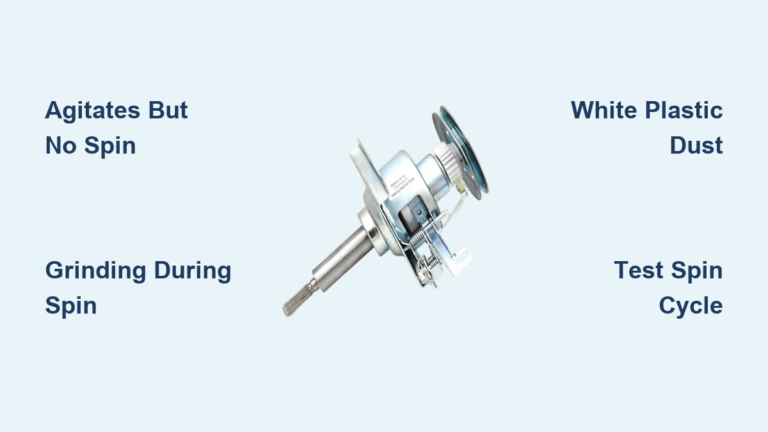
Symptom: Grinding noise plus leak equals likely a damaged impeller.
Replace the Pump
- Disconnect power and water
- Remove clamp and hose from pump outlet
- Unscrew mounting bolts and disconnect electrical plug
- Install new pump and reconnect all parts
- Use compression clamps on hoses. Never reuse old ones
Difficulty: Intermediate. Consider professional help if uncomfortable.
Address Tub or Internal Hose Leaks
Internal leaks require disassembly but are often the root cause.
Inspect Internal Hoses
• Remove top or front panel
• Check tub-to-pump hose and return hose for cracks
• Replace if brittle or split. Cost is $10 to $20
Best Practice: Use compression clamps, not zip ties, for secure connections.
Diagnose Tub Damage
• Look for rust, cracks, or moisture around the drive shaft
• Failed tub-to-bearing seal allows water to leak down the shaft
Reality Check: Tub replacement takes 3 to 4 hours and costs $400 to $700. For machines over 8 years old, replacement may be smarter.
Level the Washing Machine
An unlevel washer vibrates, loosens parts, and leaks.
Adjust Leveling Feet
• Use a spirit level on the top of the machine
• Rotate front feet clockwise to raise, counterclockwise to lower
• Ensure stability side-to-side and front-to-back
Test: Run a spin cycle. No rocking means it is level.
Maintenance: Recheck every 3 to 6 months, especially on wooden floors.
Prevent Future Leaks
Stop leaks before they start with simple habits.
Use HE Detergent and Correct Amount
• Non-HE detergent in HE machines creates excessive suds that back up into overflow tubes
• Test. Swirl a washed garment in clean water. If suds form, you are using too much
Fix: Switch to HE detergent and follow dosage on the bottle.
Install Leak Protection
• Flood-stop device. Shuts off water automatically when a leak is detected. Cost is $80 to $150
• Leak tray. Slips under the machine to catch drips. Ideal for upstairs laundry rooms
Follow 5-Year Hose Rule
• Replace all hoses every 5 years, even if they look fine
• Braided stainless steel hoses are the gold standard
Statistic: A burst hose releases 10 plus liters per minute. Enough to flood a room in minutes.
When to Call a Professional
Some repairs are not DIY-friendly.
Seek Expert Help If
• Leak is inside the tub or around the drive shaft
• Control board or pressure switch is suspected
• You have replaced parts but the leak continues
• The machine is over 8 years old with major component failure
Cost Guide:
• Diagnosis: $100 to $200
• Pump or hose replacement: $80 to $150
• Tub or bearing repair: $300 to $600
Rule of Thumb: If repair cost exceeds 50% of a new machine, replace it.
Frequently Asked Questions About Water Leakage in Washing Machines
Why is my washing machine leaking from the bottom?
A leak from the bottom typically points to a failing drain pump, cracked internal hose, or damaged tub seal. Access the bottom panel and run a cycle to pinpoint the source. A grinding noise with the leak suggests pump impeller damage.
Can I fix a leaking washing machine myself?
Yes. 85% of leaks are fixable with basic DIY skills. Common fixes include tightening hose connections, cleaning the pump filter, replacing the door gasket, and upgrading to braided hoses. Professional help is needed for tub, control board, or internal component failures.
How often should I replace washing machine hoses?
Replace hoses every 5 years regardless of appearance. This is the industry standard and required by many insurance policies. Braided stainless steel hoses are recommended for superior burst resistance.
Why does my washing machine leak only during the spin cycle?
This usually indicates overloading, an unbalanced load, or a damaged door gasket. Reduce load size, distribute laundry evenly, and inspect the gasket for tears or debris buildup.
What causes a washing machine to leak when it is off?
A leak when the machine is off points to a faulty inlet valve that is not sealing properly, or backflow from the drain hose inserted too deeply into the standpipe. Check the inlet valve first, as it is the most common cause.
Is it worth repairing a leaking washing machine?
It depends on age and issue. Repair if the machine is under 8 years and the problem is minor like a hose, seal, or pump. Replace if the machine is over 8 years with major component failure or if repair costs exceed half the price of a new unit.
Key Takeaways for Fixing Water Leakage in Washing Machines
A leaking washing machine is rarely a reason for immediate replacement. With systematic diagnosis and targeted repairs, most issues can be resolved affordably. The key is identifying when the leak occurs. Fill cycle leaks point to inlet valves or hoses, drain cycle leaks indicate pump or hose problems, and idle leaks suggest valve failure. Always start with the simplest fixes. Tighten connections, clean filters, and replace worn washers before tackling major components.
Preventive maintenance extends machine life to 10 to 15 years. Clean door gaskets weekly, replace hoses every 5 years, use HE detergent correctly, and keep the machine level. Consider installing a flood-stop device for added protection. Remember that a small drip today can become major water damage tomorrow. Address leaks promptly, and your washing machine will serve you reliably for years to come.