Washing Machine Agitator Repair: Quick Fix Guide
If your top-loading washing machine leaves clothes dirty or tangled, the problem is likely a failed washing machine agitator. When the top of the agitator stops spinning while the bottom turns freely, or it rotates in both directions without resistance, the culprit is usually worn agitator dogs, small plastic ratcheting parts inside the unit. This repair is common, affordable, and completely DIY-friendly.
This guide walks you through diagnosing the issue, finding the right parts, and completing the repair in 30-90 minutes with basic tools and a $10 repair kit. You will restore full agitation power and avoid a costly service call.
Diagnose the Problem Before Buying Parts
Before purchasing anything, confirm the agitator is actually the problem. A simple hand test takes less than a minute and prevents wasted parts and effort.
Hand Test for Broken Agitator Dogs
- Unplug the washer or turn off power at the breaker.
- Open the lid and grip the agitator firmly.
- Rotate it by hand:
– Normal behavior: Turns easily clockwise, locks when reversed.
– Faulty behavior: Spins freely in both directions without resistance.
If the agitator spins both ways, the agitator dogs have failed and need replacement.
Signs Your Agitator Needs Attention
Watch for these symptoms indicating internal component wear:
- Top of agitator does not move during wash cycle
- Lower base spins, but clothes aren’t being pulled through the water
- Clothes come out still dirty or tangled underneath
- Clicking or grinding noises during agitation
- Wobbling or side-to-side movement during operation
These signs point to worn plastic parts like dogs, cams, and thrust washers inside the agitator assembly.
Identify Which Component Failed

Most agitator failures stem from one of four internal parts. Knowing what each does helps you understand the repair and ensure you replace the right components.
Agitator Dogs: The Ratcheting Mechanism
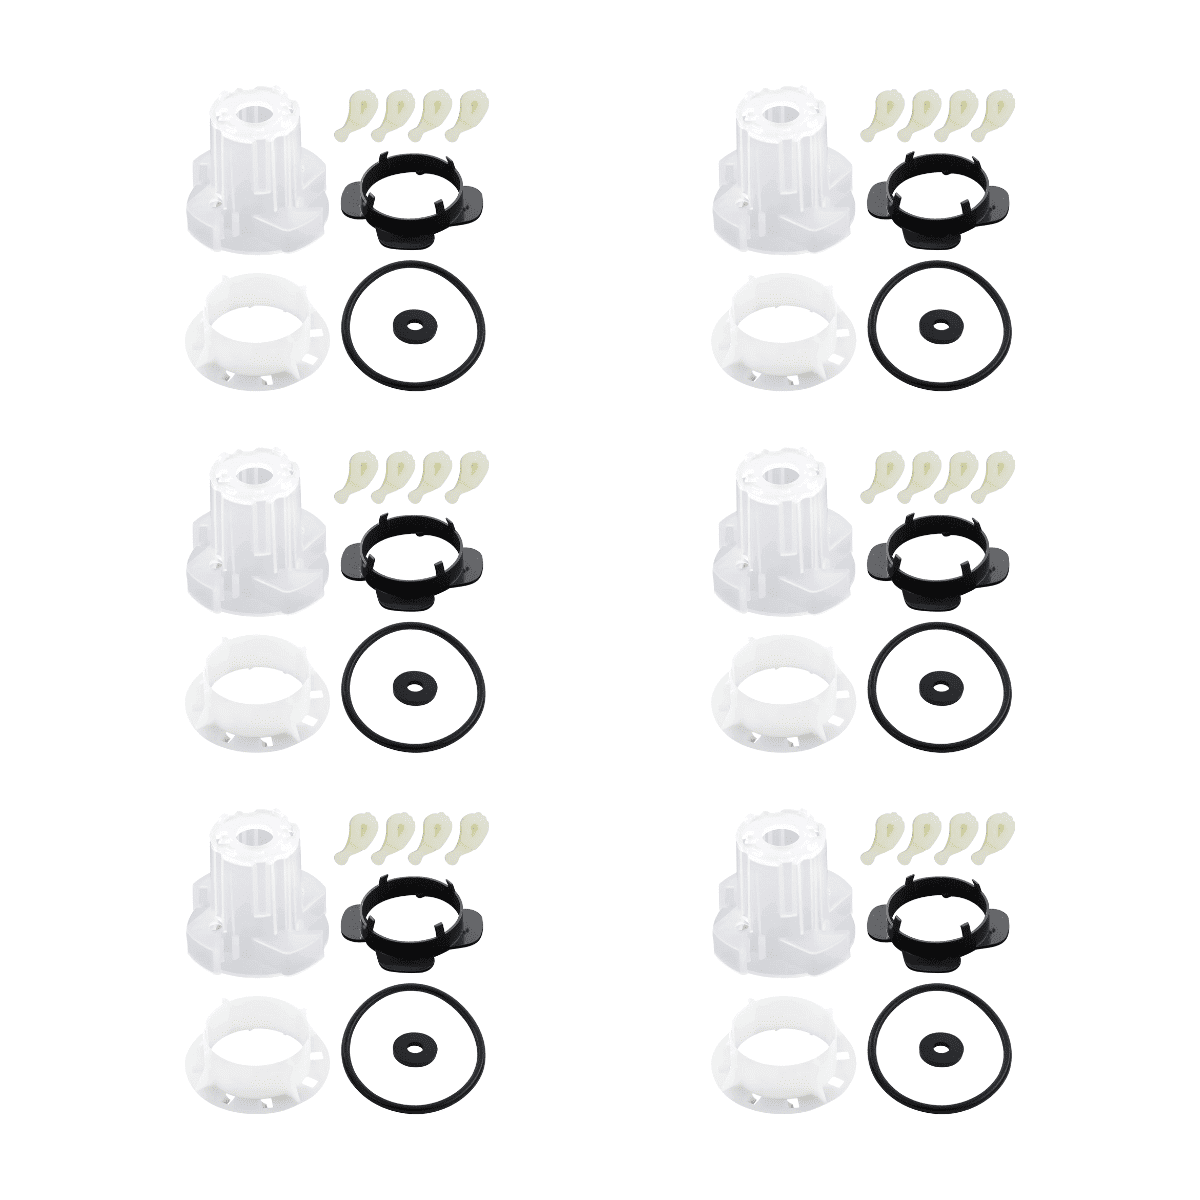
Agitator dogs are small plastic ratcheting teeth, approximately one inch long, shaped like commas or hooks. Four of these sit inside the upper agitator, held by the cam assembly. Their job is simple: allow clockwise rotation while locking during counter-clockwise motion, creating the oscillation needed for cleaning.
These plastic parts wear out from repeated stress, heavy loads, and age. When cracked or worn, the top agitator slips and stops agitating.
Pro Tip: Always replace all four dogs at once. Mixing old and new parts causes uneven wear and early failure.
Cam Assembly: The Connector
The cam is a clear plastic shaft with slots that hold the agitator dogs. It comes in three sizes: short, medium, and long. The correct size must match your washing machine model exactly.
The cam connects the upper and lower agitator halves using locking tabs. Some repair guides recommend cutting off these tabs after installation for easier future access, though this deviates from the original design.
Caution: Some replacement cams don’t fit perfectly even with correct part numbers. Test fit before final assembly.
Thrust Washer: The Friction Reducer
The thrust washer is a flared plastic ring, approximately 1.25 inches in diameter, sitting between the agitator base and the transmission shaft. It reduces friction and prevents wobble during operation.
This part should be replaced every time you open the agitator, even if it looks fine. A small amount of grease on the top surface during reinstallation extends its life.
Center Bolt and Seal: The Secure Connection
A 7/16-inch or 11 mm hex bolt holds the agitator to the drive shaft, hidden under a plastic dust cap and rubber O-ring. The O-ring seals out water and detergent.
When reinstalling, lubricate the seal with a drop of liquid soap to prevent pinching. Never use penetrating oil on a stuck bolt, as residue can contaminate future laundry loads.
Gather Tools for the Job
You need only standard household tools for this repair. No specialty equipment required.
Tools List
- Socket wrench with ratchet
- Extension bar (10+ inches)
- 7/16-inch socket (most common)
- 11 mm socket (for Whirlpool, Kenmore)
- Flathead screwdriver
- Needle-nose pliers
- Standard pliers
- Broom handle or lever bar
- Flat nylon strap (like a dog leash)
- Toothbrush and mild detergent
- Clean rag
- Small amount of grease
Time-Saver: Use a nylon strap and broom handle to lift a stuck agitator safely without yanking.
Find Your Model Number and Correct Parts
Using the wrong repair kit leads to poor fit and failed repairs. Always verify your model first.
Where Model Numbers Are Located
Look for the model number in these common locations:
- Inside the washer lid
- On the back panel
- Behind the front kickplate
- Near the door opening
Write down the model number, serial number, and type designation (such as Kenmore Type 111).
Match Parts to Your Washer
Use your model number on parts supplier websites like AppliancePartsPros.com, RepairClinic.com, or Sears Parts Direct. Search for “agitator repair kit” or “agitator dogs.”
Confirm these specifications before purchasing:
- Cam size (short, medium, or long)
- Bolt size (7/16-inch, 11 mm, or square drive)
- Kit contents: dogs, cam, thrust washer, O-ring, and cap
User Insight: Many report success with OEM-equivalent kits under $8 on Amazon with two-day shipping.
Step-by-Step Agitator Repair Procedure
Follow these steps carefully to avoid damage and ensure long-lasting results.
1. Prepare the Washer
Unplug the machine or cut power at the breaker. Ensure the tub is empty and dry. Open the lid fully.
2. Remove the Fabric Softener Dispenser
Pull the dispenser straight up to remove it. Some models have a locking ring that requires upward pulling to release. Clean with warm, soapy water while it’s out.
3. Access the Center Bolt
Look into the agitator’s center. Pry off the dust cap with a flathead screwdriver. Remove the black O-ring using needle-nose pliers. If present, remove the plastic retaining clip with pliers.
Wipe the area with a rag to remove detergent buildup.
4. Remove the Agitator Bolt
Identify your bolt size. Most use 7/16-inch, though Whirlpool and Kenmore often use 11 mm. Older models may have a 1/2-inch square drive.
Attach the correct socket and extension. Hold the lower agitator base steady with your foot to prevent spin. Turn counter-clockwise to loosen and remove the bolt.
Warning: Do not use WD-40 or penetrating oil. If the bolt is stripped, seek professional help.
5. Pull Out the Agitator
Grasp the base lip and pull straight up. If stuck, loop a nylon strap around the base, lay a broom handle across the washer top, and use it as a lever to apply even upward force.
Pro Move: Standing on the base while pulling can help, but don’t crack the plastic.
6. Separate the Agitator Halves
Place the agitator upright on the floor. Stand on the lower base to secure it. Pull the upper section straight up to separate it from the lower base.
This exposes the cam, dogs, and thrust washer for replacement.
7. Inspect and Remove Old Parts
Flip the upper agitator upside down to dump debris. Remove the old cam assembly, agitator dogs, and thrust washer from the lower base.
Check for these problems:
- Cracked or missing dog teeth
- Worn splines inside the shaft
- Damaged cam or locking tabs
- Flattened or cracked thrust washer
Replace the thrust washer every time, even if it looks okay.
8. Clean the Spline Area
Use a toothbrush and dish soap to scrub the inner splines. Remove all soap scum, grit, and plastic fragments. Wipe dry with a clean cloth.
Skipping this step reduces grip and causes early failure.
9. Install New Components
Load the new cam and dogs by inserting all four new dogs into the cam. The curve of each dog faces outward, and notches face inward. Never install upside down, as only the correct orientation locks properly.
Press the cam spacer onto the cam until it snaps. Insert the new cam assembly into the upper agitator.
For the thrust washer, remove the old one from the lower base. Install the new one with the flared side facing up. Add a small dab of grease to the top surface.
10. Reconnect the Agitator Halves
Align the cam’s locking tabs with the slots in the lower base. Press the upper section down firmly until it clicks into place.
Test by rotating clockwise (should spin) and reversing (should lock).
11. Reinstall the Agitator
Align the splined base with the transmission shaft. Lower it straight down until fully seated. Reinsert the center bolt.
12. Tighten the Center Bolt
Use the socket wrench to tighten clockwise. Hold the lower base steady. Tighten to snug plus a quarter-turn past hand-tight. Do not overtighten, as this cracks the plastic housing.
Rule of Thumb: Snug is secure, not strained.
13. Replace Seals and Covers
Slide the O-ring back onto the spindle. Press the dust cap into place. If the seal is damaged, use the new one from the kit.
Lubricate the O-ring with a drop of liquid detergent to prevent folding. Reinsert the fabric softener dispenser.
Test Your Repair
Verification ensures your fix works long-term. Don’t skip this step.
Manual Rotation Test
Turn the agitator by hand. It should spin freely clockwise and lock when reversed. If it still spins both ways, check dog orientation or cam fit.
Run a Wash Cycle
Restore power. Start a short wash cycle with a small load. Observe full top-to-bottom movement, no unusual noises, and proper oscillation of the upper agitator. Check for leaks at the base.
Success Indicators: Clothes come out cleaner, no tangling, and smooth operation.
Common Mistakes That Ruin DIY Repairs
Even experienced DIYers make these errors. Avoid them to ensure your repair succeeds.
- Mixing old and new agitator dogs causes uneven wear and early failure.
- Installing dogs upside down prevents locking action entirely.
- Overtightening the center bolt cracks the housing and causes leaks.
- Skipping spline cleaning reduces grip and performance.
- Ignoring cam fit issues causes slippage despite new parts.
- Using oil on the bolt contaminates future laundry loads.
- Forcing stuck parts without leverage damages the transmission.
Stop if Stuck: If the agitator won’t come out or the bolt is seized, call a professional.
When to Replace the Entire Agitator

DIY repair won’t work if the agitator itself is damaged.
Replace the whole unit if the base is cracked or broken, the splines are stripped and won’t grip the shaft, there are multiple fractures in the plastic housing, or the washer is 6-8 years old and repairs keep failing.
Real-World Note: One user replaced a six-year-old agitator after the bottom cracked. A full unit cost approximately $60.
Professional Help: Know When to Call
Seek expert help if the center bolt is stripped or corroded and can’t be removed, the transmission shaft is damaged, the agitator base is broken and hard to remove, you’ve tried twice and the top still won’t turn, or you’re uncomfortable using tools near electrical components.
Warning: Forcing removal can damage the drum or transmission, leading to costly repairs.
Brand-Specific Tips for Your Washer
Whirlpool
Most Whirlpool models use an 11 mm bolt. Agitator dogs slide in and out easily. Common models include WTW4800XQ, WTW5000DW, and LA5510XTSB. Always replace the seal.
Kenmore
Kenmore often shares platforms with Whirlpool. Check model type: 110, 111, or 417. May use 7/16-inch or 11 mm bolt depending on manufacturing year.
Maytag
Verify cam size before ordering, as some models have unique cam designs.
GE
Older GE models use plastic square-drive nuts instead of metal bolts. May require different removal methods. Check YouTube for model-specific videos.
Prevent Future Agitator Problems
Simple habits extend your agitator’s life and prevent future failures.
- Don’t overload the washer.
- Check pockets for coins, keys, or toys before washing.
- Inspect the agitator annually for wobble or looseness.
- Clean under the base every six months.
- Replace thrust washer and dogs proactively during any repair.
- Clean the dispenser cap area to prevent gunk buildup.
Annual Check: Lift the cap and spin the agitator. It should lock in reverse.
What This Repair Costs
| Item | Cost or Time |
|---|---|
| Repair Kit | $5-$15 |
| Professional Repair | $150-$250 |
| Savings | Over 90% |
| First-Timer Time | 60-90 minutes |
| Experienced Time | 30-60 minutes |
Spend $10, save $200, and restore full cleaning power.
Frequently Asked Questions About Washing Machine Agitator Repair
How do I know if my agitator dogs are broken?
Perform the hand rotation test. If the agitator spins freely in both directions without locking, the agitator dogs are broken and need replacement.
Can I replace just the agitator dogs, or do I need a full kit?
You can buy dogs individually, but full kits are strongly recommended. They include the cam, thrust washer, O-ring, and dust cap, ensuring all wear items are replaced simultaneously for longer-lasting results.
Why does my agitator wobble after replacement?
Wobbling usually indicates a worn or improperly installed thrust washer. Remove the agitator and check that the thrust washer is seated correctly with the flared side facing up. Apply grease to the top surface if needed.
What if the center bolt won’t come out?
Don’t use penetrating oil, as it contaminates laundry. Use the correct socket size (7/16-inch or 11 mm) and apply steady counter-clockwise pressure. If the bolt is stripped or corroded, call a professional to avoid transmission damage.
How often do agitator dogs fail?
Agitator dogs typically last 5-10 years depending on usage frequency and load size. Heavy use, overloading, and age accelerate wear on the plastic components.
Is this repair worth doing myself?
Absolutely. DIY agitator repair costs $5-$15 in parts versus $150-$250 for professional service. The repair takes under an hour and restores full cleaning performance.
Final Thoughts on Restoring Your Washing Machine
Washing machine agitator repair is one of the most cost-effective DIY fixes in home appliance maintenance. By replacing worn agitator dogs, the cam assembly, and the thrust washer, you restore full cleaning power and extend your washer’s life for years.
The key to success lies in proper diagnosis, correct part matching, and careful reassembly. Take time to verify your model number, clean the spline area thoroughly, and test the repair before running a full load. With the right parts, basic tools, and attention to detail, this repair pays for itself in a single service call.
If the agitator base is cracked or the bolt is truly stuck beyond recovery, don’t risk damaging the transmission. Call a professional. But for the vast majority of agitator failures, a $10 kit and an hour of your time gets your washer working like new again.